
Track Attendance
1. Virtual Time Clock
2. Physical Time Clock
3. Automatisms
4. Options for HR Manager
1. Virtual Time Clock
Dynamics HR Management integrates a virtual time clock with which your employees can quickly and easily record their attendances.
The virtual time clock can be used directly in Dynamics 365, but also in Outlook or even on the road with a smartphone or tablet.
This gives you the flexibility you need to record attendances anytime, anywhere and save time.
Go to Navigation Bar -> HR -> Dashboards and change the view to Virtual Time Clock Dashboard.
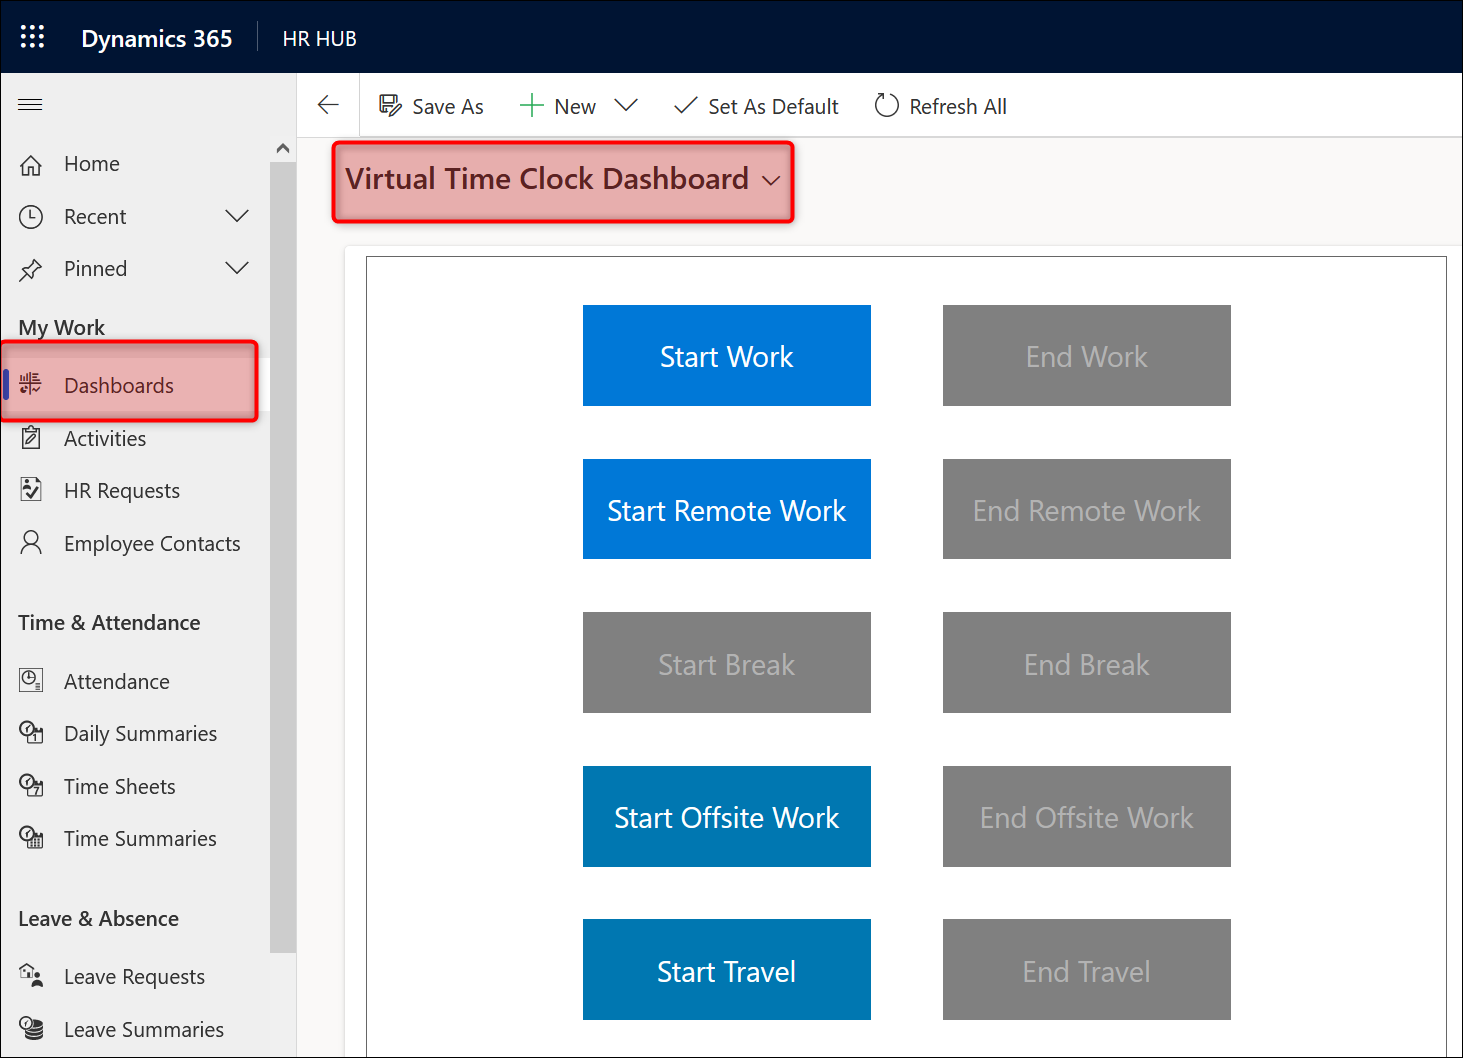
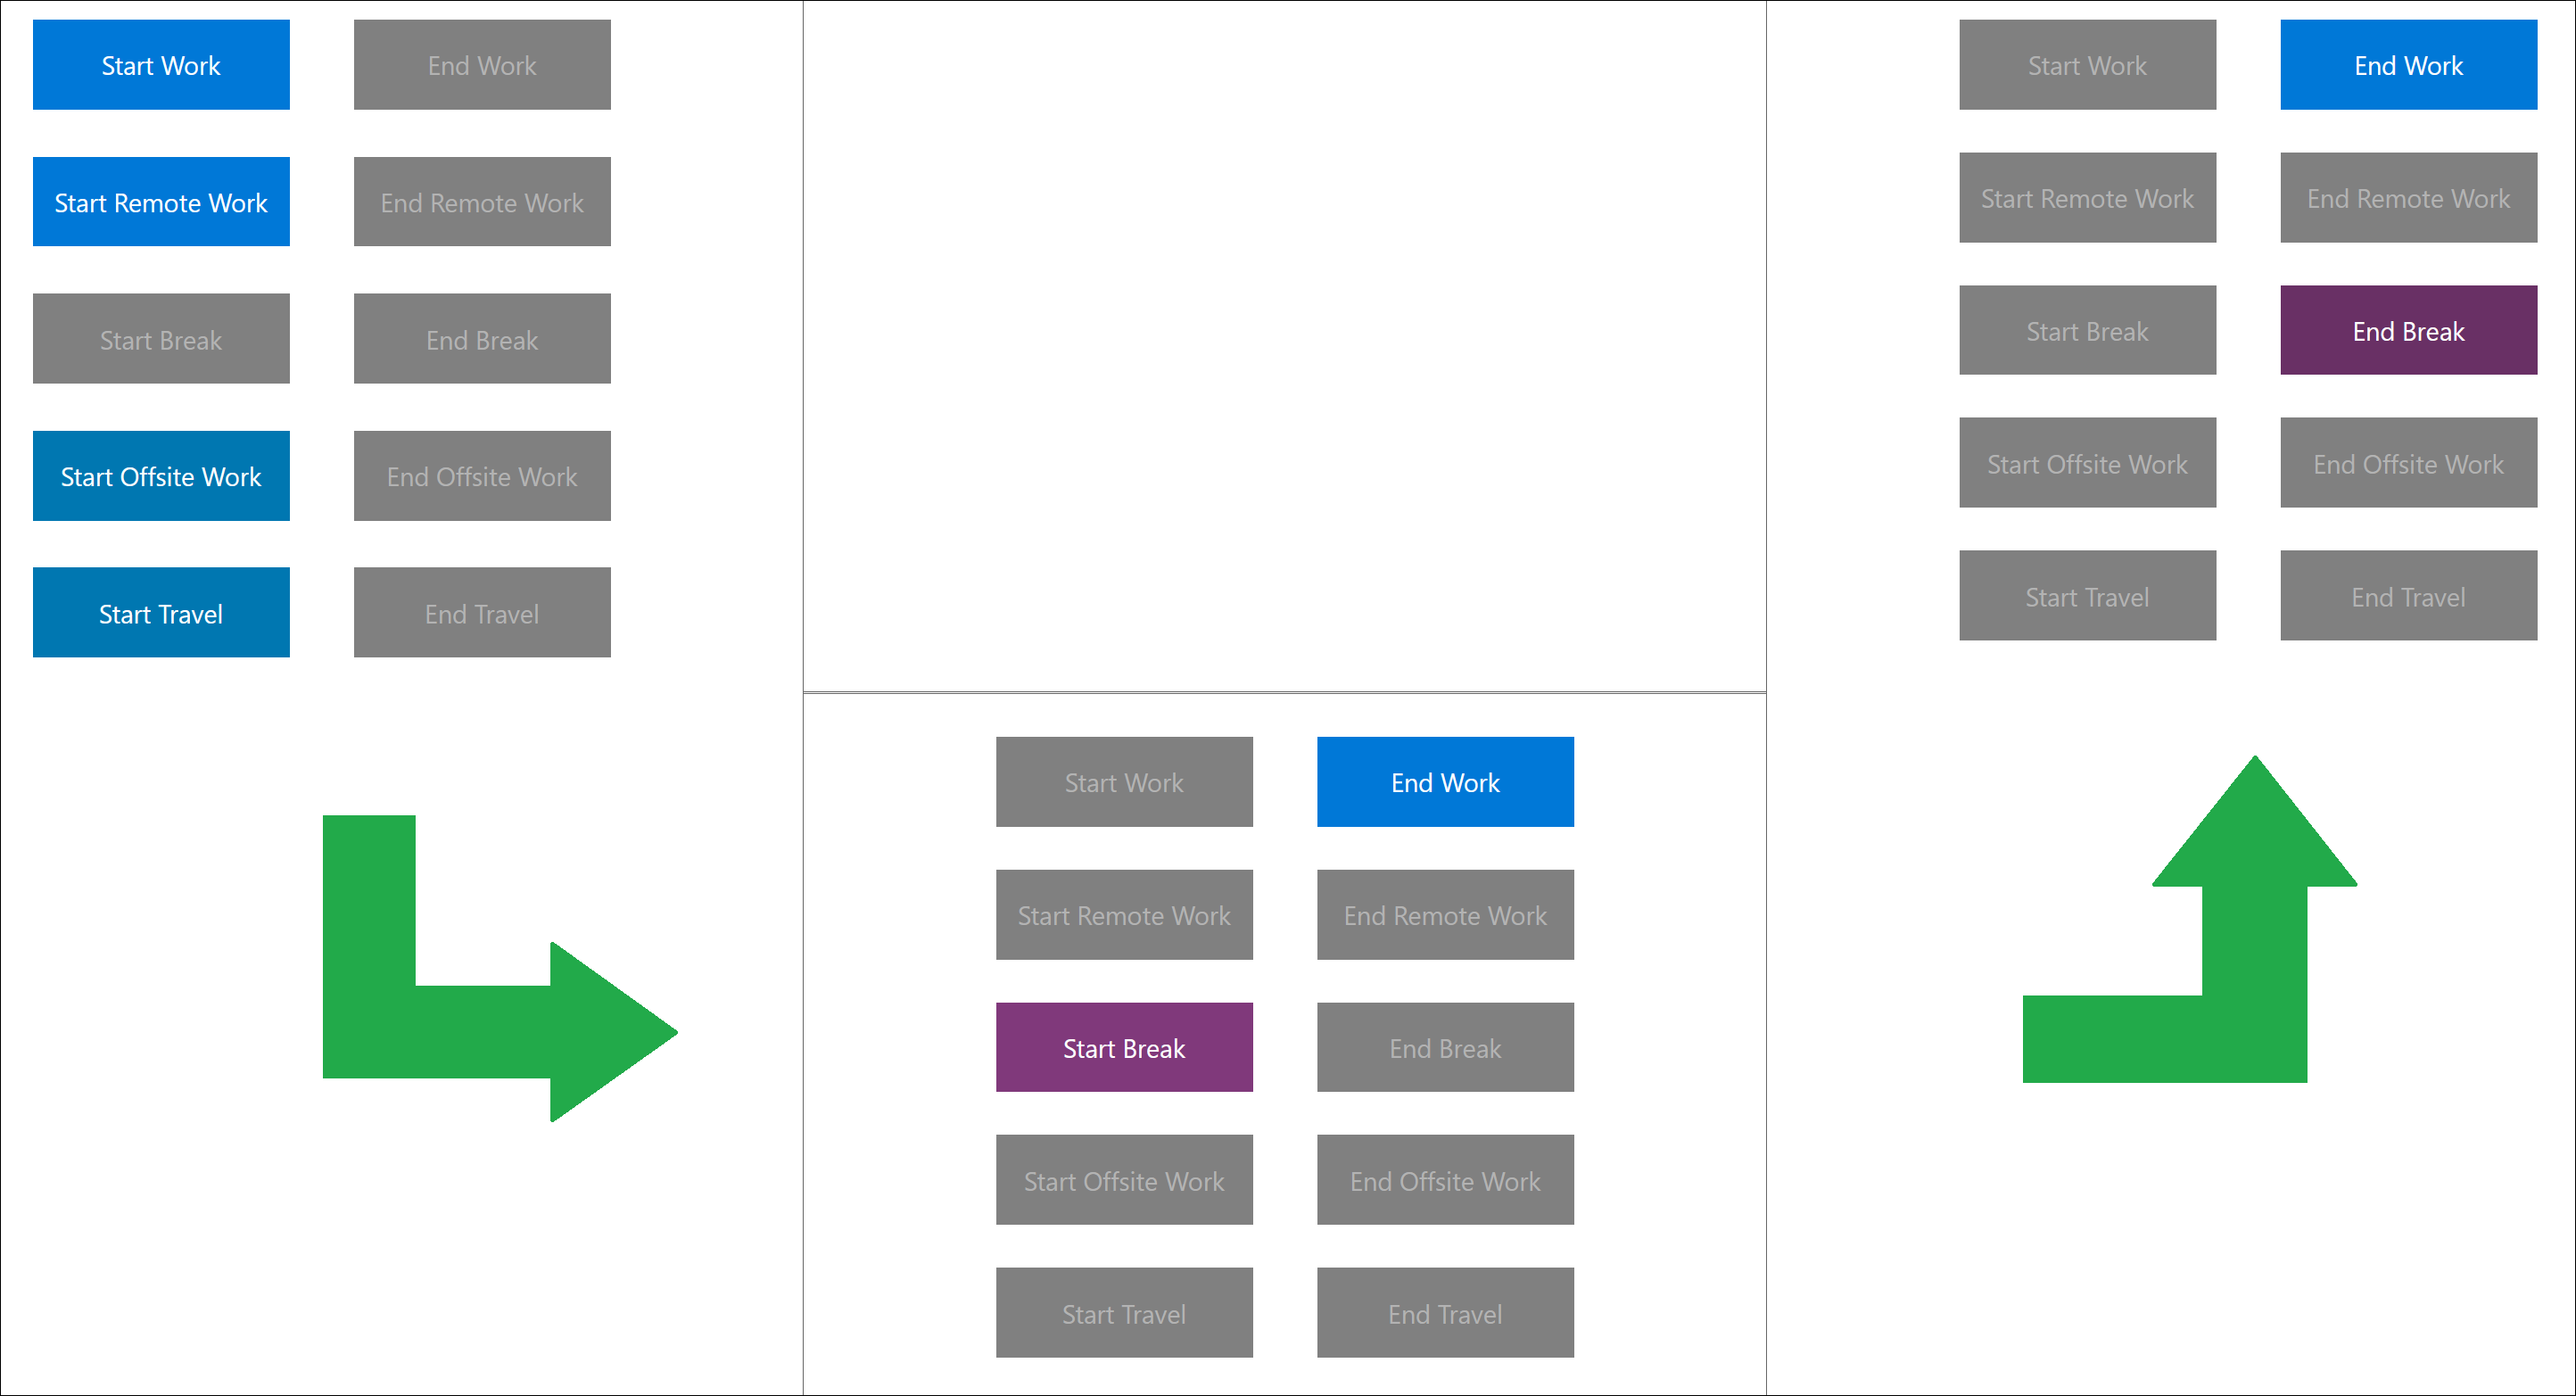
You can now enter your attendance. The buttons are context-dependent to avoid errors. In the original state it is only possible to start work. Afterwards it is possible to end work or to start the break. If you are in the break, it is possible to finish the break or to finish the work.
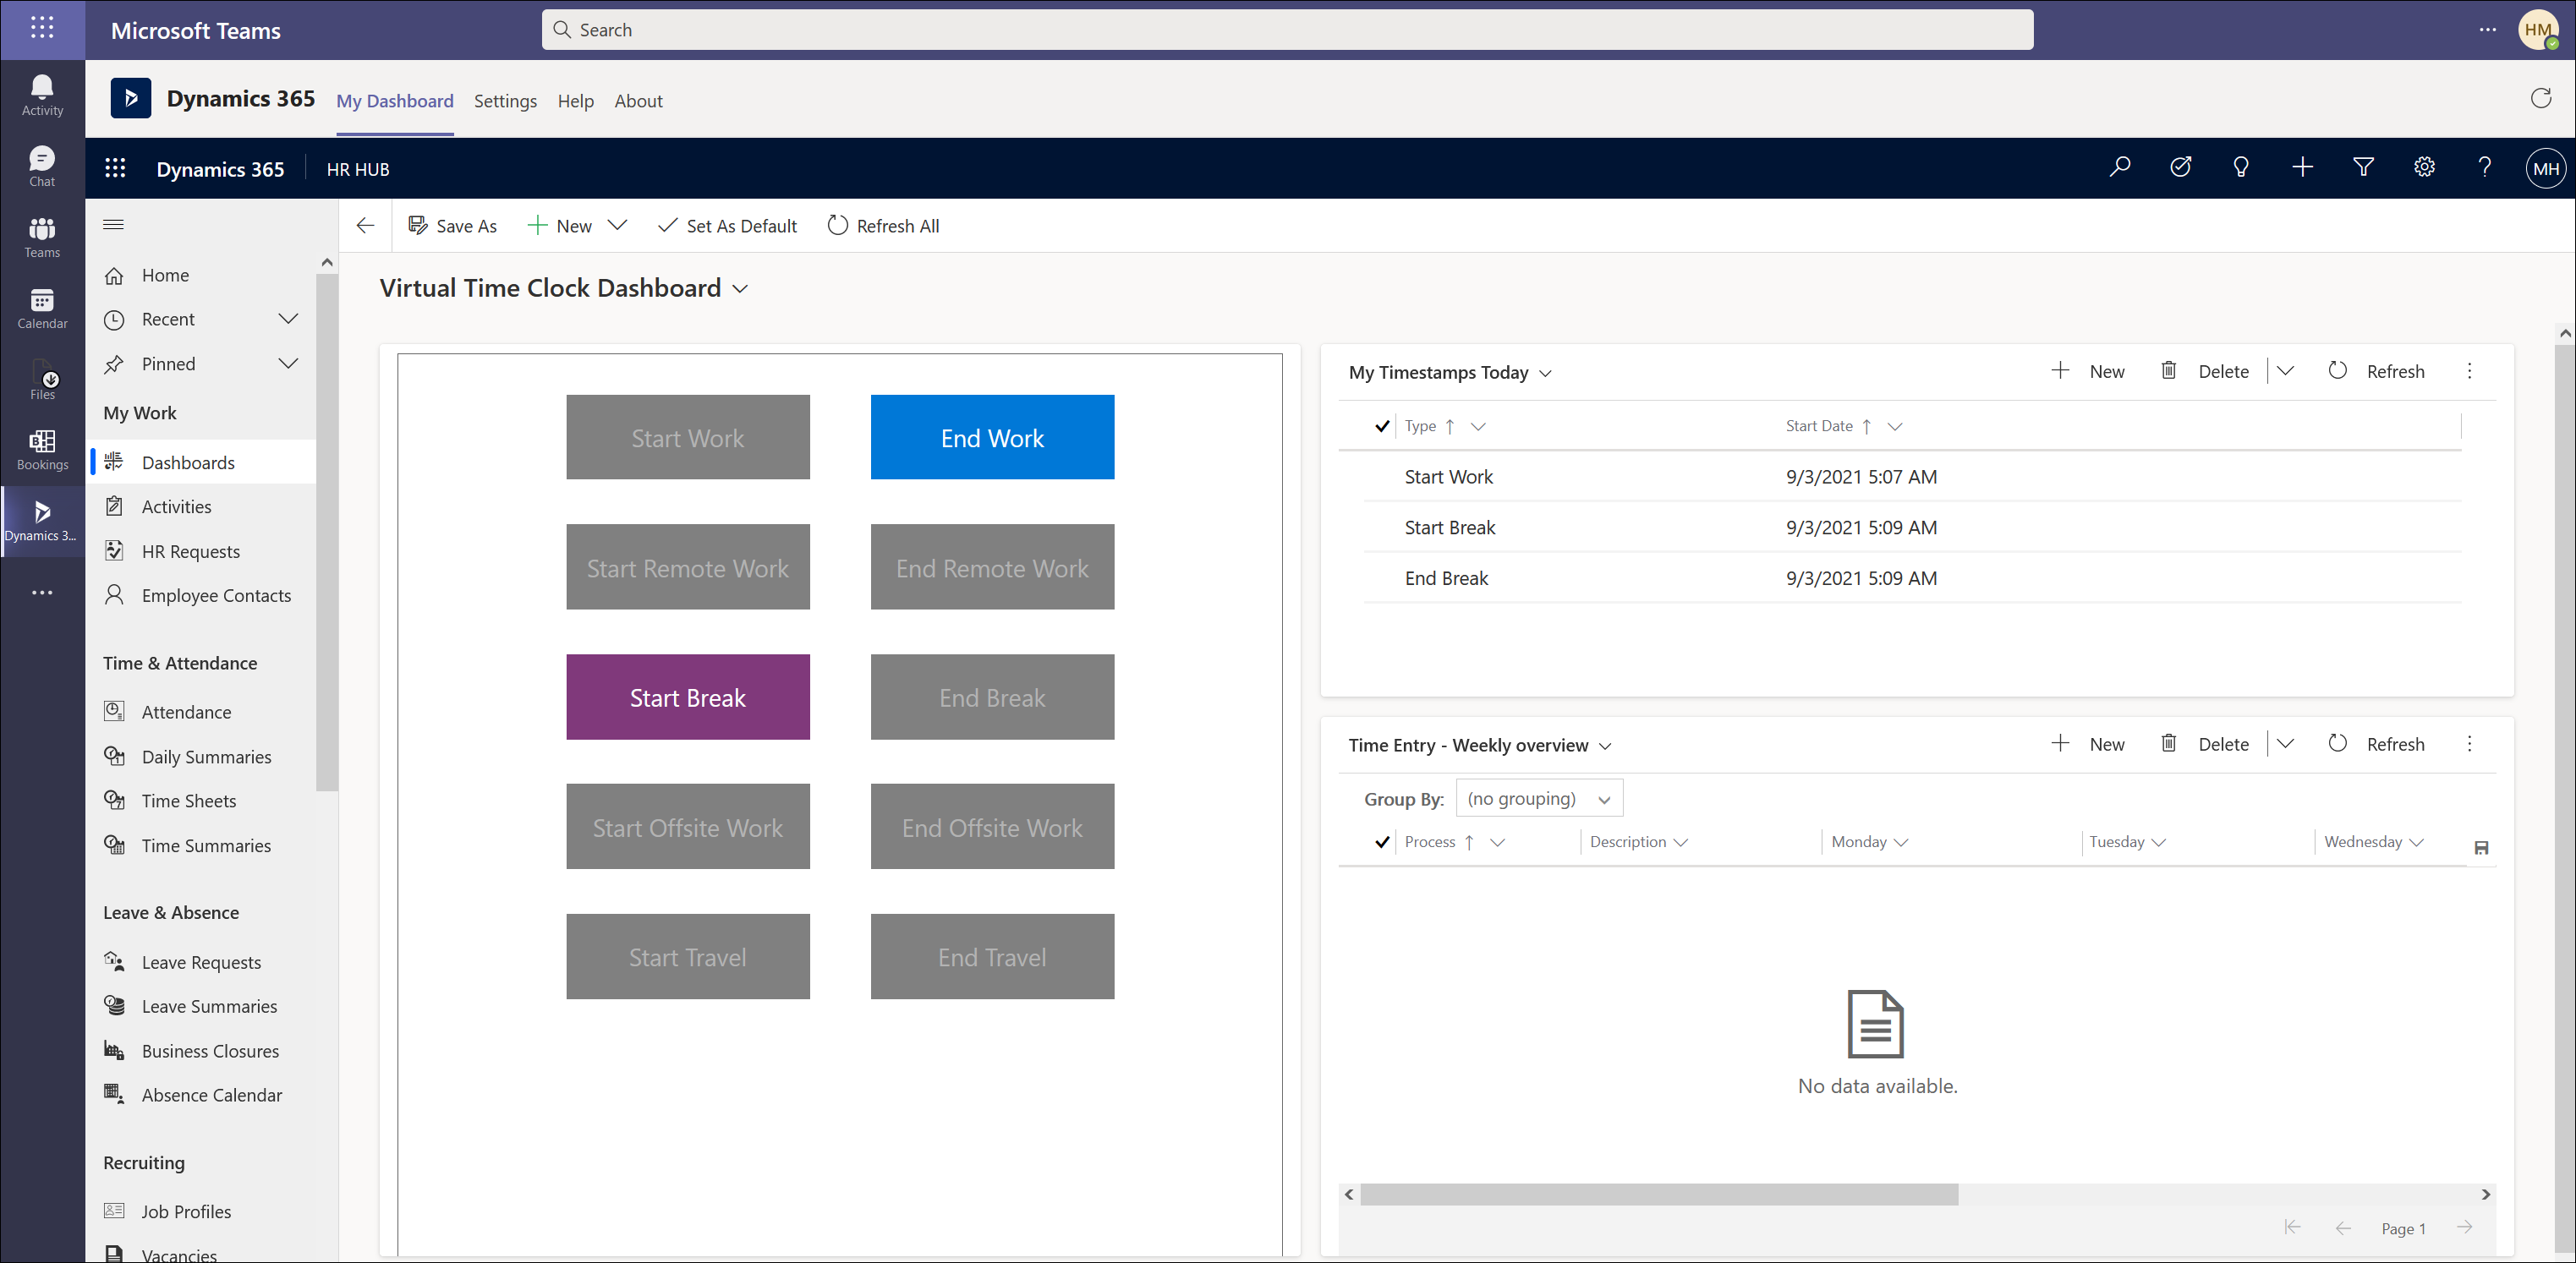
This is how the time clock looks in Teams:
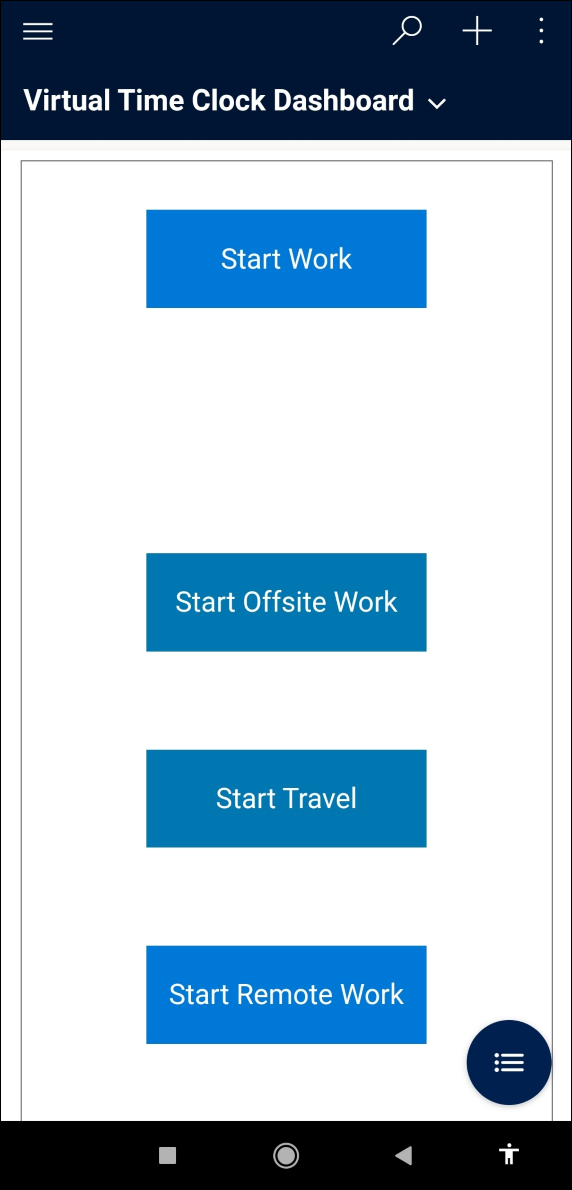
This is how the time clock looks on the smartphone:
Each action you enter here is saved separately as a single presence detail. This gives you an exact list and not just an overview. Furthermore, it is possible to correct or supplement individual presence details if, for example, an employee forgets to record the end of his or her work. You can find out how this works here: Options for HR Manager
The recorded attendance details are transferred directly to the attendances and processed further there. Further information on attendance details and where and how to use them can be found here: Overview - what is what?
Back to top | Back to table of contents
2. Physical Time Clock
If you already use or want to use a physical time clock in your company, you may be able to connect it directly to Dynamics HR Management.
Full integration can be achieved with time clocks from our partner DataFox. For further information please contact your Success Manager.
For time clocks from other manufacturers, please contact your Success Manager. Since each manufacturer uses a different technique, each case must be examined individually to determine whether the system is compatible.
Back to top | Back to table of contents
3. Automatisms
3.1 Automated calculation of mandatory breaks
In many countries and/or companies there are regulations on mandatory breaks. These must be taken after a certain working time and must last a certain minimum amount of time. So that you do not have to check all attendances for this rule and adjust them manually if necessary, you can store the rules that apply in your company in the system so that they are automatically included in the calculation.
Example: A break of 30 minutes must be included in every 5 hours of working time. A break is only considered a break if it lasts at least 15 minutes. If a worker is under the age of 18, a break of 60 minutes must be included in 5 hours of working time.
Further information on how to configure this automatic calculation can be found here: Configure mandatory breaks
3.2 Overtime
Overtime is automatically calculated from attendances. For this purpose, the booked attendance times are offset against the allocated hours of the employment terms. Furthermore, the accumulated overtime hours are directly and automatically converted into leave entitlements of the absence type Overtime and are available for vacation requests in self-service.
If overtime leave is requested, amount of hours can be entered manually and is not restricted to full days or half days.
All this can be tracked and checked in the Absence overview.
Back to top | Back to table of contents
4. Options for HR Manager
4.1 Manual correction of records
As HR Manager, you have the option of entering or correcting employee attendance details manually. This means that all other times that were calculated automatically are corrected and recalculated.
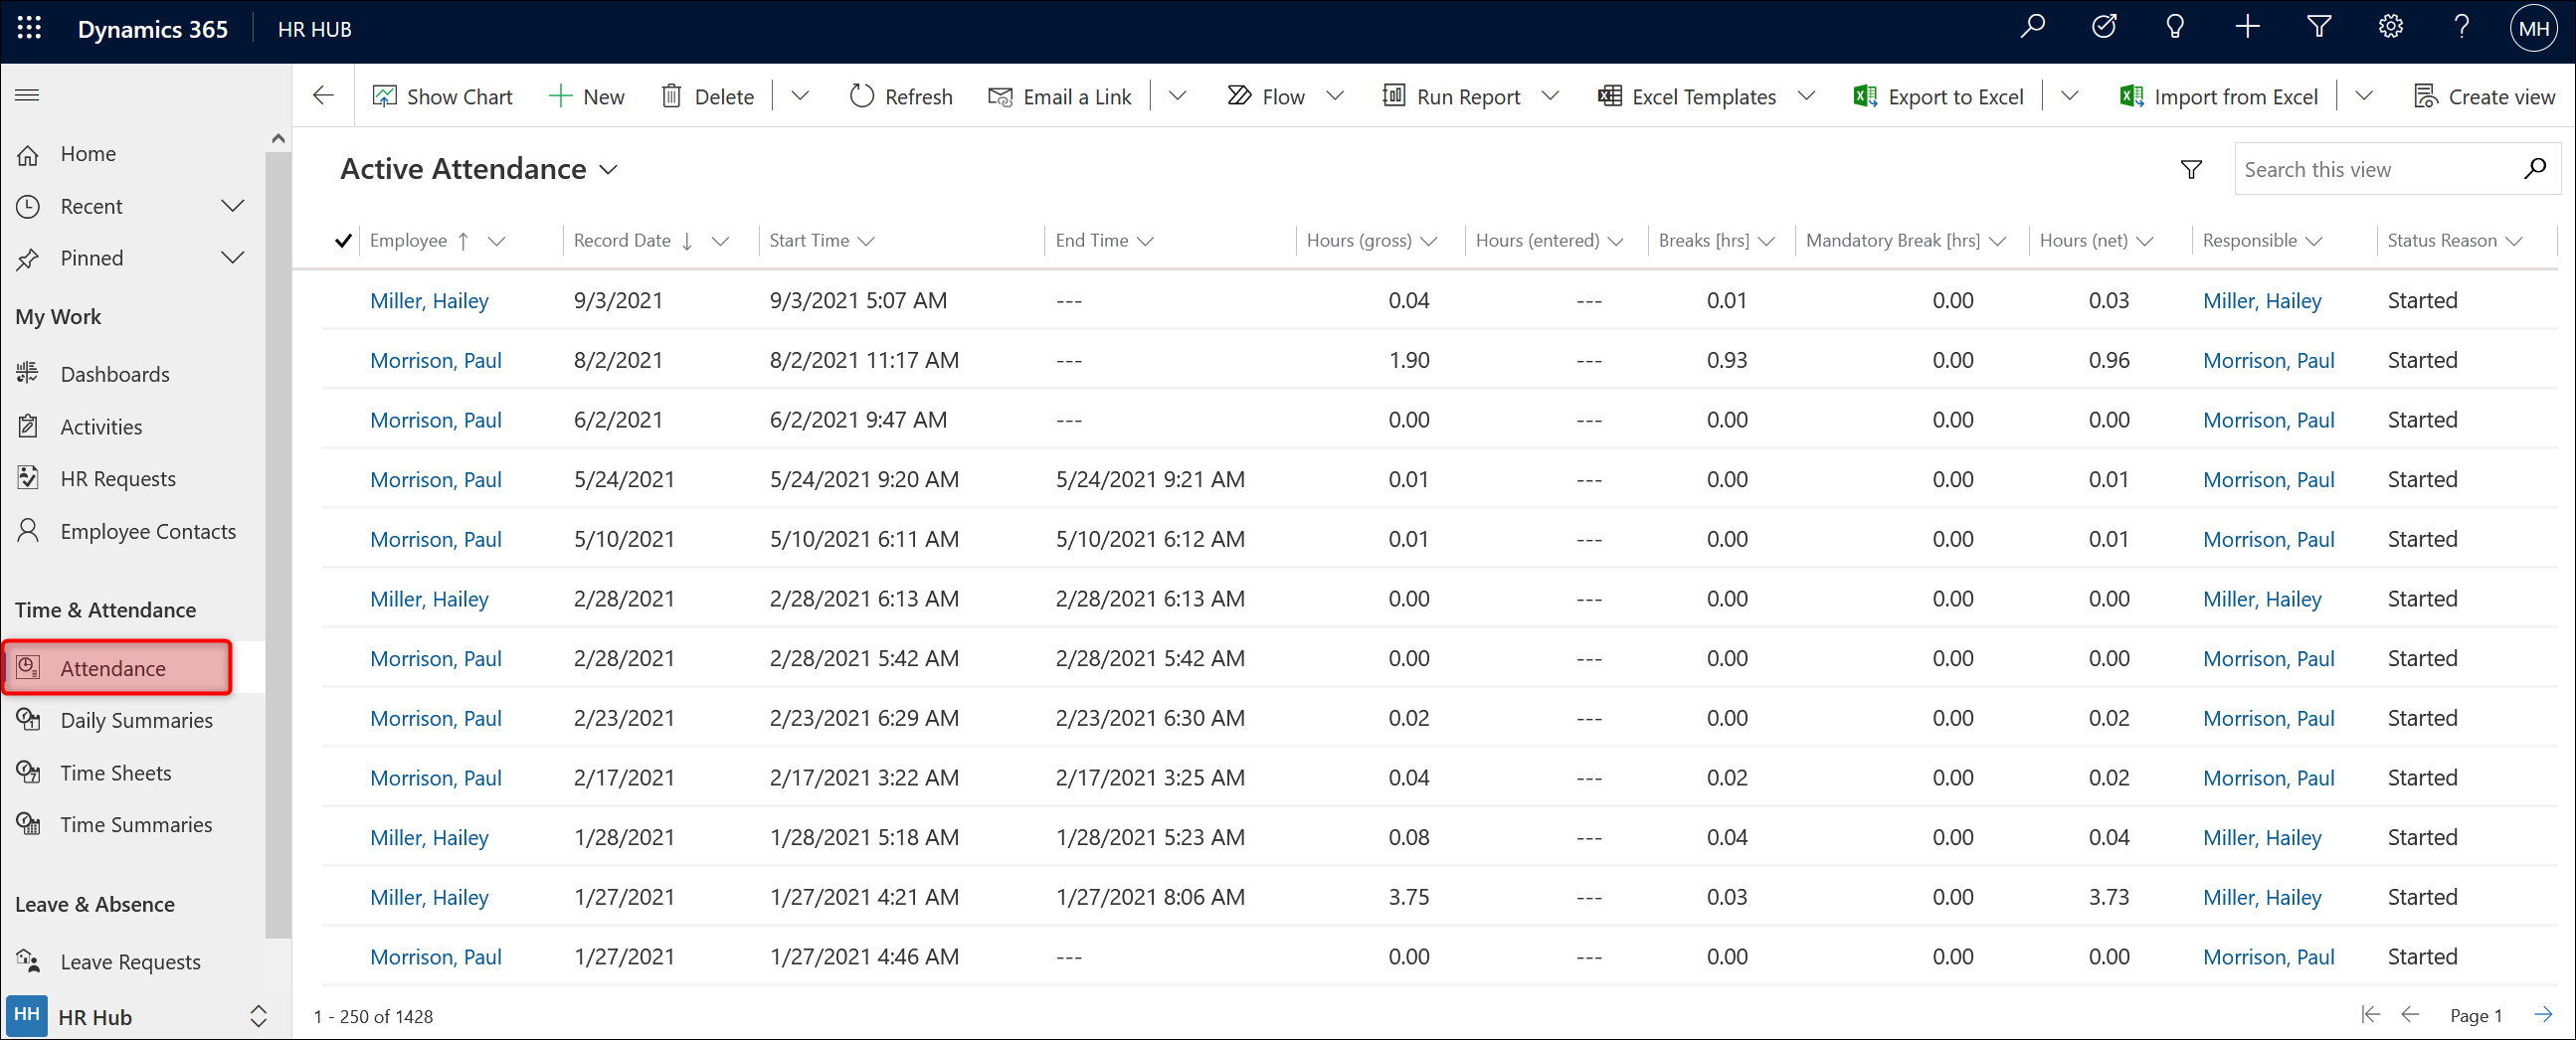
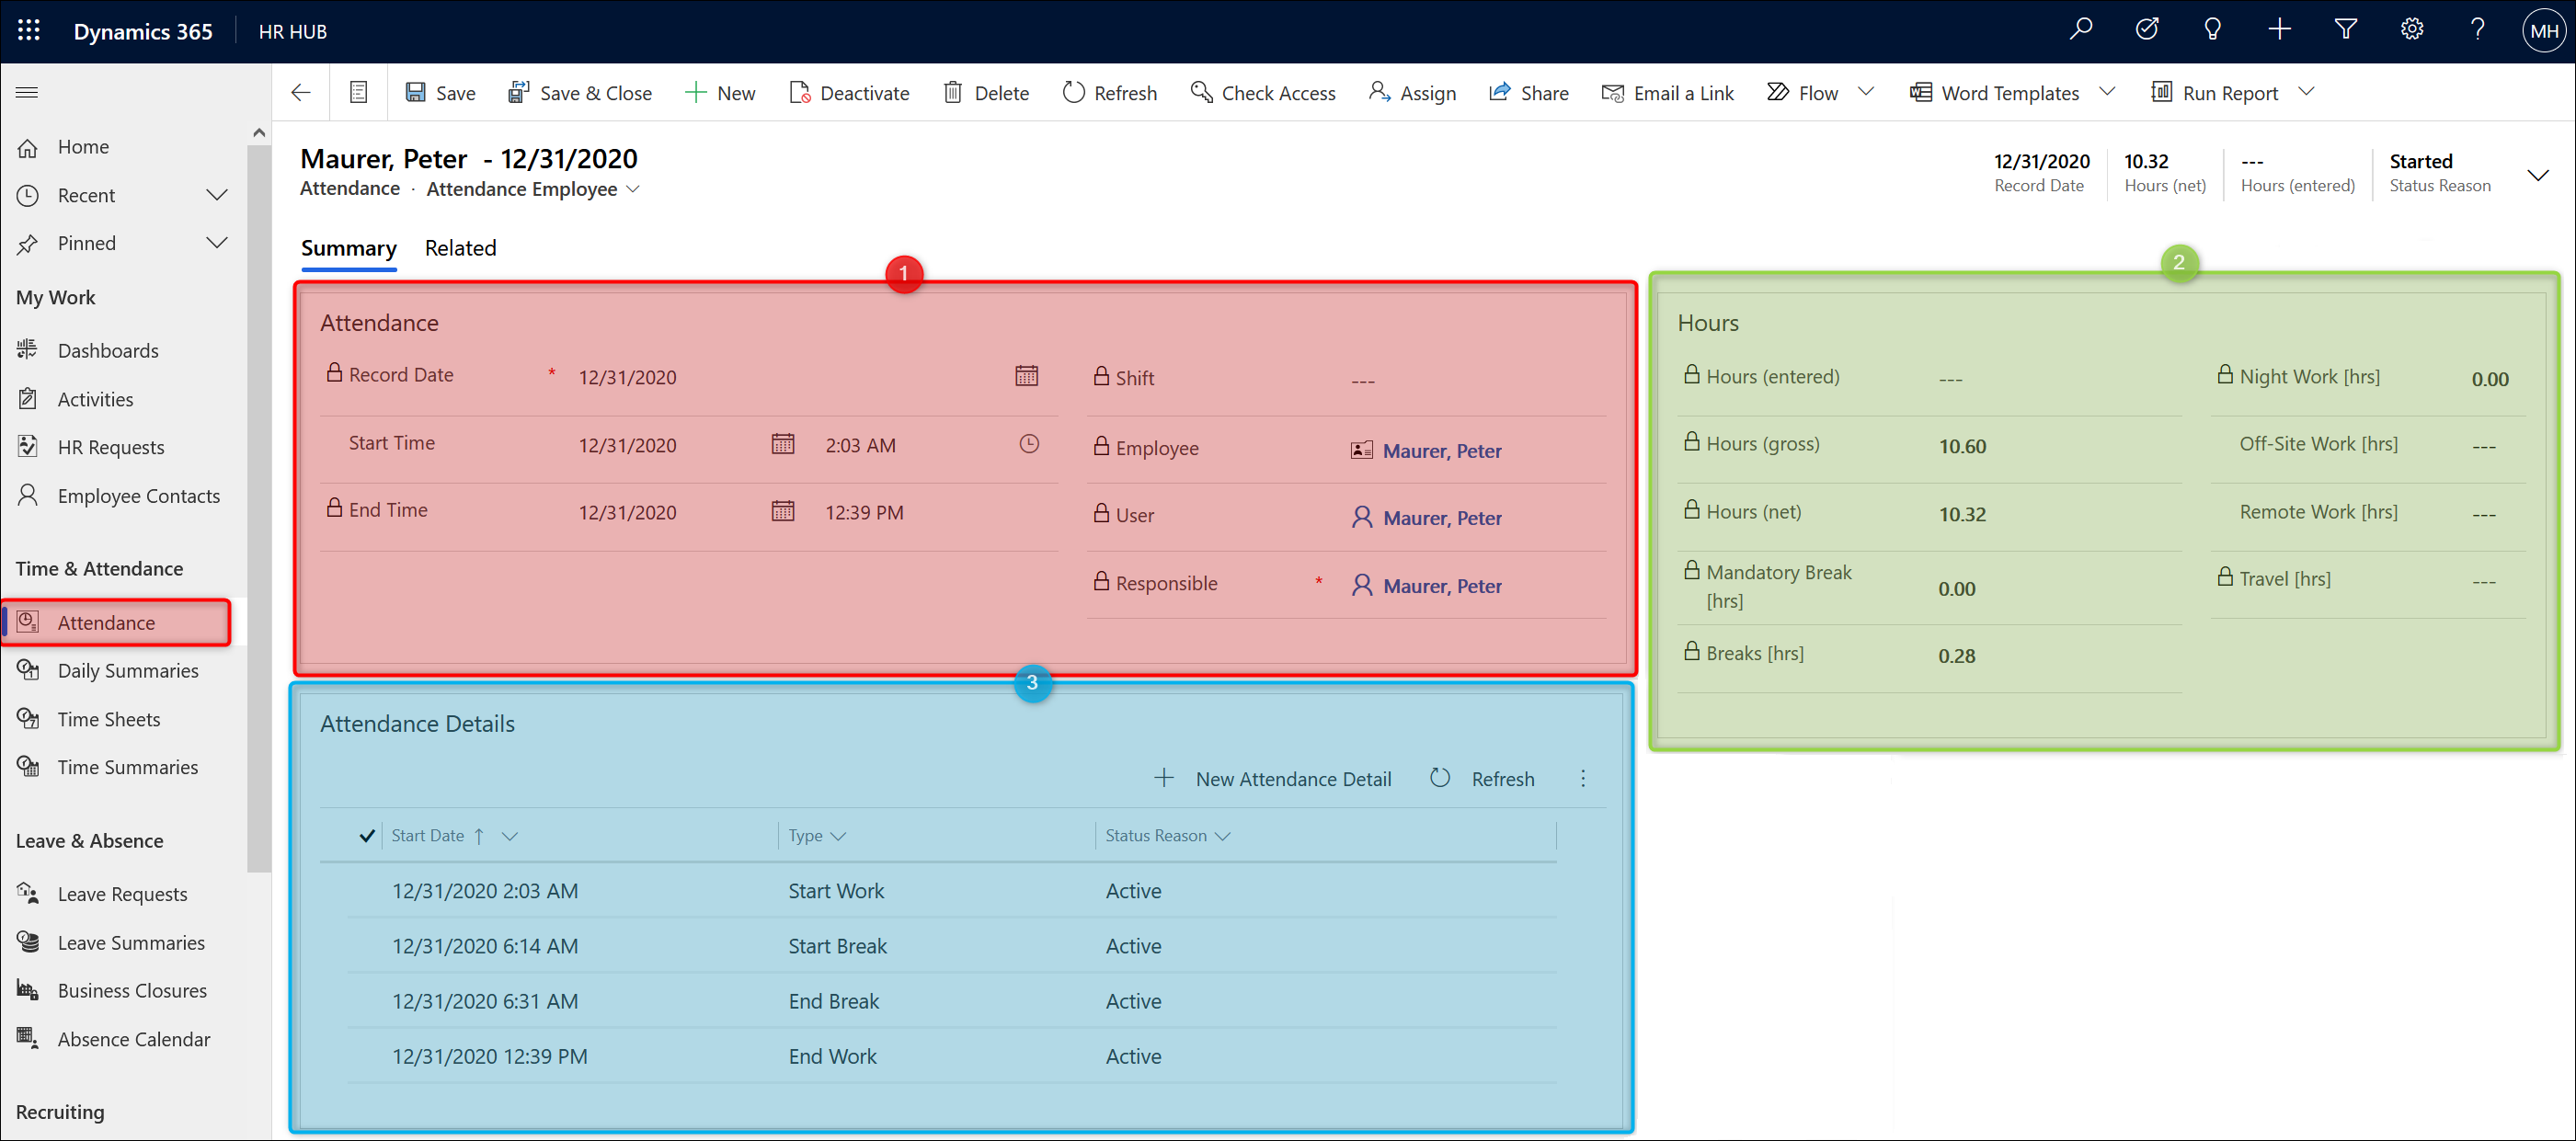
Go to HR Hub (Sitemap) -> Attendance and open the attendance overview you want to edit.
In sector 3 (down, blue) you can see all attendance details.
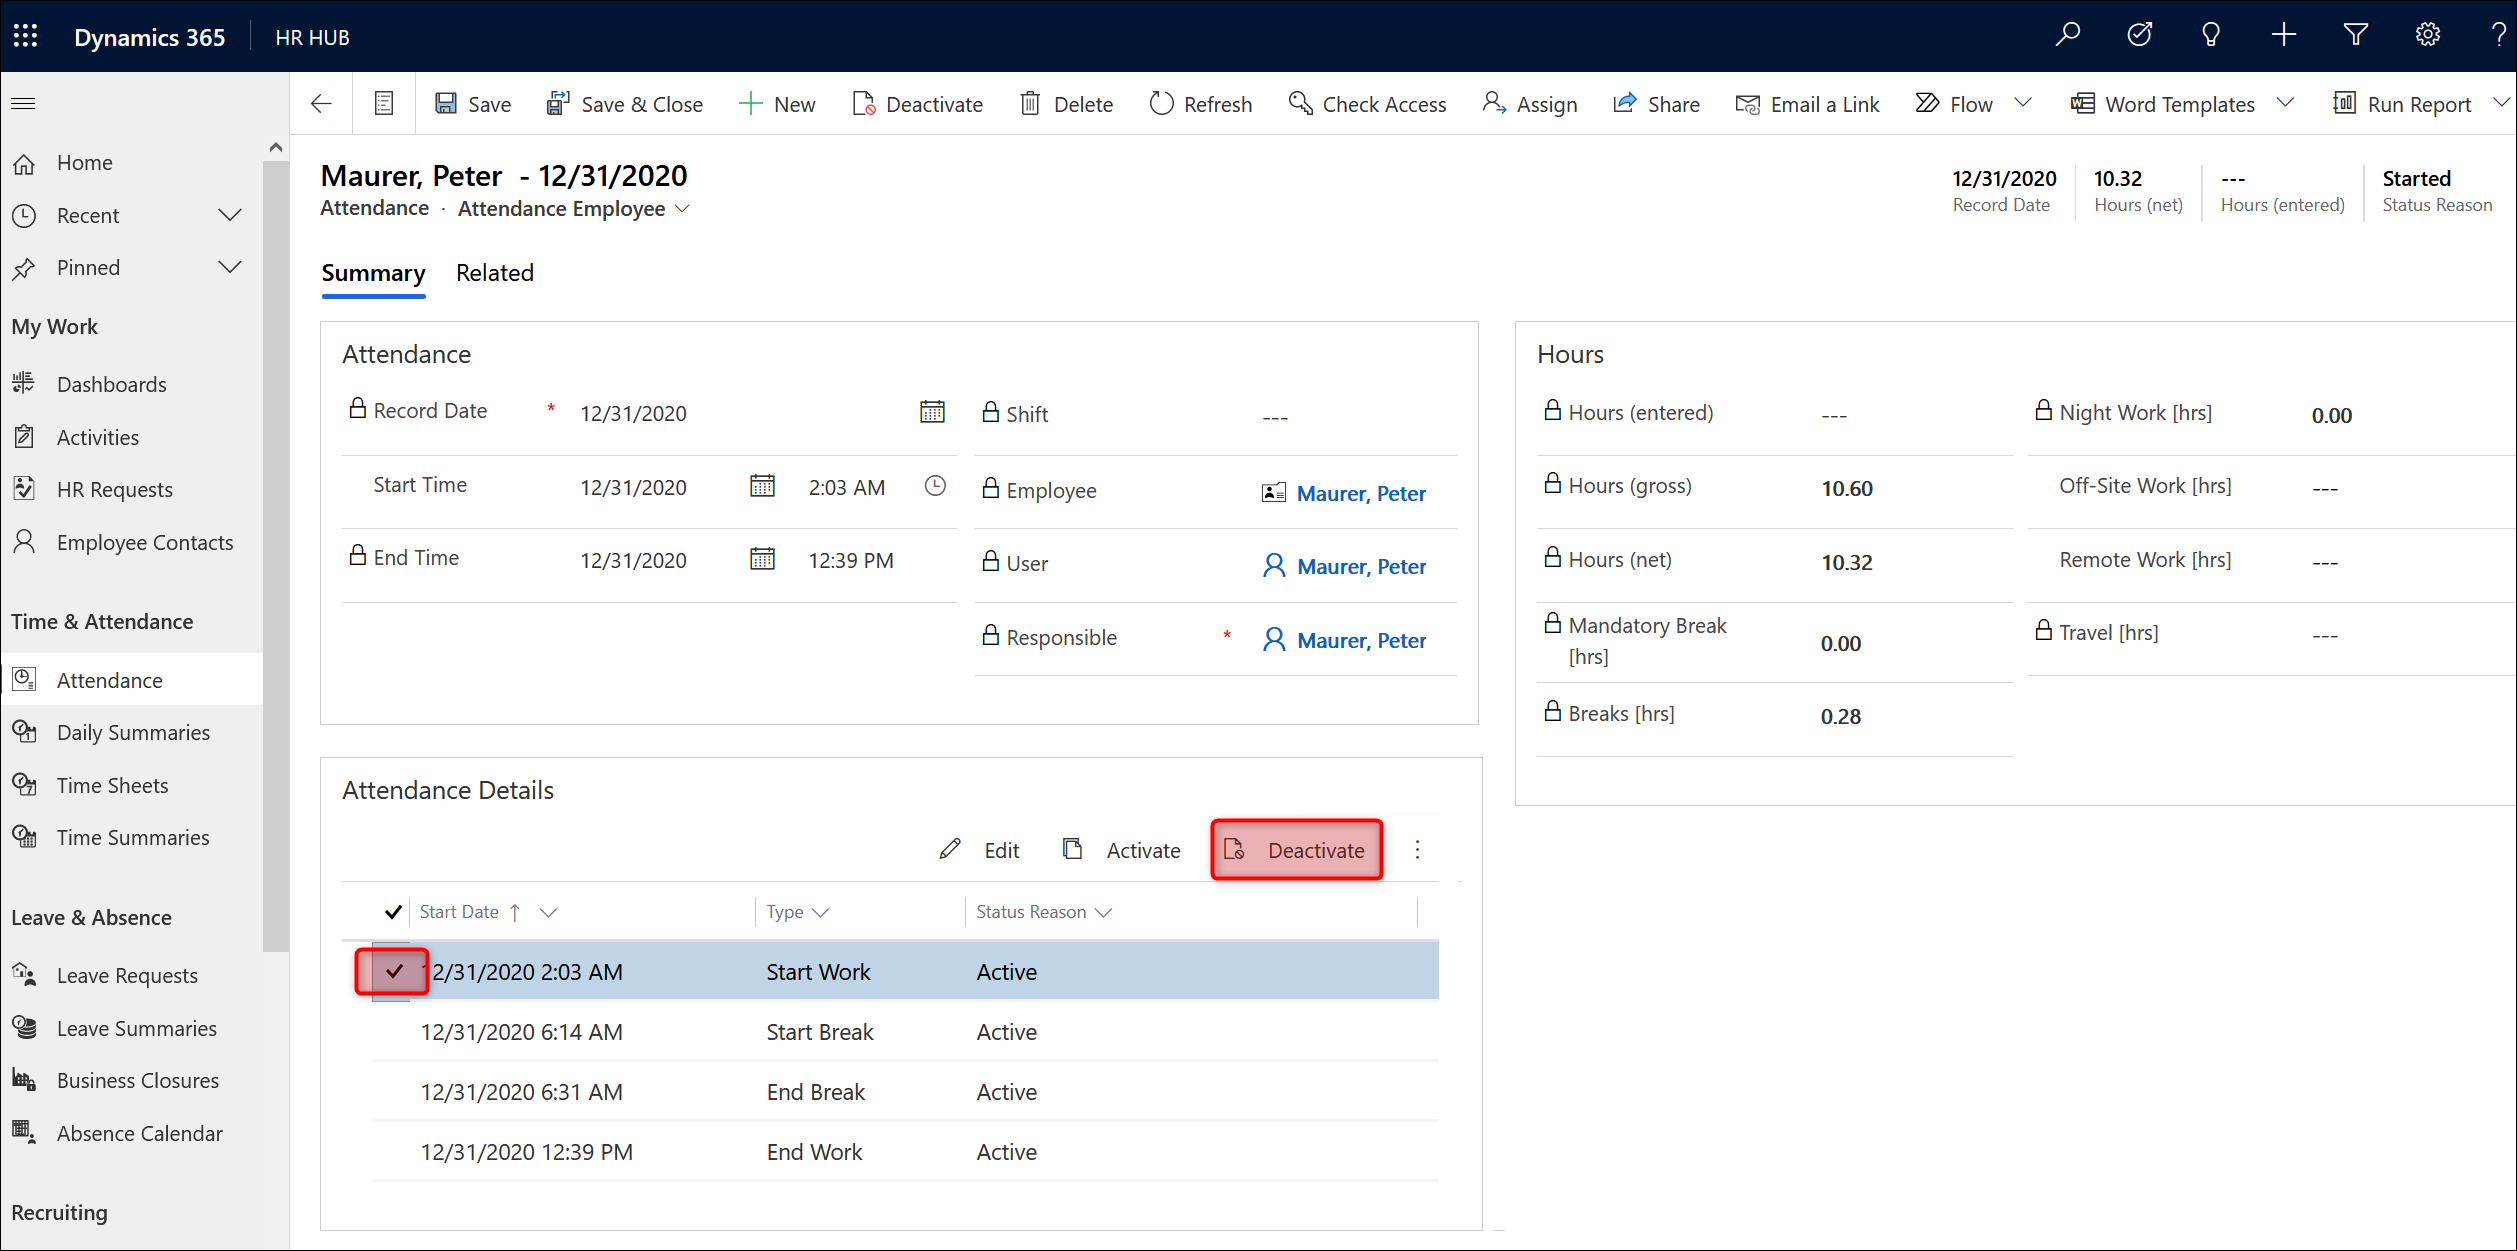
You can now correct one or more details or add missing ones. To deactivate a detail, open it with a double-click and then choose Deactivate in the menu bar and save the attendance detail, alternatively you can click left of the attendance detail on the checkmark and deactivate from here.
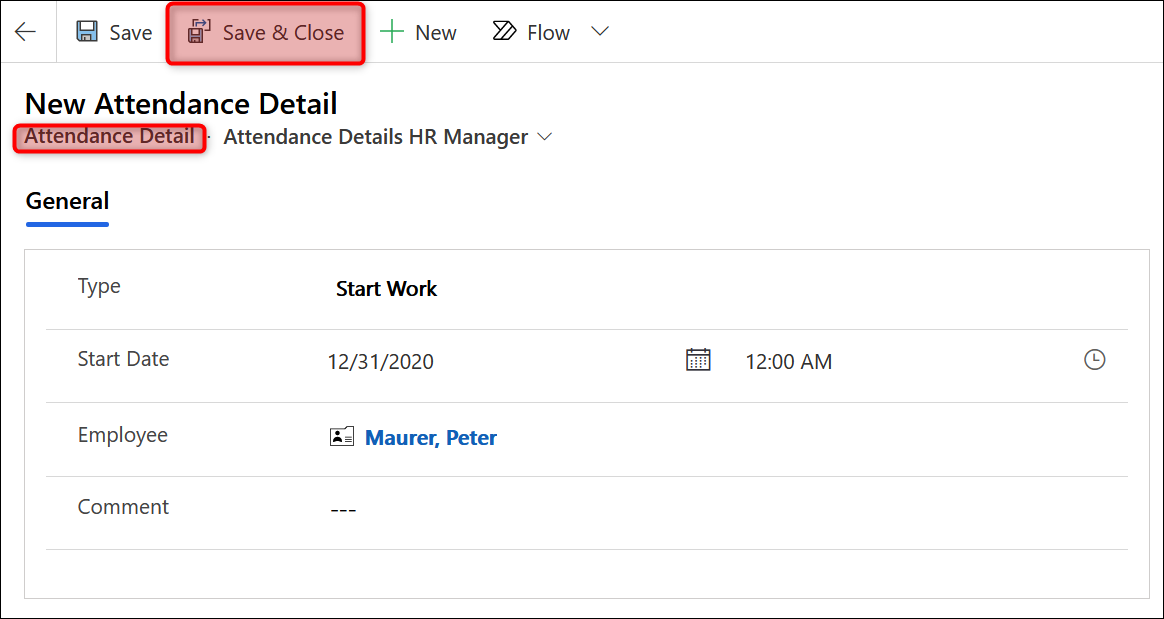
Now you can add a new attendance detail (corrected if necessary). To do this, click on the + Icon.
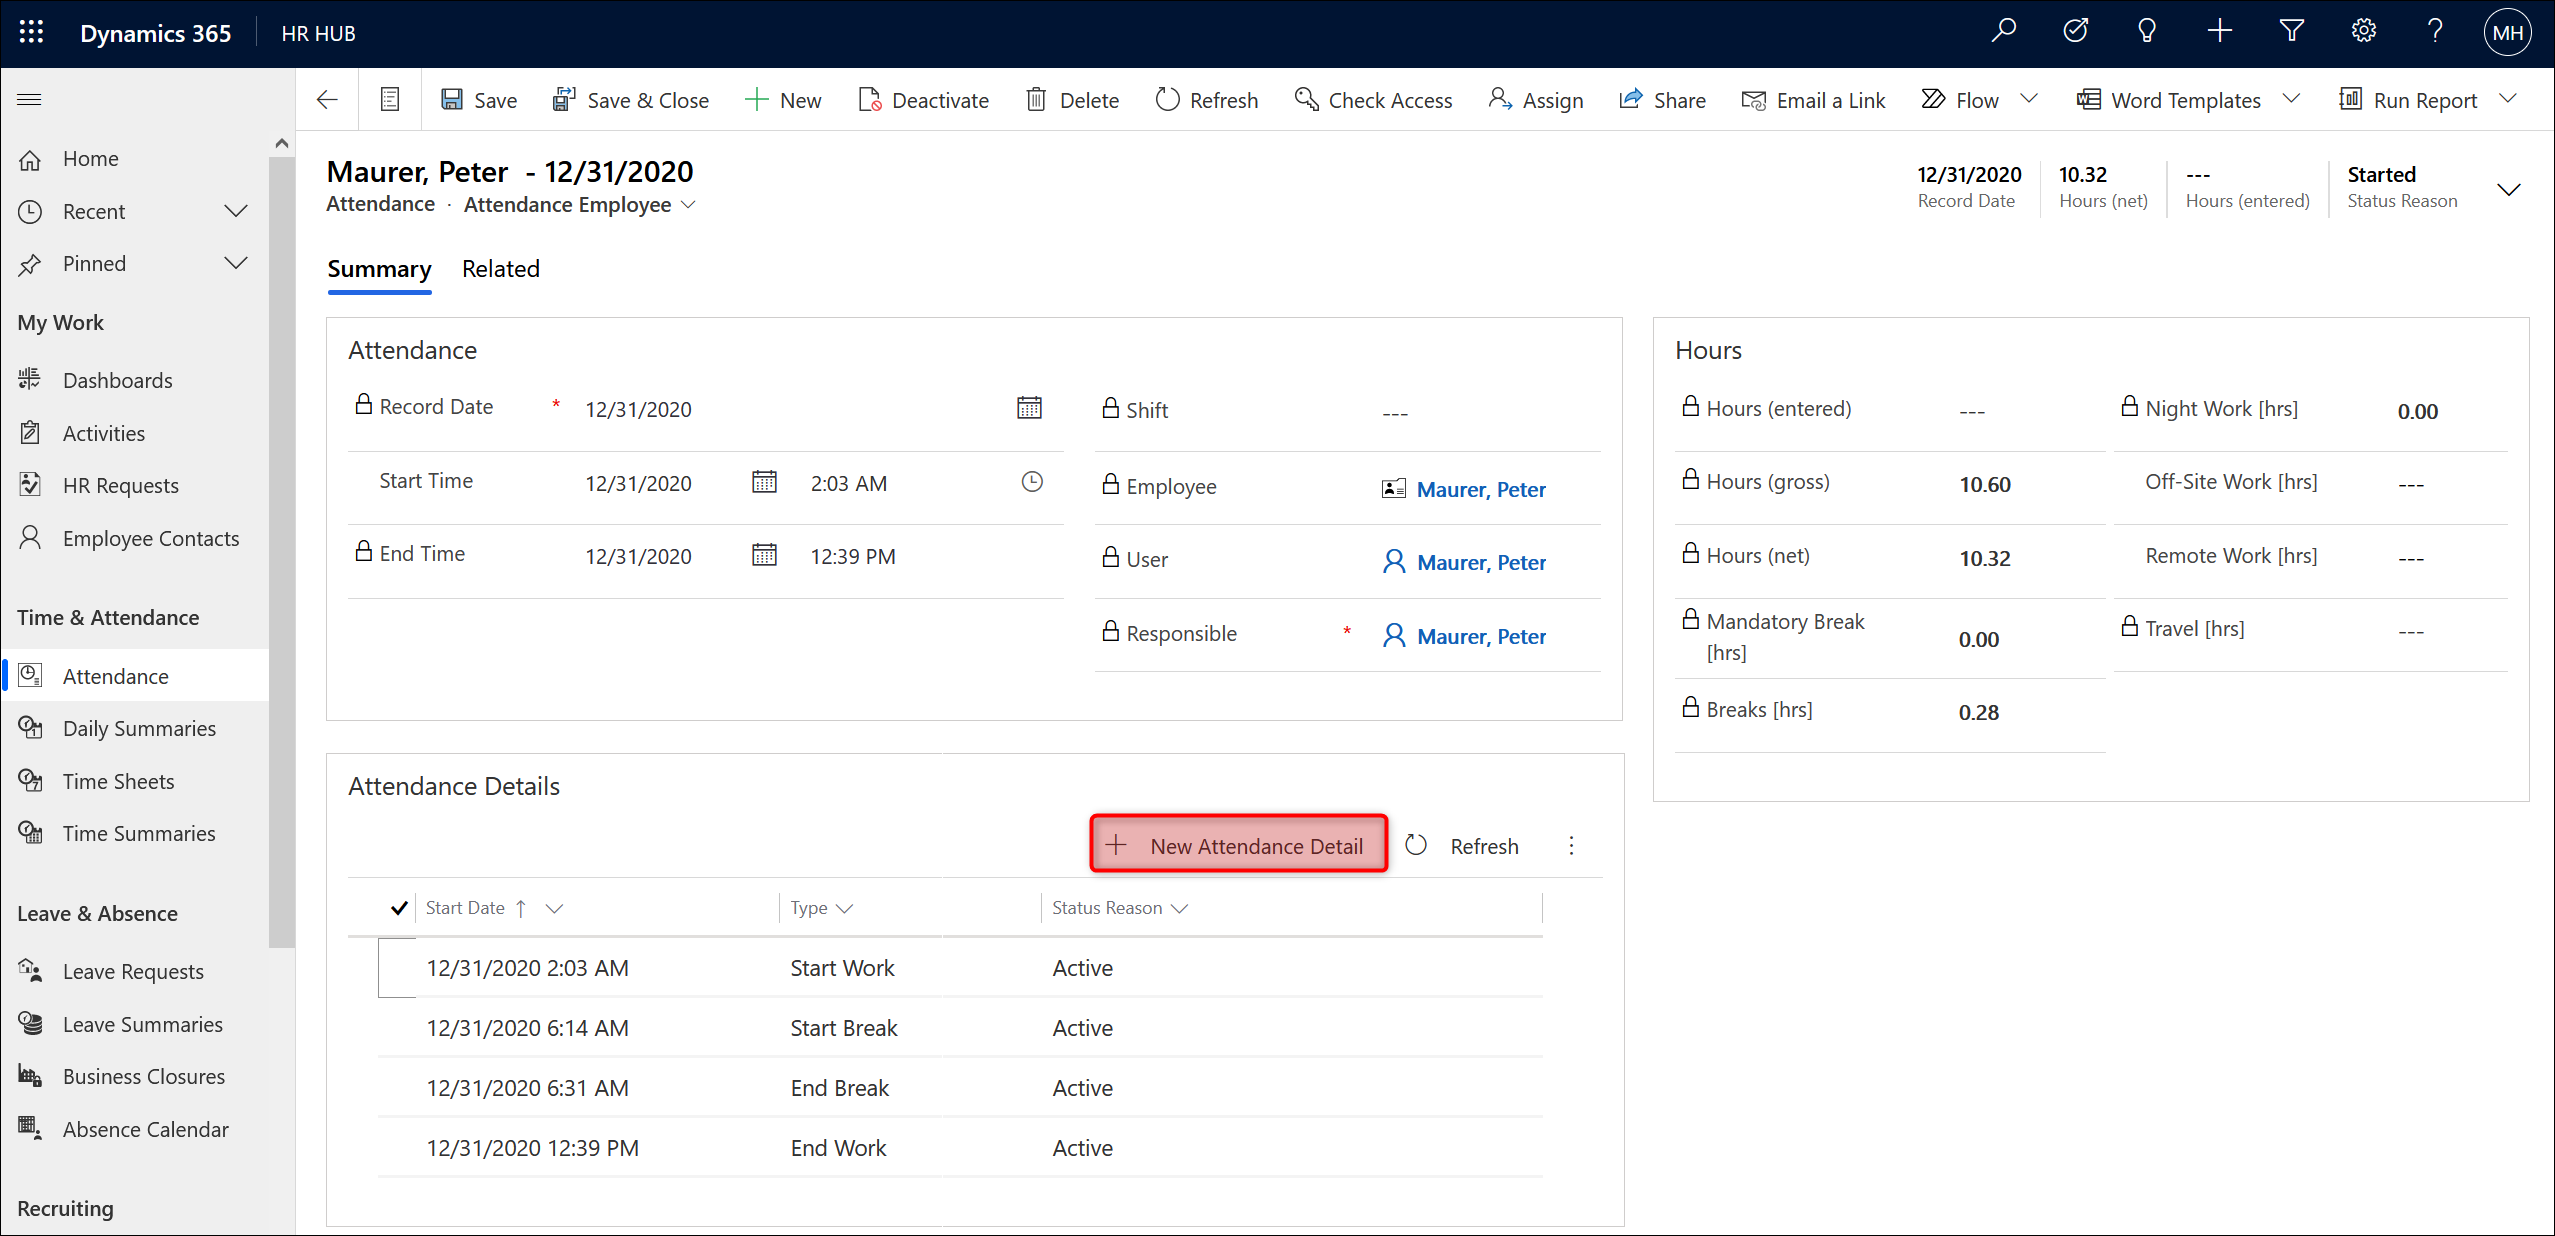
Now select the desired type of attendance detail (Start Work, End Work, Start Break, End Break) and enter the new / corrected data. Save & Close the attendance detail.
If necessary, you must reload the page so that the already recalculated times become visible.