By default, HR for Dynamics is able to calculate overtime based on daily working hours and create the resulting leave entitlements. The time account functionality offers extended options: it is now possible to create multiple time accounts with complex calculation rules in order to comply with company-, industry- or country-specific standards. In addition, all types of working hours (e.g. night work, home office hours, etc.) can be evaluated.
Enable necessary addons
Objective
This page leads you through the process of enabling the Time Account addon.
Process
System Admin
Download Addon to Time Accounts on the website
System Admin
Enable fitting workflow in your Environment
HR Manager
Use time accounts in the system
Prerequisites
- You have system administrator rights when running the installer
- Have access to the customer portal for downloads and instructions (two users were invited by us)
- An environment with the base language English, German or French is set up correctly
Click Through
First, activate the Time Account functionality:
- Navigate to the Customer Portal
- Log in with your credentials
- Click on Downloads
- From the list of optional downloads, select Addon: Time Account Activation and download it
- Navigate to PowerApps
- Log in with the admin account you created with your new environment
- In the right half of the top bar, select the correct Environment
- Click on Solutions on the left
- Click Import Solution in the grey top bar
- Click Browse
- Select the Addon: Time Account Activation file you downloaded
- Click Next
- Make sure in the Advanced Settings, the checkmark for Enable Plugin steps and flows included in the solution is checked
- Click Import
- Done! The addon for Time Accounts is now being imported and will be installed in your environment
Before the first use, make the following settings:
- Navigate to PowerApps
- Select your environment in the top bar (screenshot)
- Select Solutions from the left menu
- Click on Hubdrive - Time Account Feature Activation
- Select Processes from the left menu
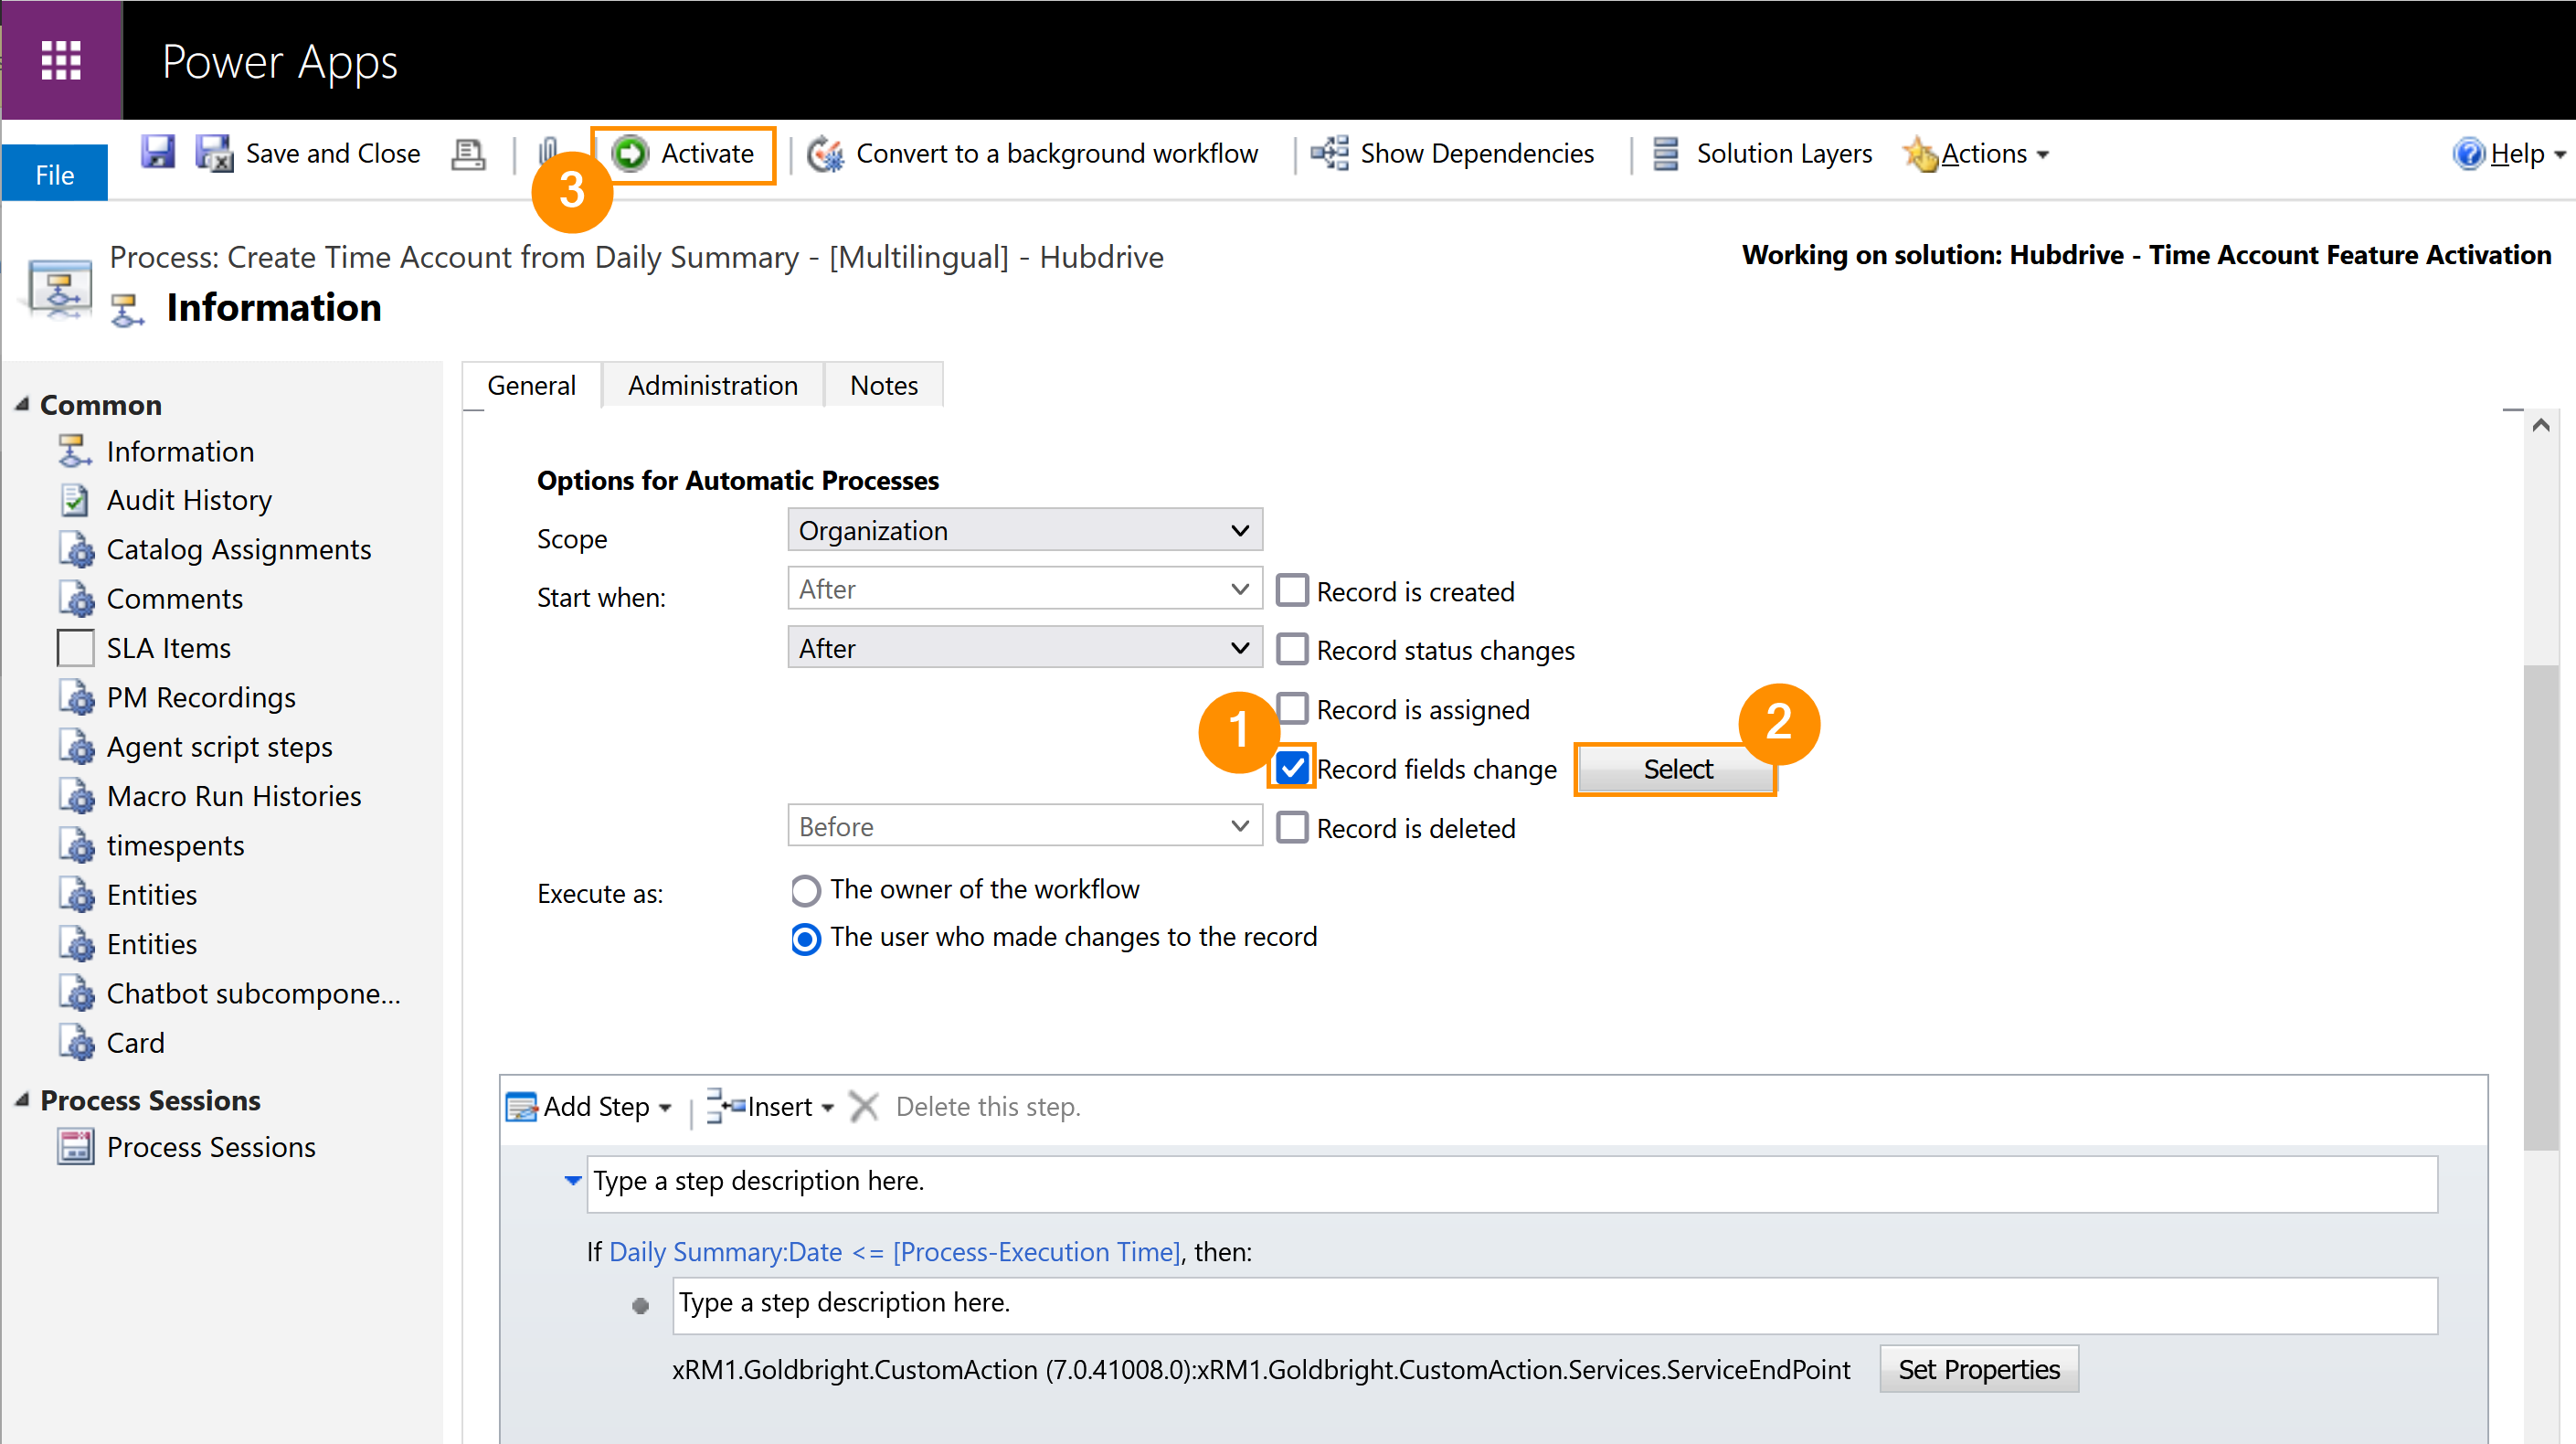
- Select Create Time Account from Daily Summary - [Multilingual] - Hubdrive
- Check the Record Fields Change box
- Click on the Select button next to it
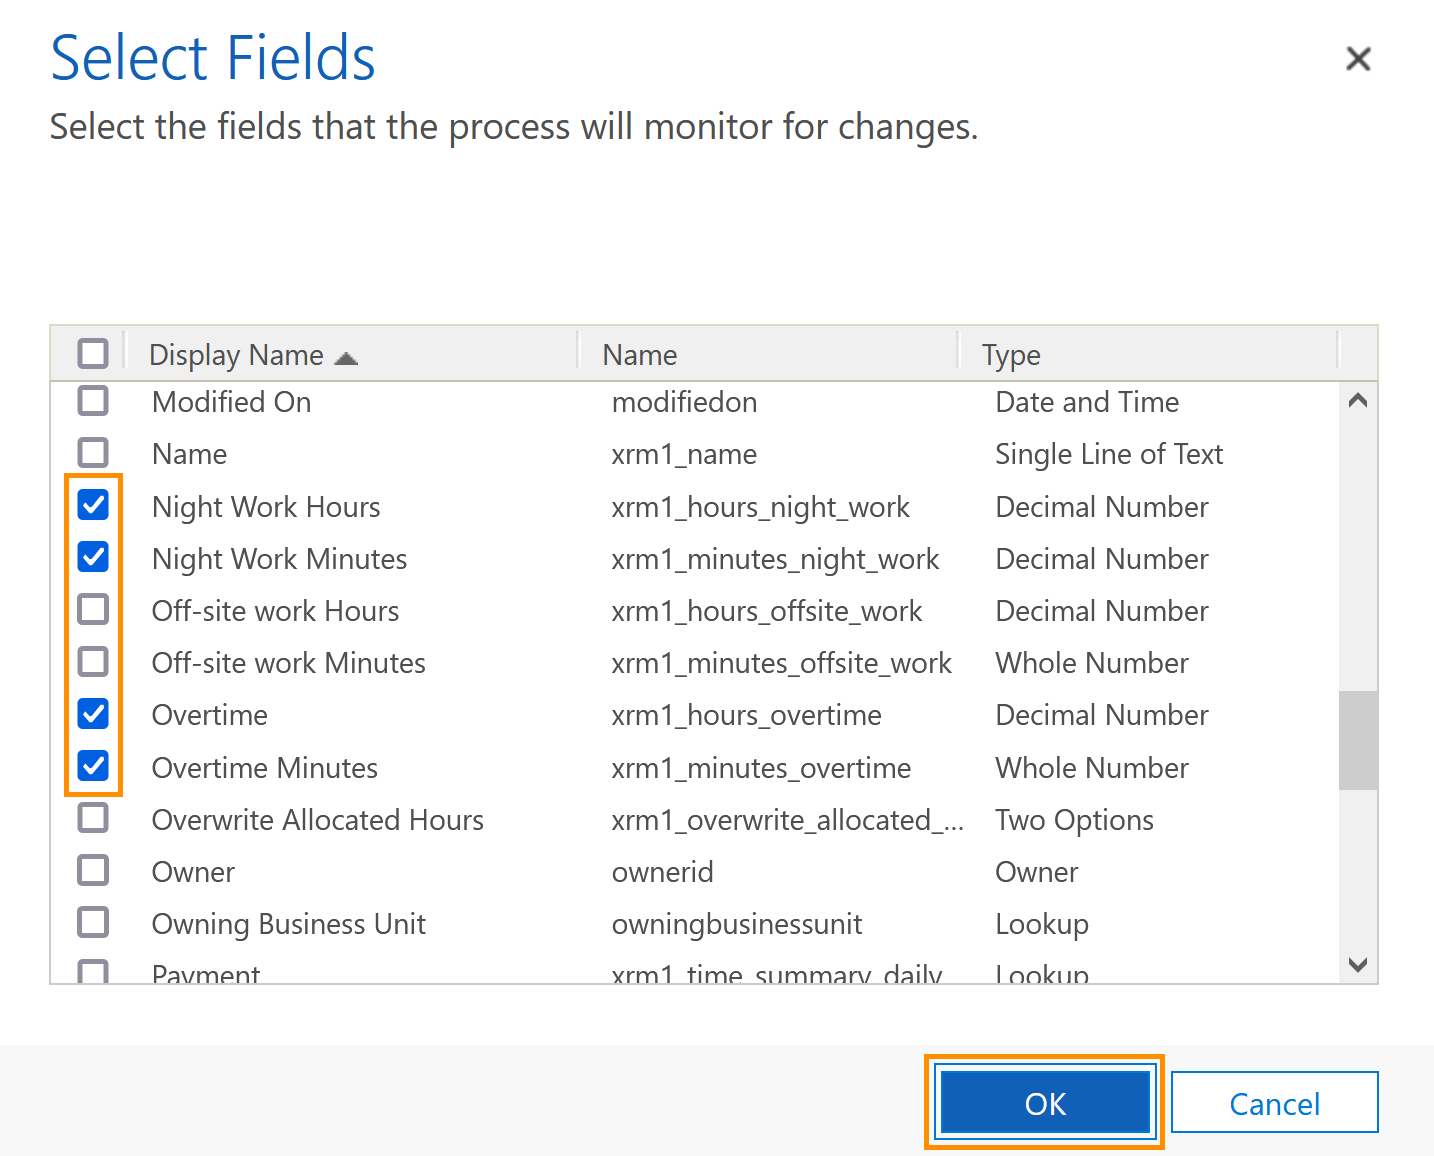
- Select the entries that will trigger the time account
- We recommend to select only the entities that your company will use to track the overtime. E.g. if your company works with night hours, and if you want to track the overtime of your employees, then select Night Work Hours and/or Night Work Minutes.
- The difference between hours and minutes is that hours will be seen as percentage of the hours (e.g. 01:30:00 will be represented as 1.50), and the minutes as an integer field (the sum of the total amount of minutes - 01:30:00 will be represented as 90).
- Close the window with the selected entries by clicking OK
- Confirm the process by clicking Activate and confirm activation
- When you're done, you can close this window
- Update the previous page, deselect the 'Create Time Account...'-Workflow, then click on Publish all customizations in the top bar
- Done! Time Accounts can now be used in your HR solution.
Result
Next Step
- After enabling the necessary addons, install base security for your HR solution.