
1. Basic information for multiple functional areas
How to assign Licenses to Users
How to download optional addons from our website
How to import addon solutions
How to connect Microsoft Flow to your Dynamics 365
How to set up DI Service Integration used for Xing publishing and StaffHub integration
Disable Advanced Find
How to customize workflows and personalize email and task content
Bulk-Import records
How to assign Licenses to Users
To apply a license, open Dynamics 365 and switch to the HR HUB app if it is not already selected.
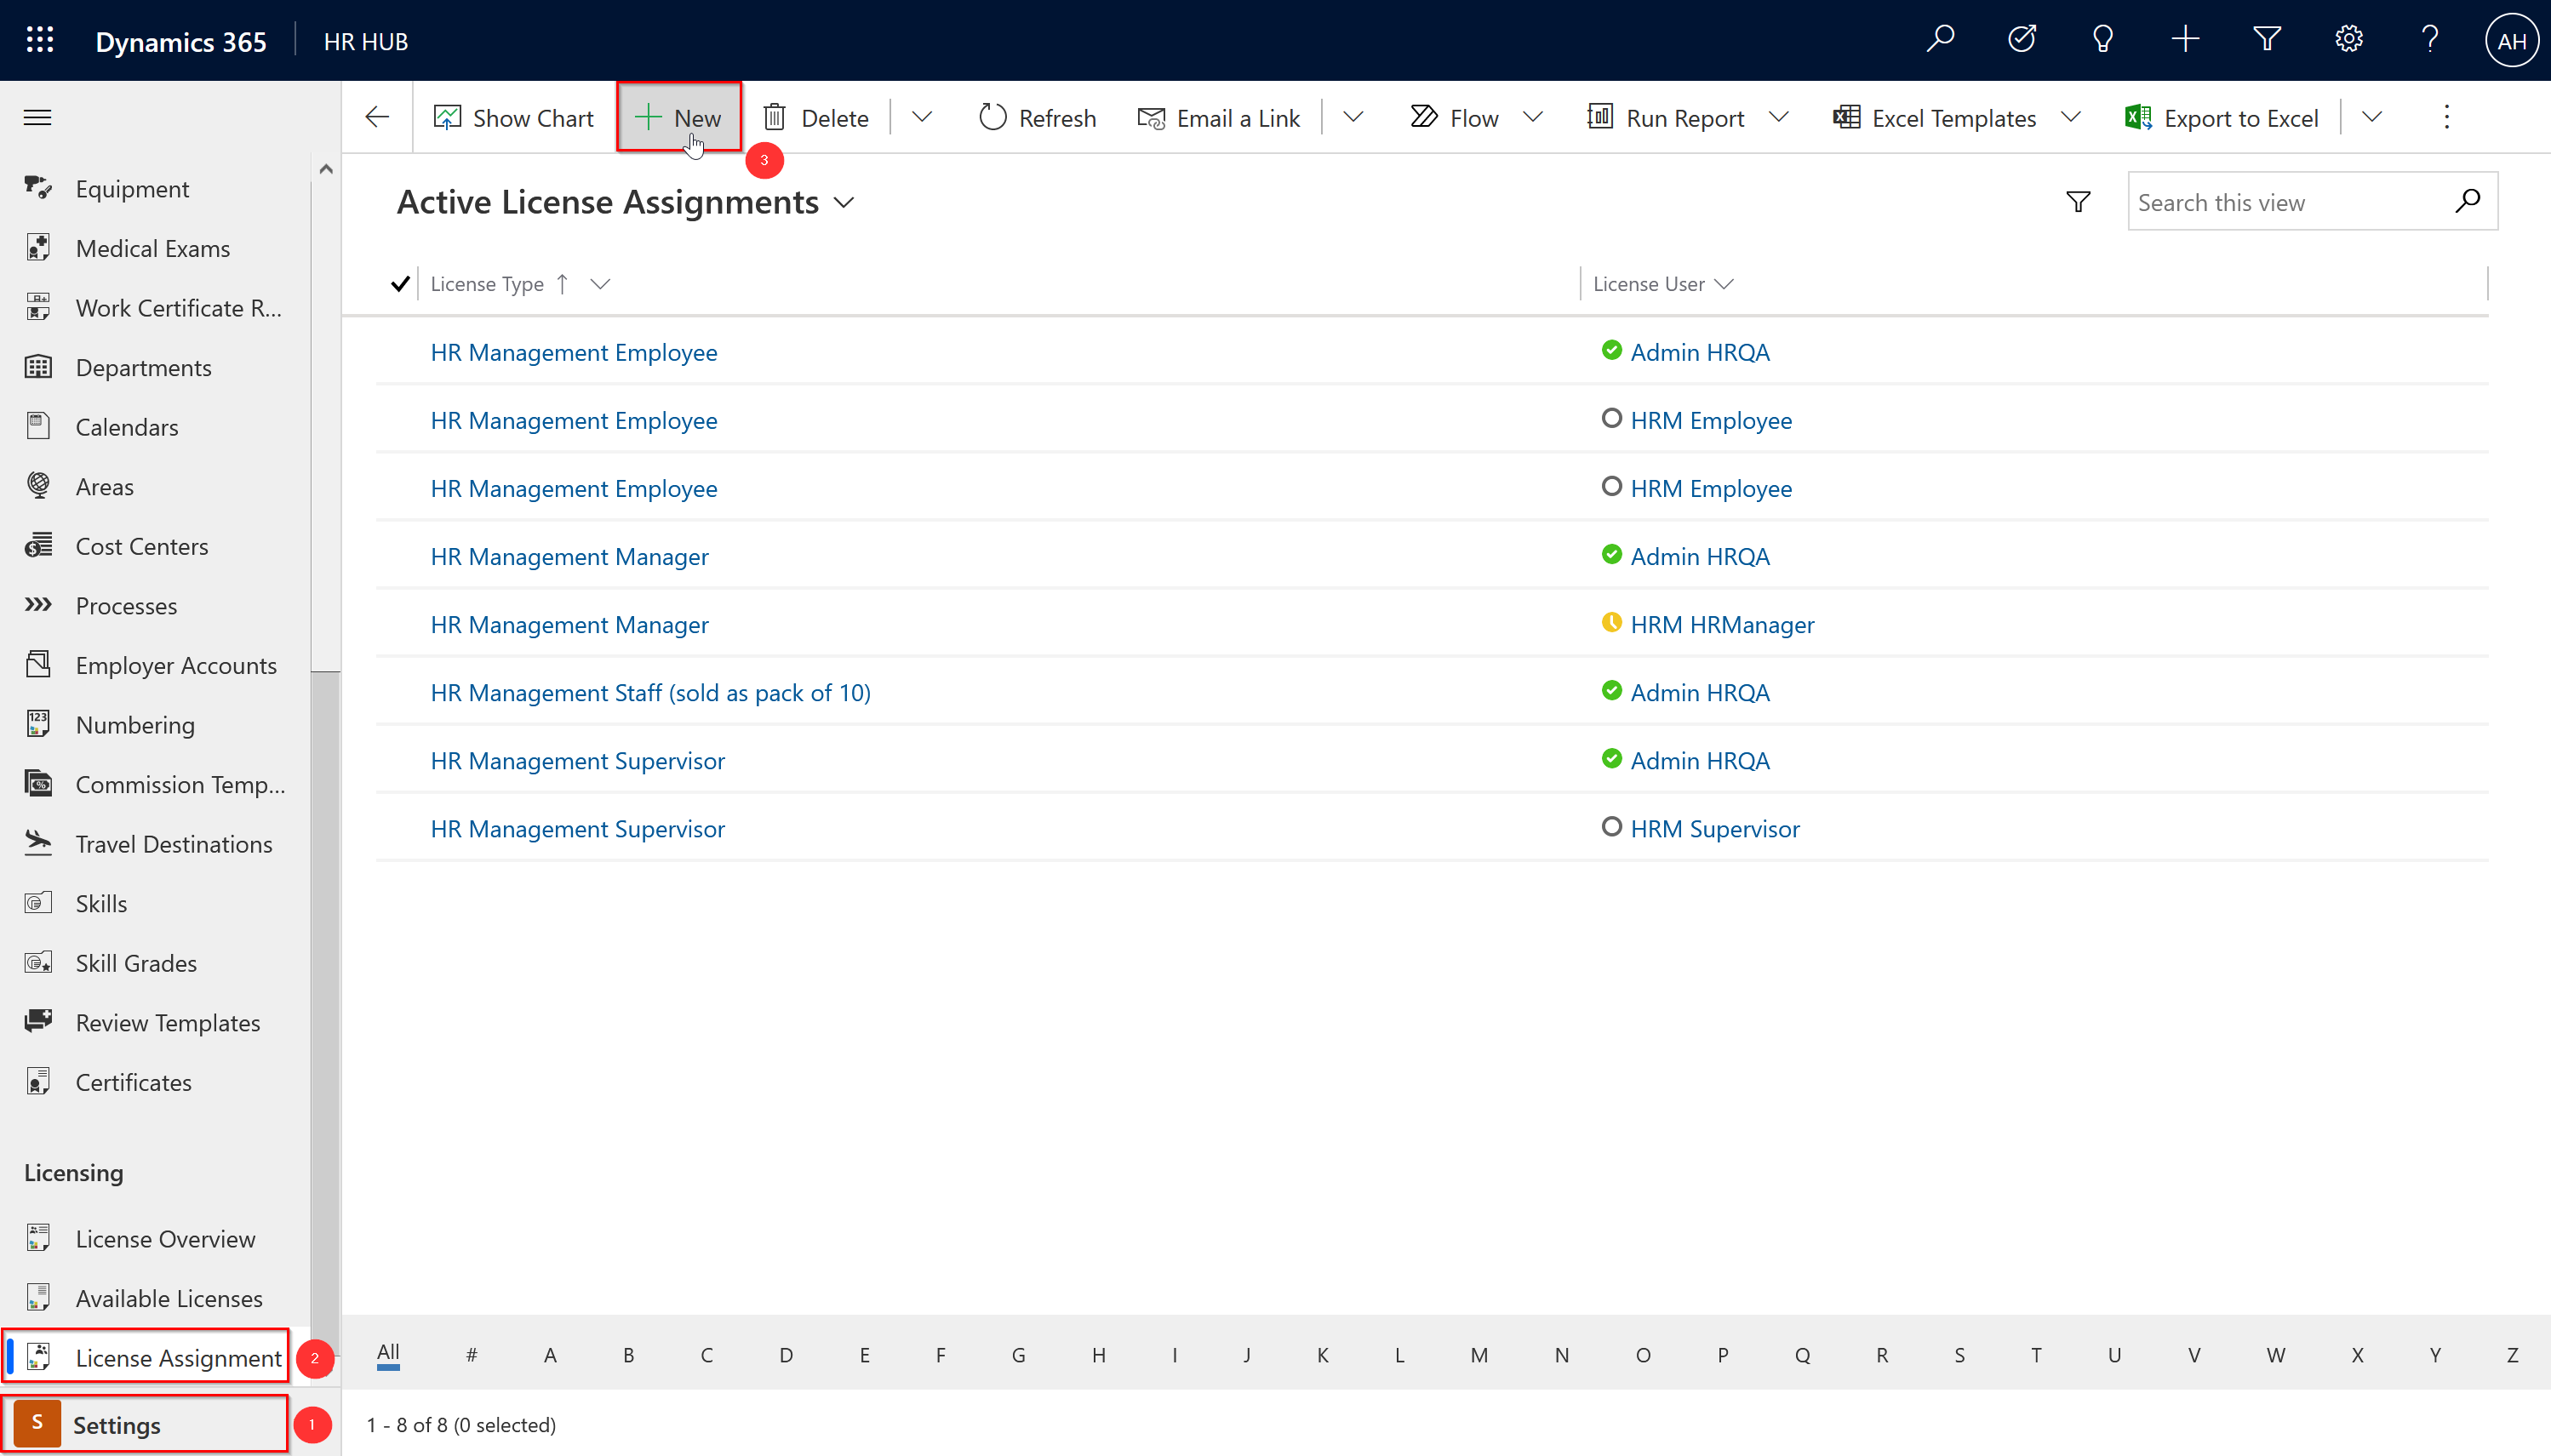
Go to Settings at the bottom left and then navigate to License Assignment in Licensing and click on New.
Now select the user and the license type you want to assign to the user. If you leave the Assign Roles Automatically option set to Yes, the specific security roles will be assigned to the user directly.
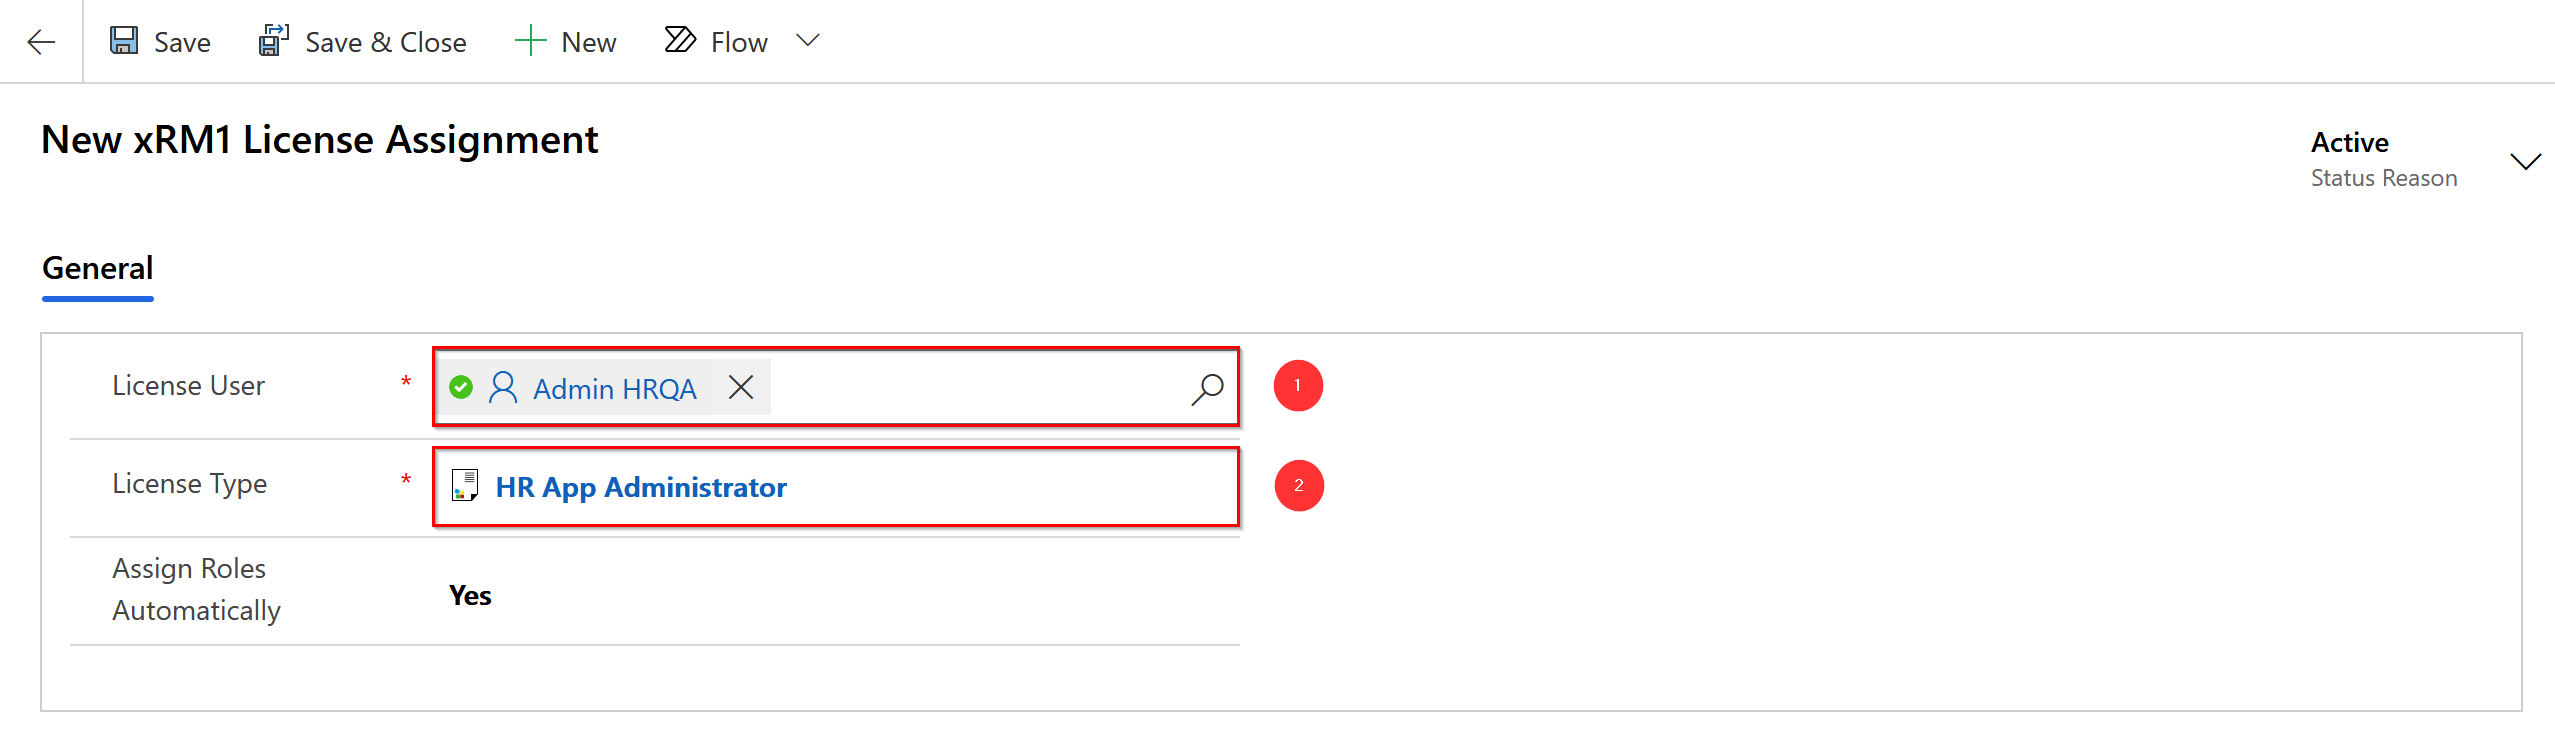
If you are unable to select the required user, please ensure that the user has been previously created in Dynamics 365.
Save & Close your changes.
How to download optional addons from our website
Depending on the features and functions you are about to configure, you might need some additional files. All these files are free of charge and can be downloaded in the customer portal: Direct Link to the download page (use the provided credentials you already used to download the solution)
On the download page, please answer the questions and all downloads that are available for the version you use, will be shown. Simply click the links and download the files.
Note: Do not extract them, unless the configuration manual explicitly says so.
How to import addon solutions
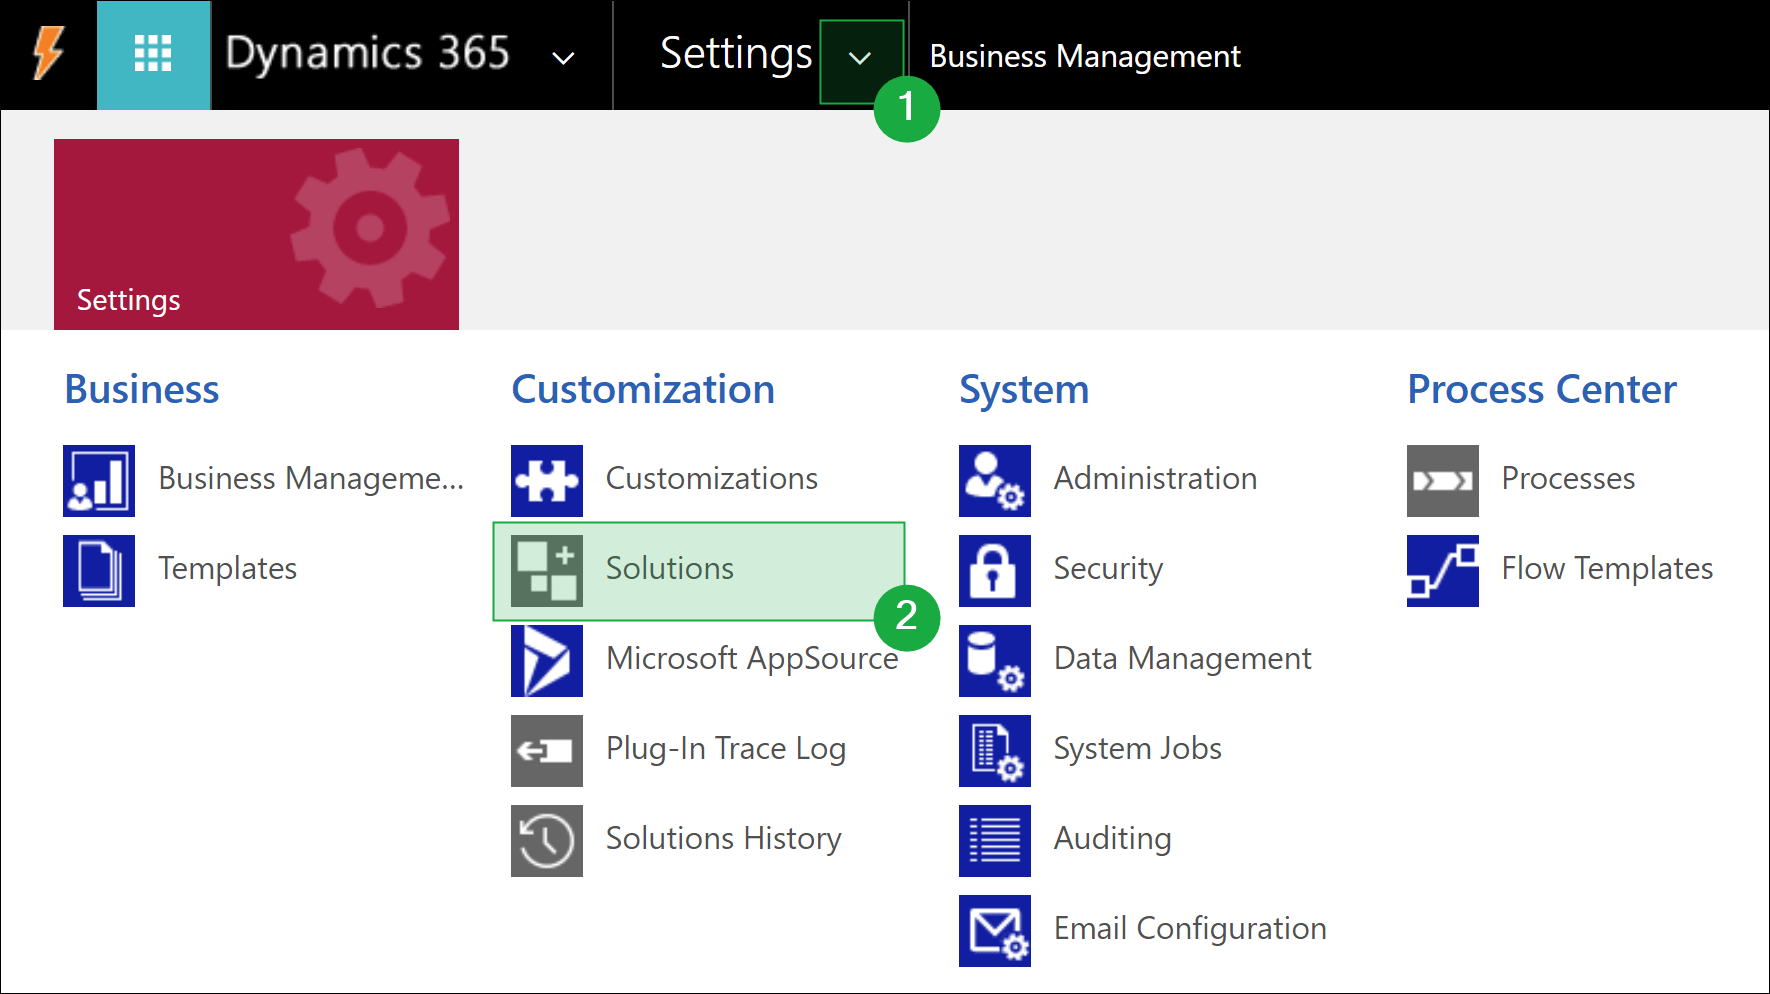
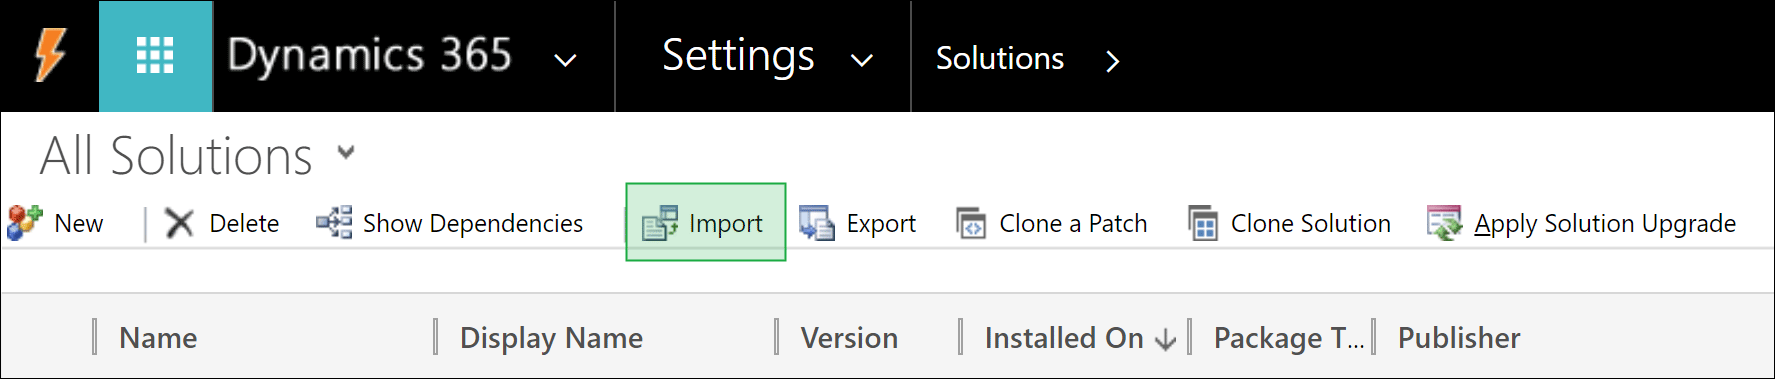
Log into your Dynamics 365 and go to Nav Bar -> Solutions
In the menu bar, click on Import
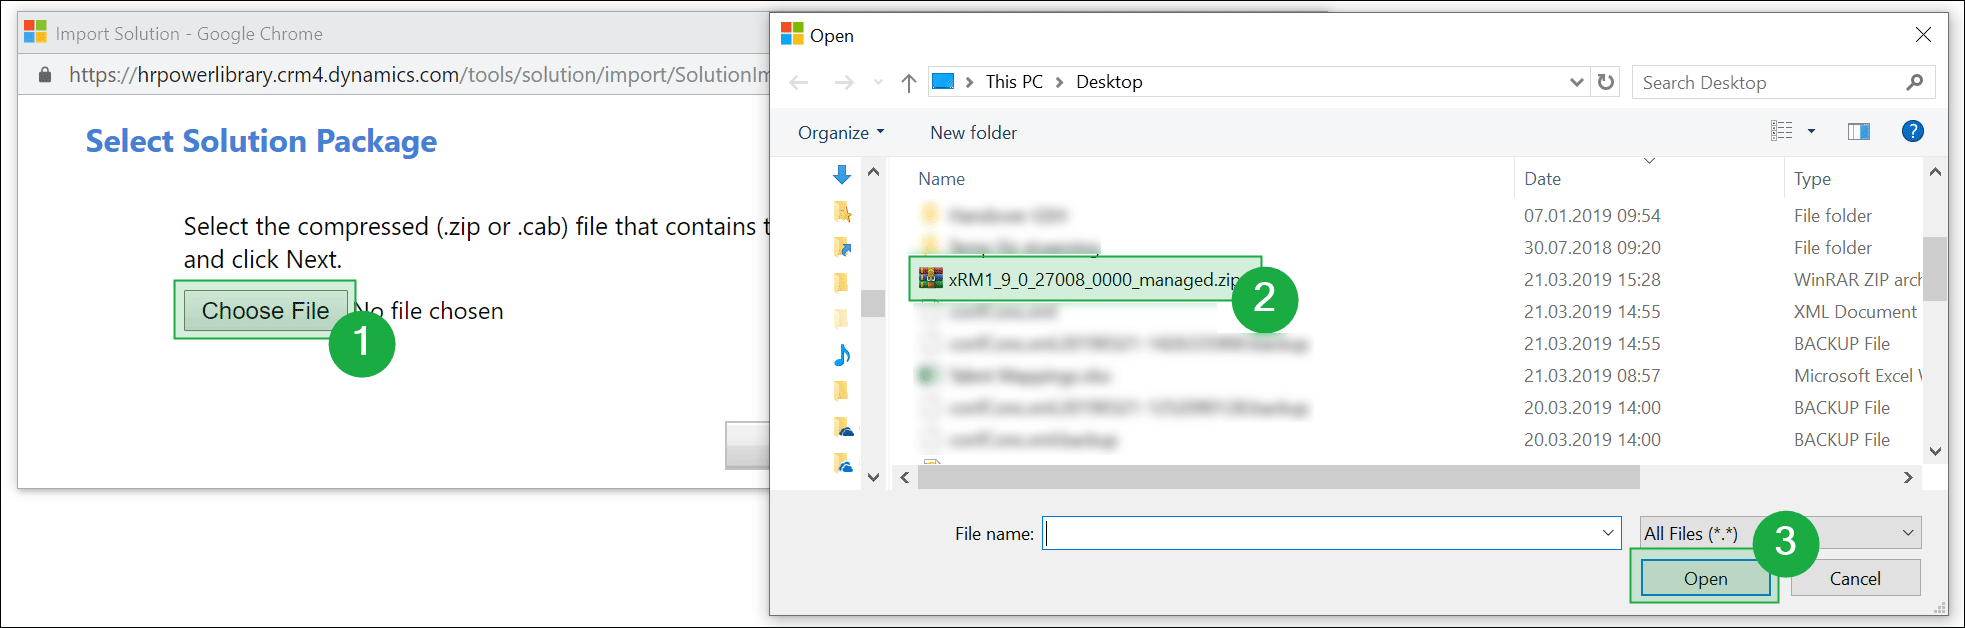
Click the Choose File button, select the Addon Solution File you want to import and press Open
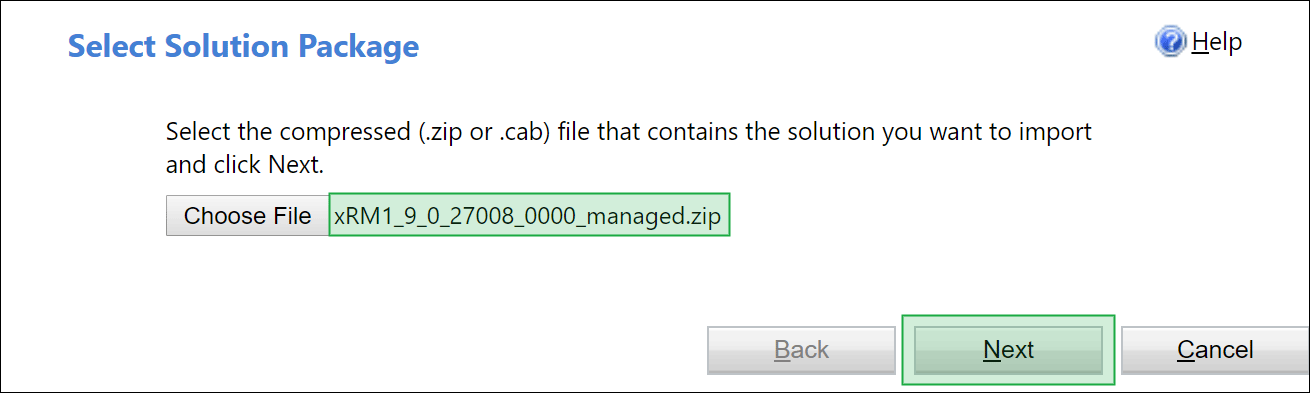
Confirm the selection of the correct solution file shown in the dialogue by clicking Next
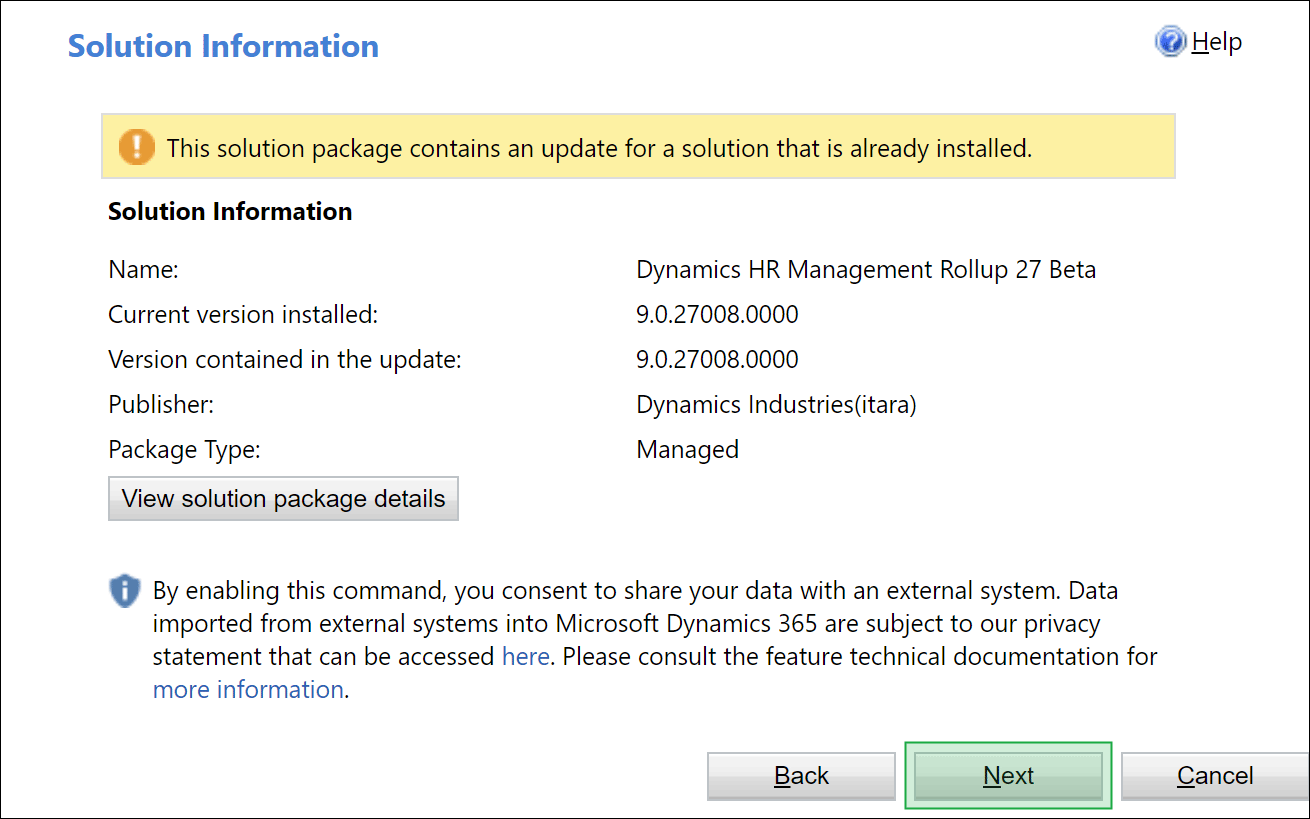
The dialogue will now import the file and prepare the installation.
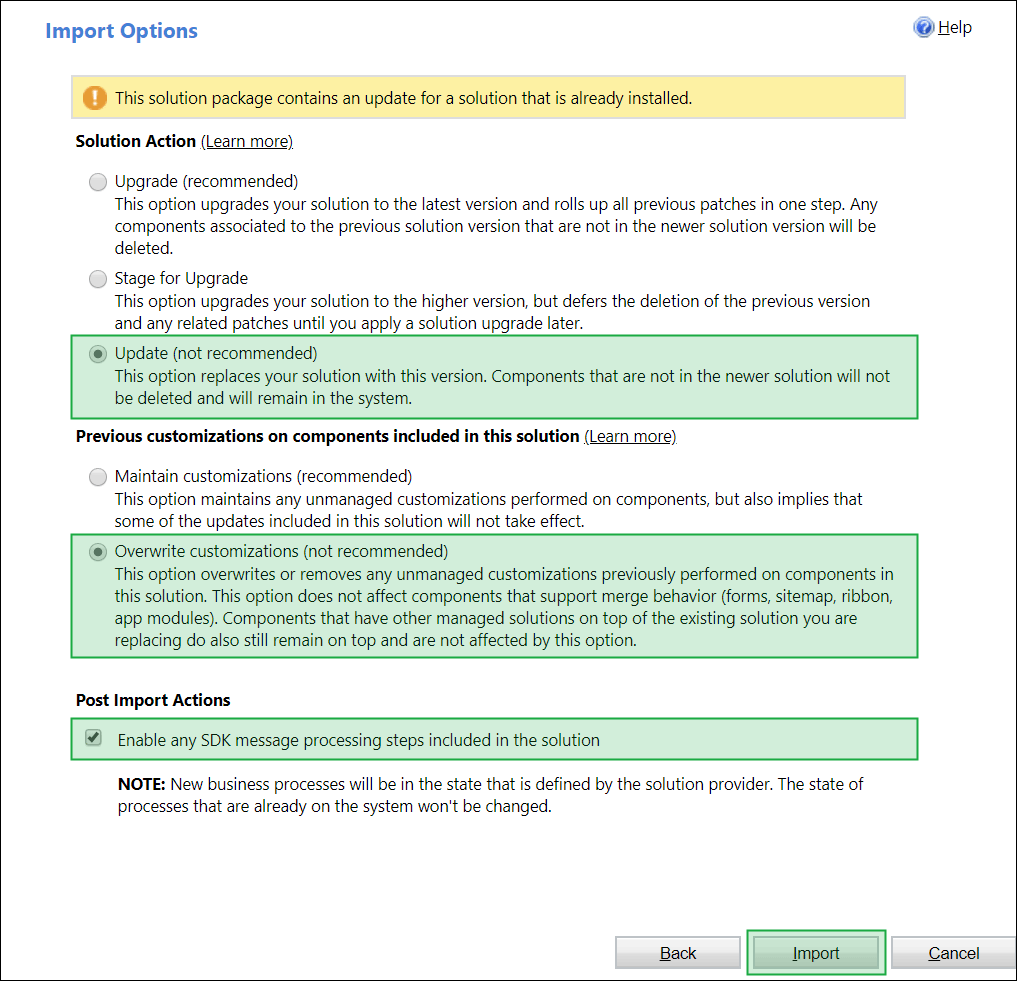
In the overview you can again check that you have the right solution. Press Next
Select Overwrite customizations and activate the checkbox Enable any SDK message processing steps included in the solution.
These options ensure a flawless installation procedure.
Press Import to start the installation
How to connect Microsoft Flow and Dynamics 365
Download and import Addon: Dynamics HR Management Flows (see the sections above on how to download and import solutions)
Go to Microsoft Flow and log in with your Dynamics 365 admin credentials

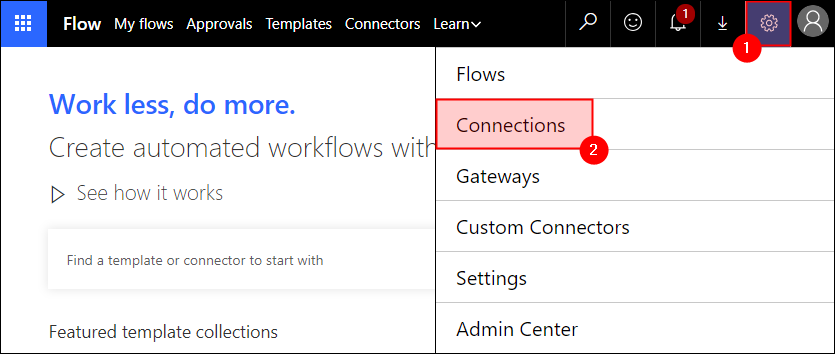
In the top right corner open the settings (gear symbol) and select Connections
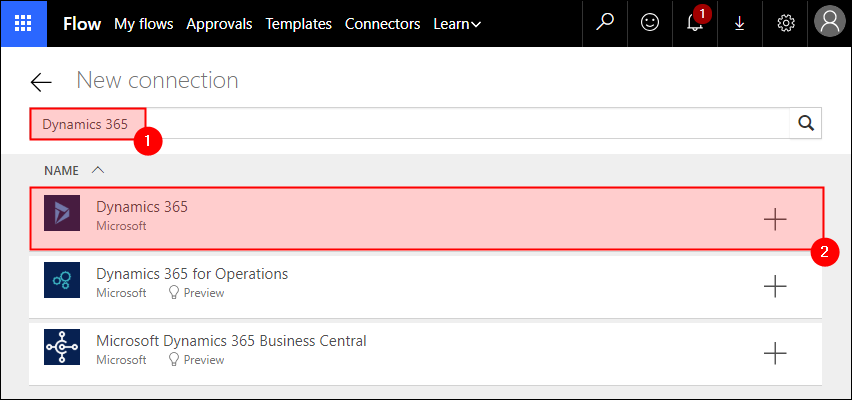
Click on +New connection

Enter Dynamics 365 in the search field and select the match
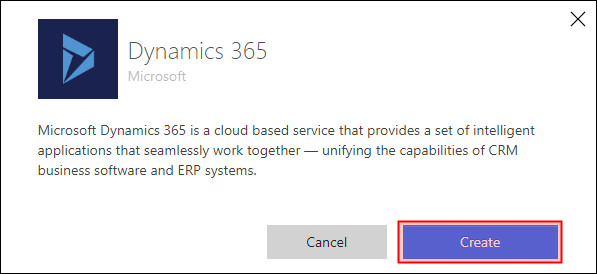
Confirm the dialog with a click on Create. You might have to enter your admin credentials again at this point.
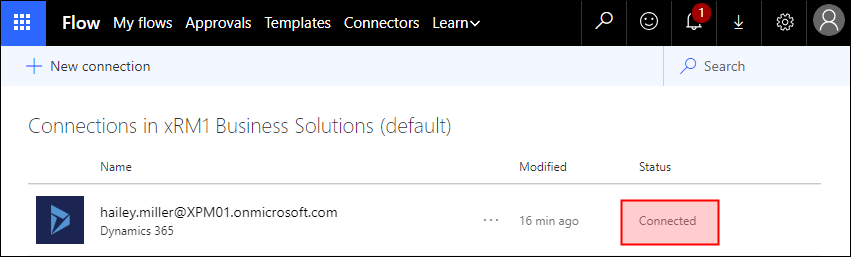
Your connection is now established and shows the status Connected
Now it is time to configure the Flows to use this connection.
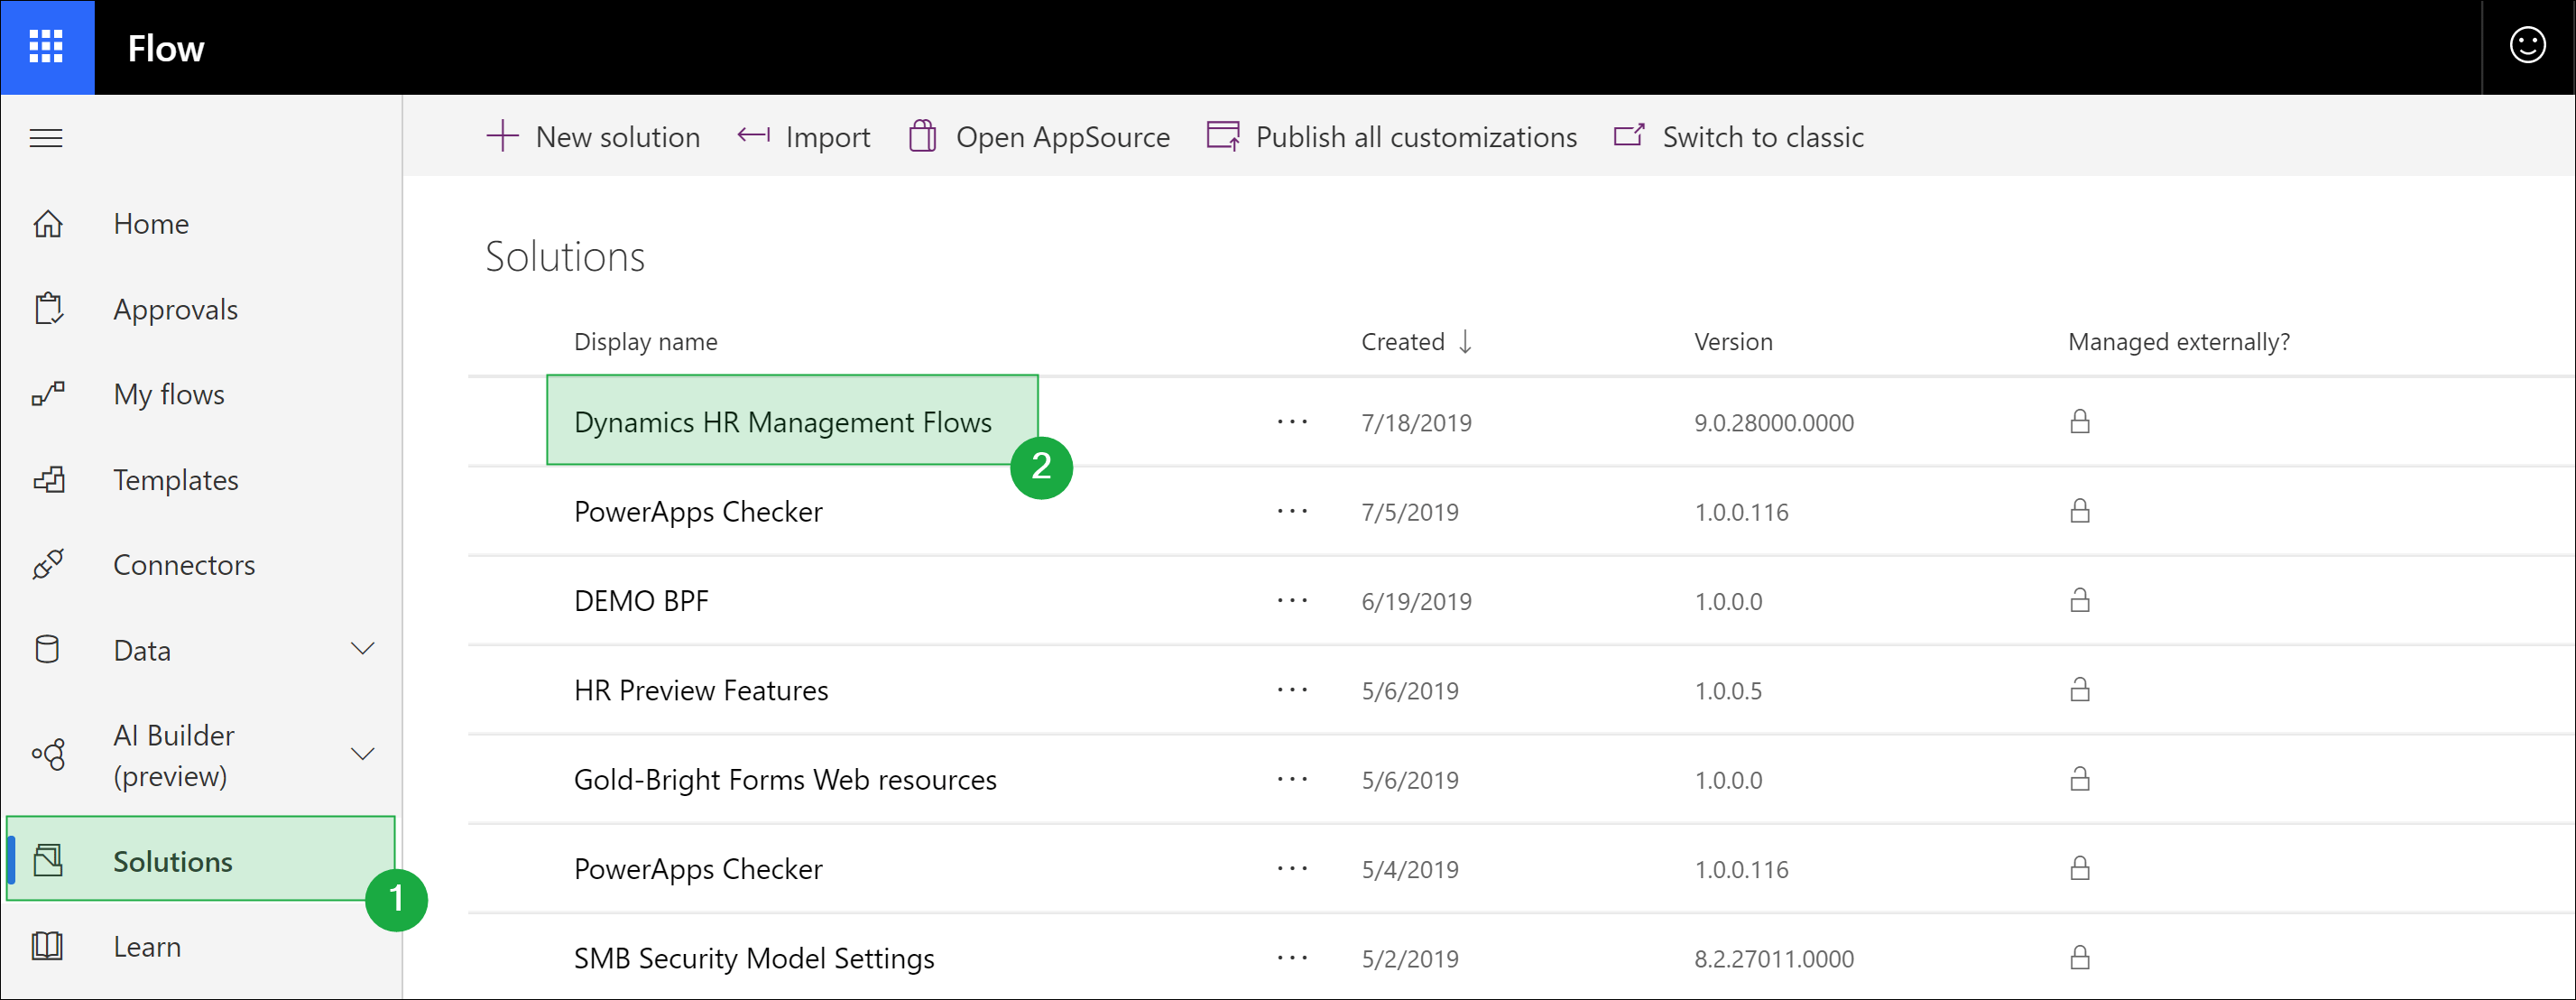
Therefore, go to Solutions and open Dynamics HR Management Flows
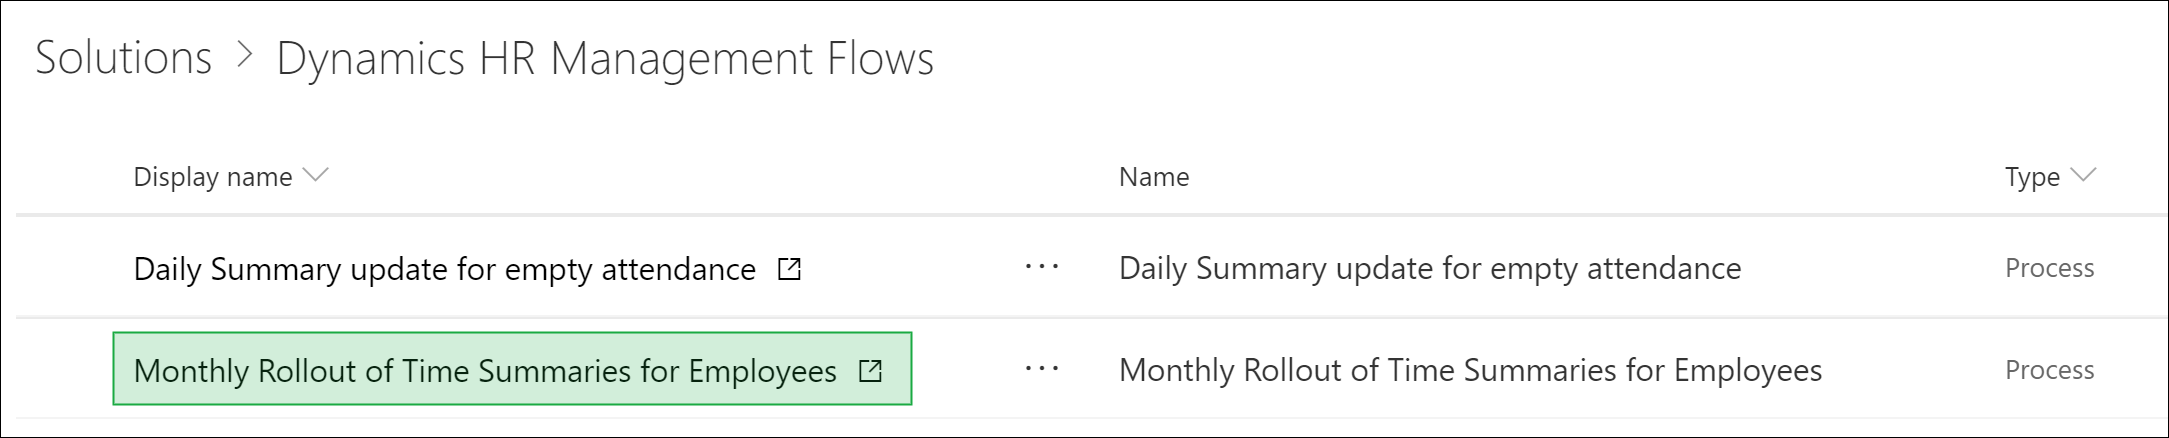
Open the Flow, that you want to configure
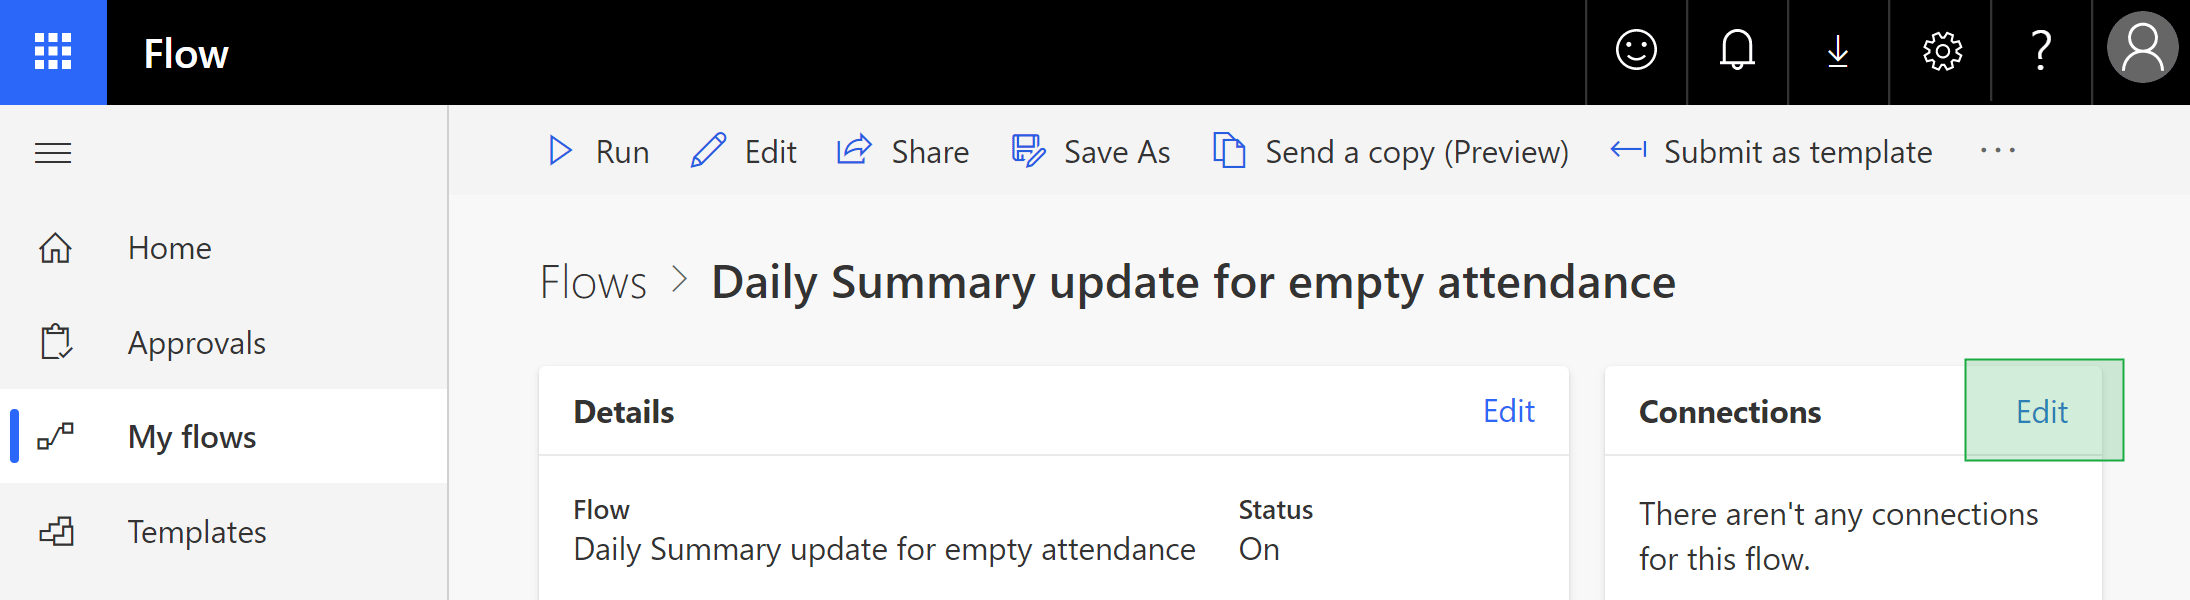
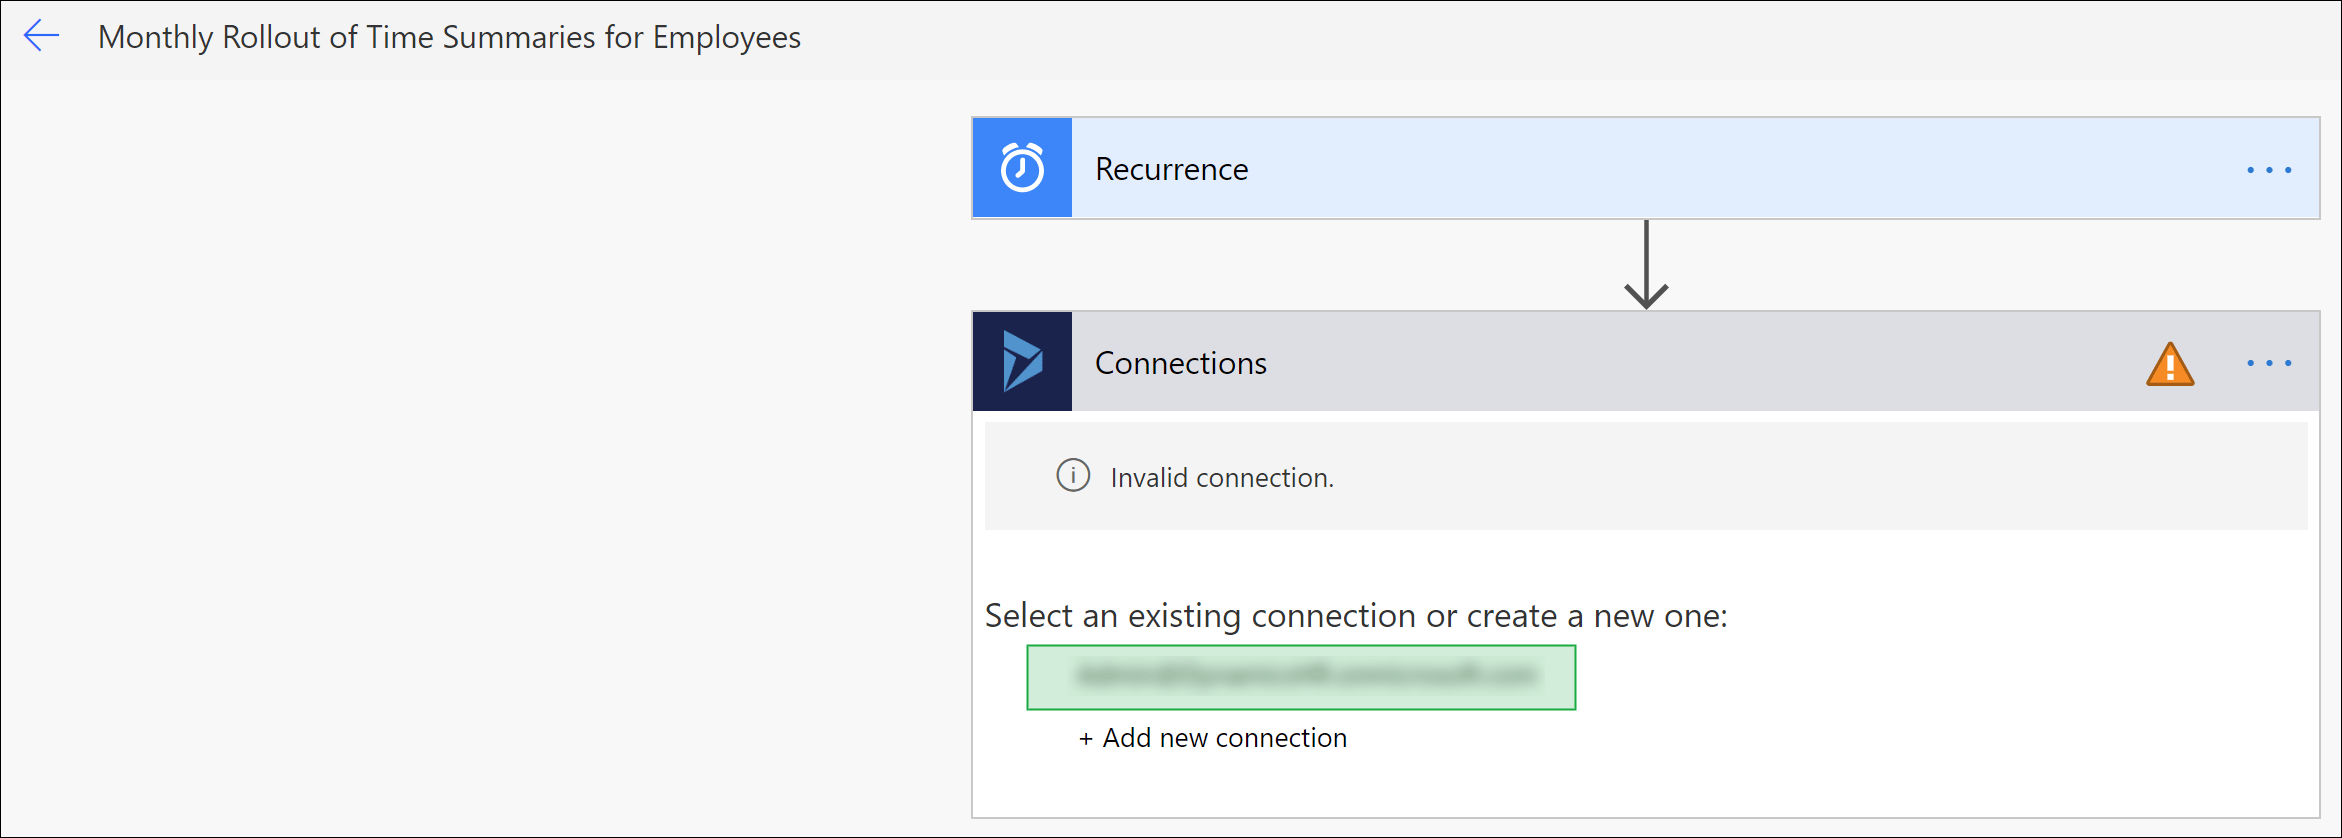
In the section Connections, click on Edit
Now, select the connection, that we created before (you can also create a new connection, if you want to)
Finally select your organization from the drop-down menu and click Save at the bottom of the page
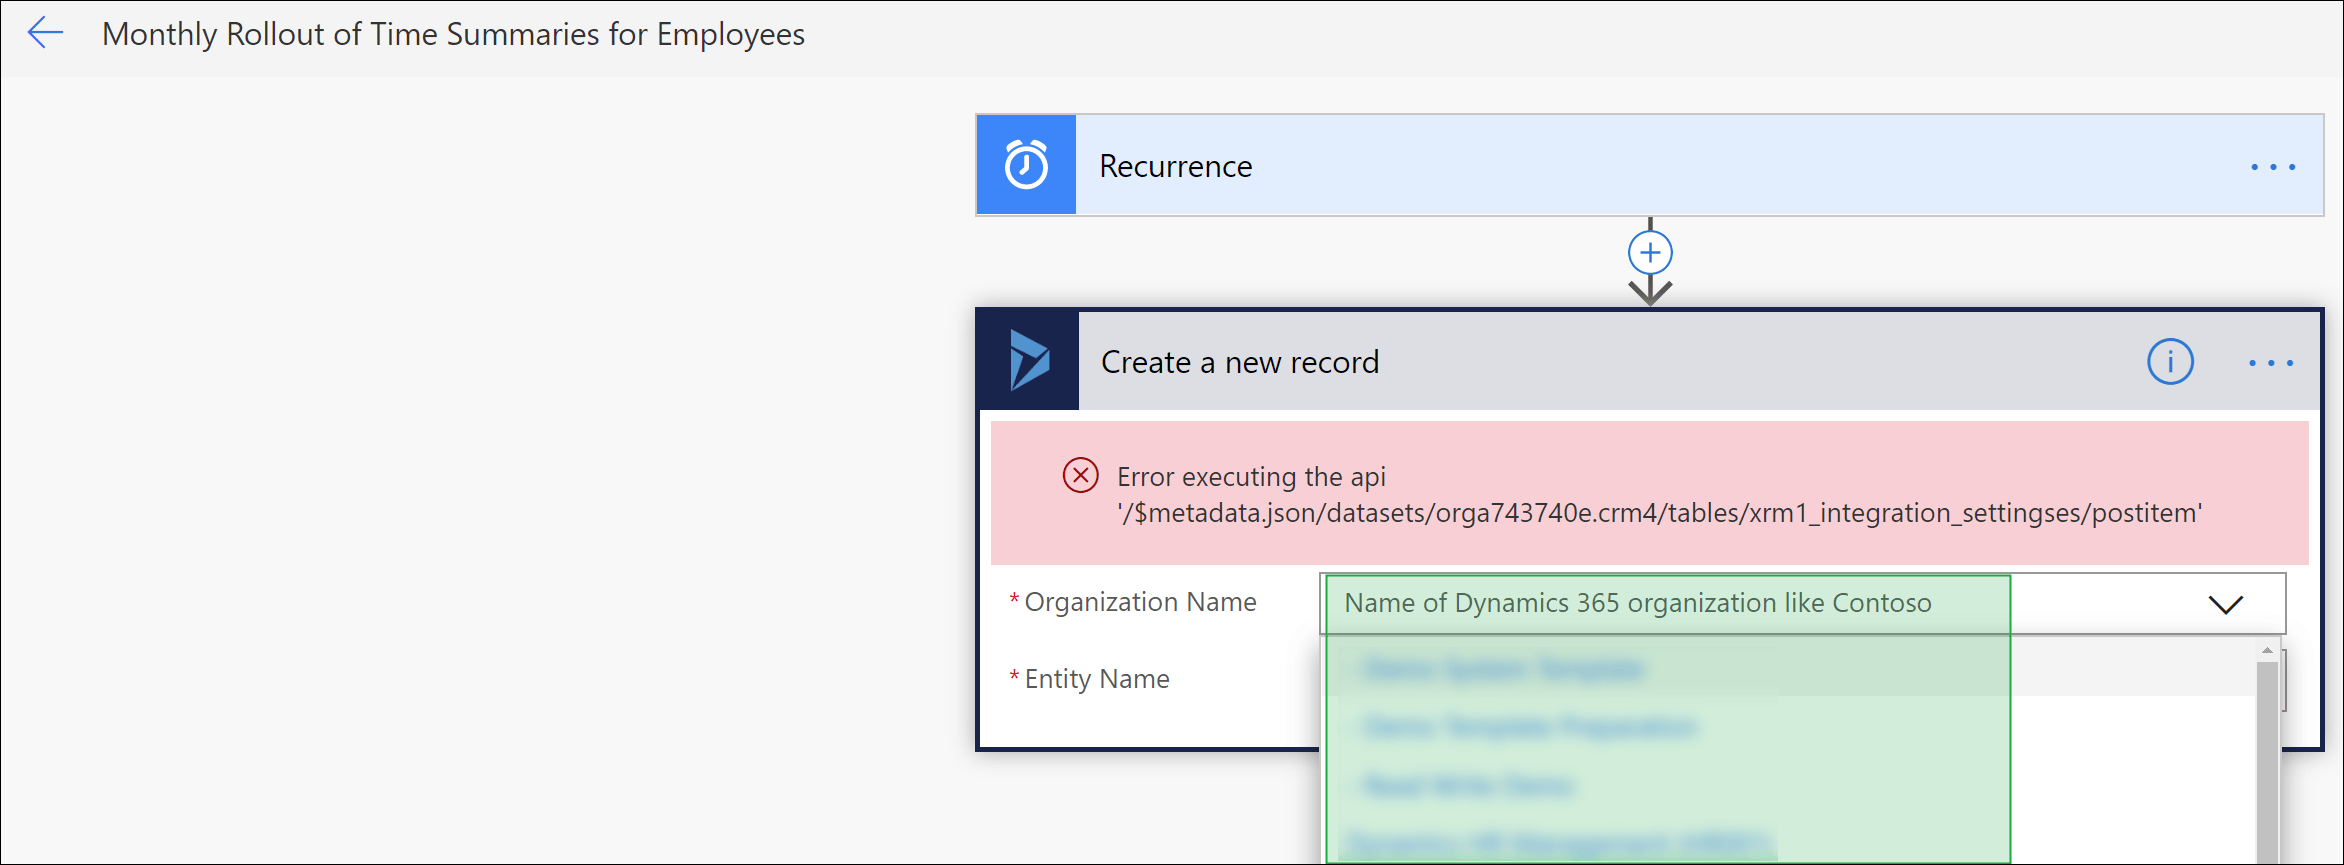
Repeat these last steps for all the Flows you want to use.
How to set up DI Service Integration
Access Permission
Go to https://diserviceintegration.azurewebsites.net/and log in with your Dynamics 365 Administrator account.
Accept the upcoming permission request. If there is no permission request, you already granted this permission.
Preparation
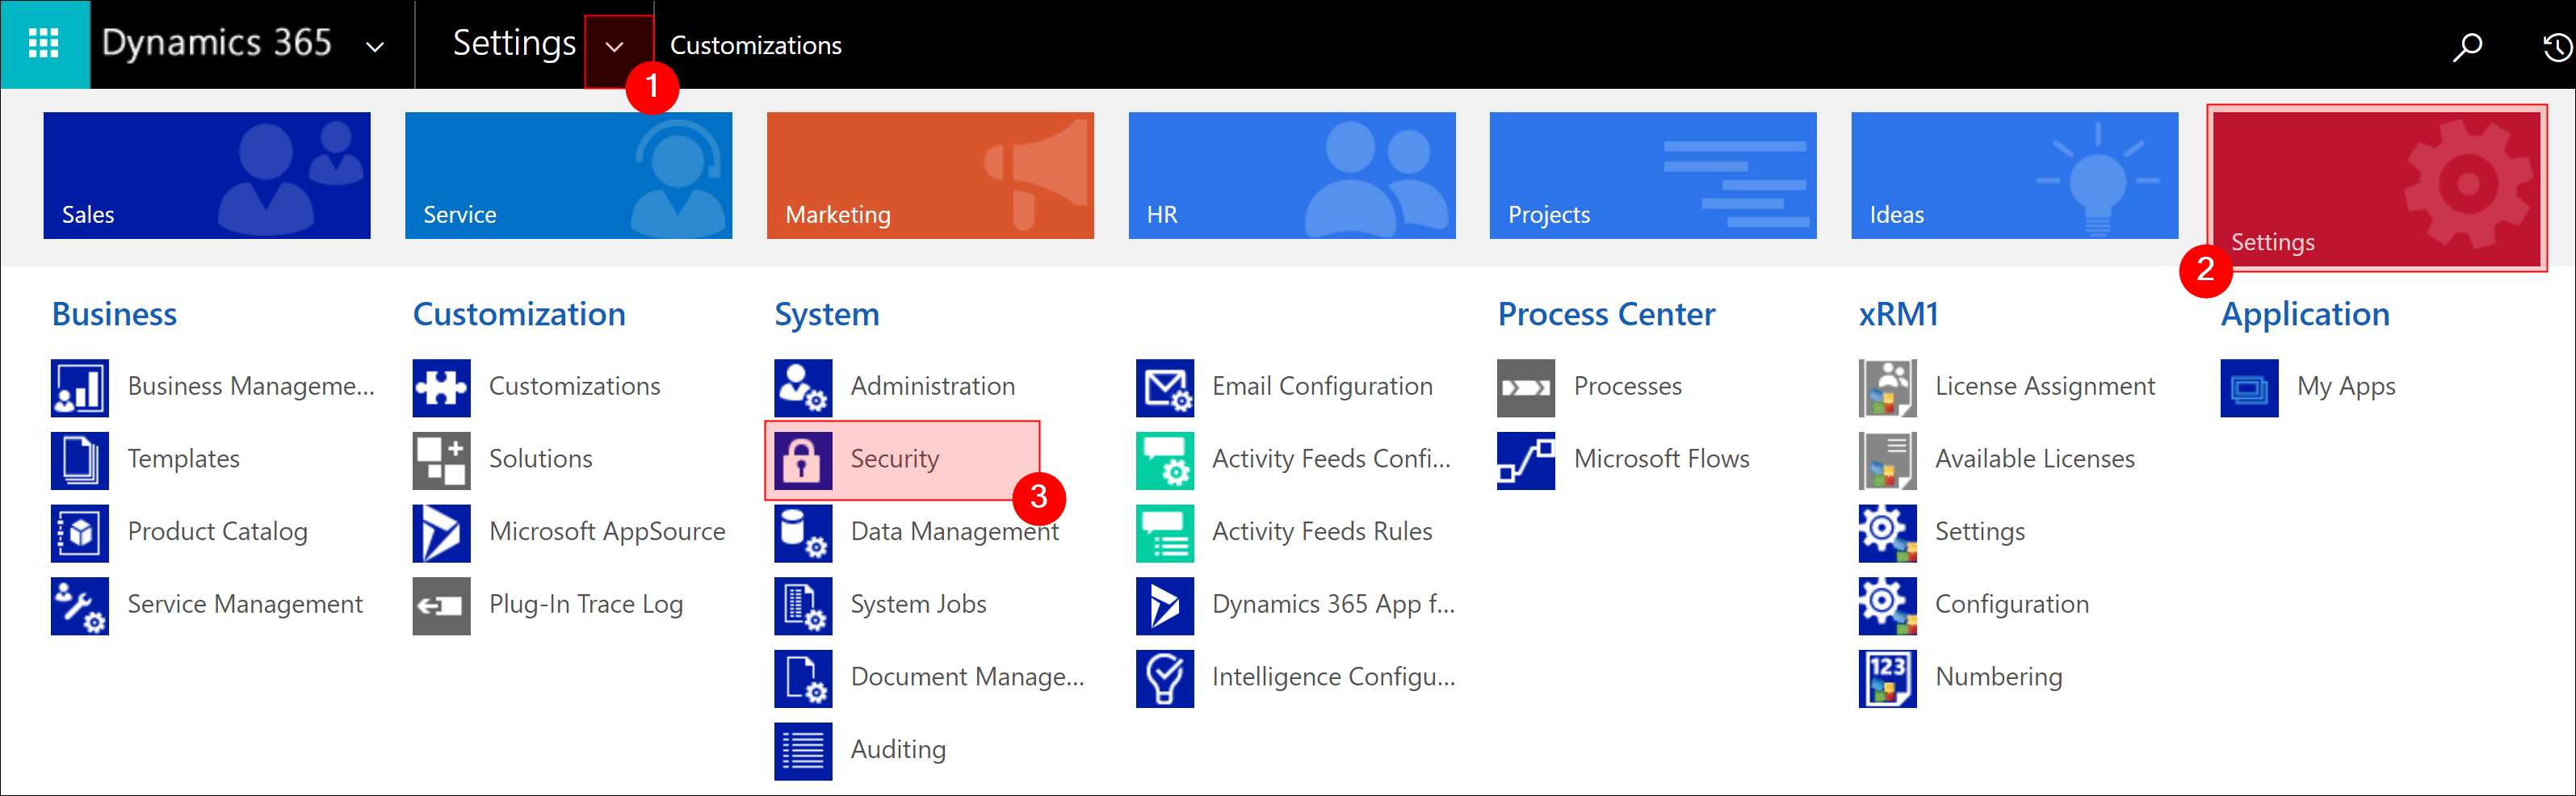
Go to Navigation Bar -> Settings -> Customizations
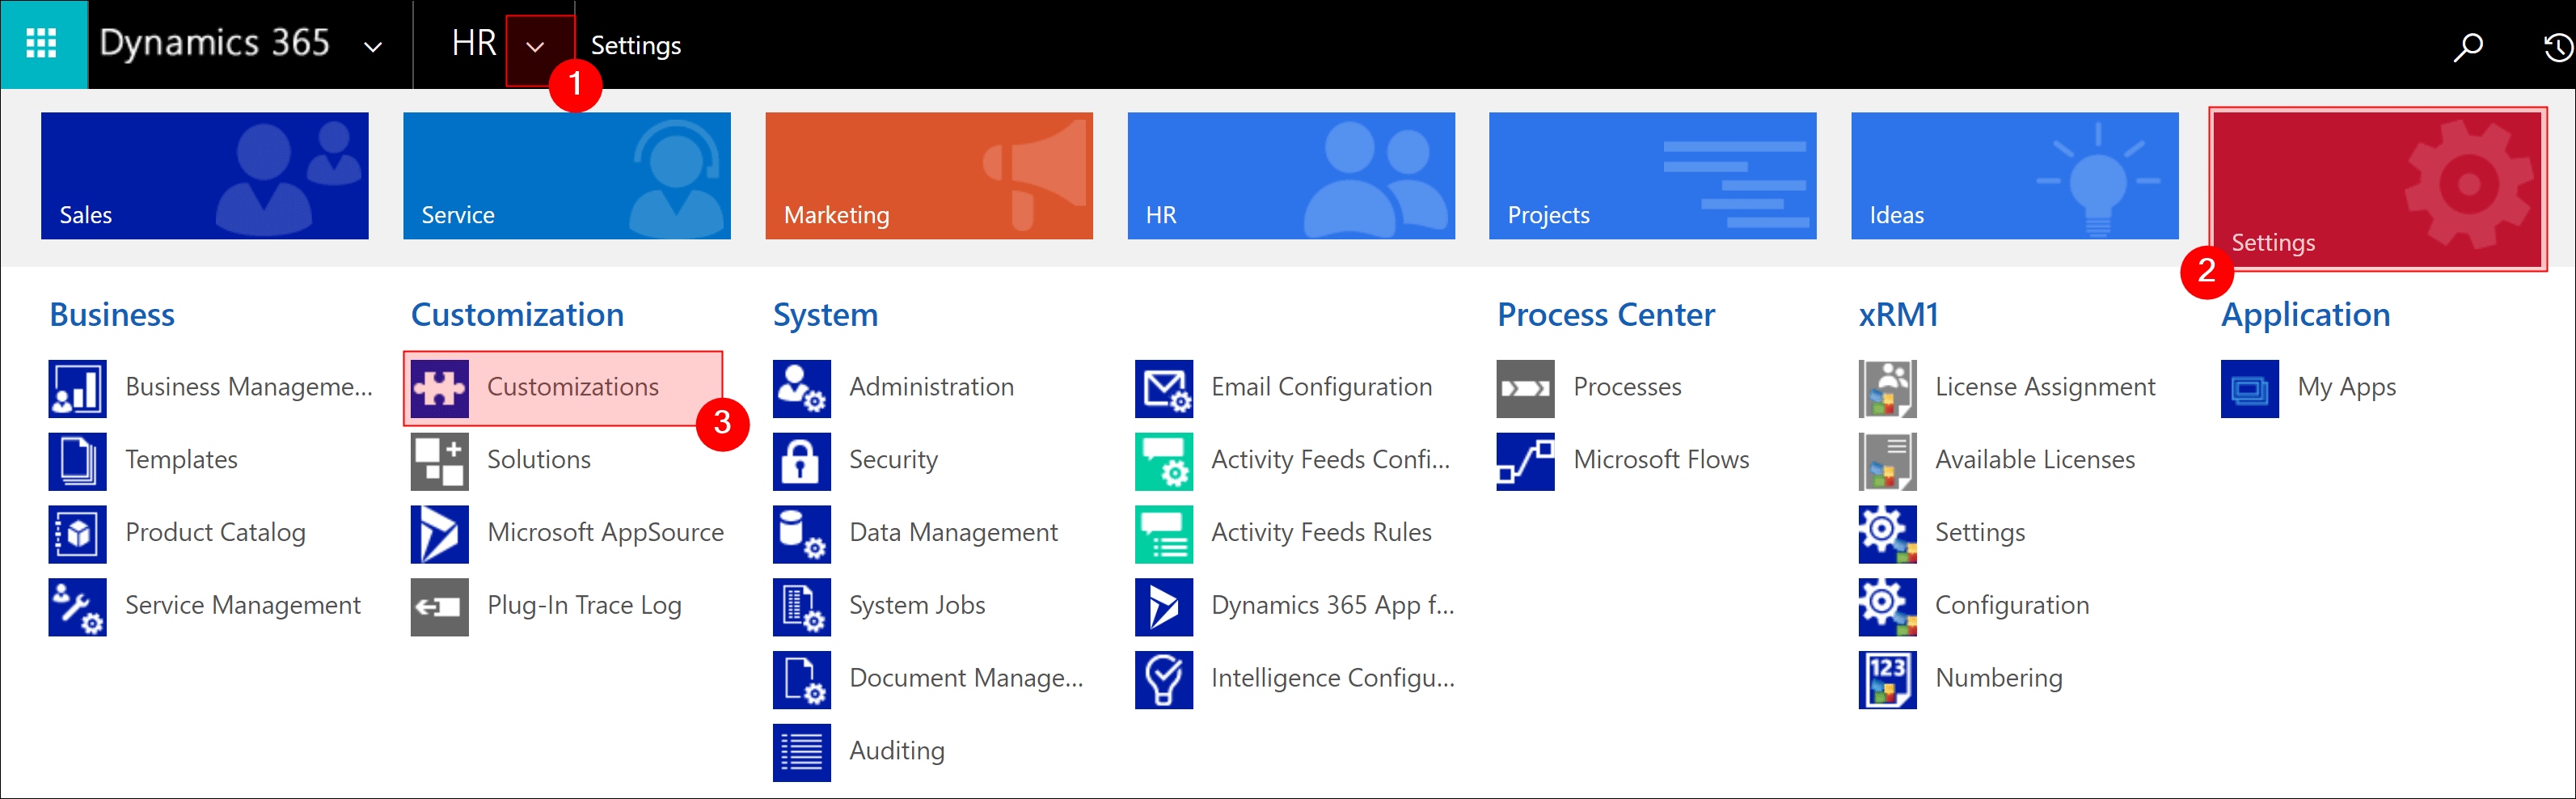
Open Customize the System
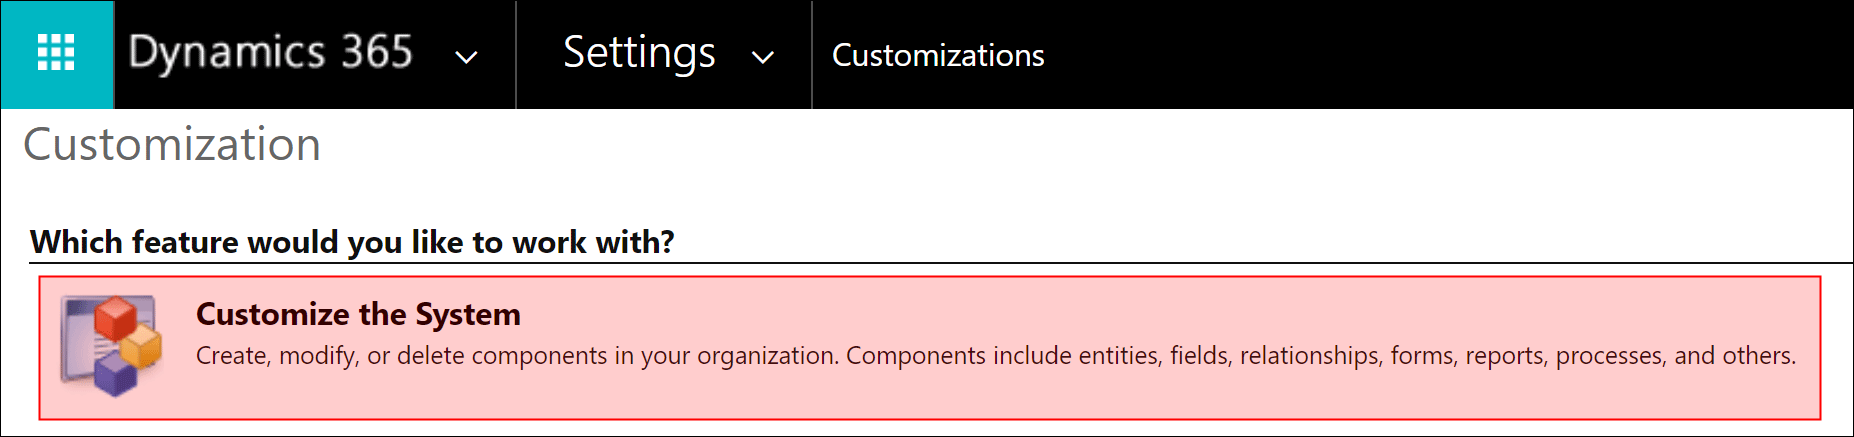
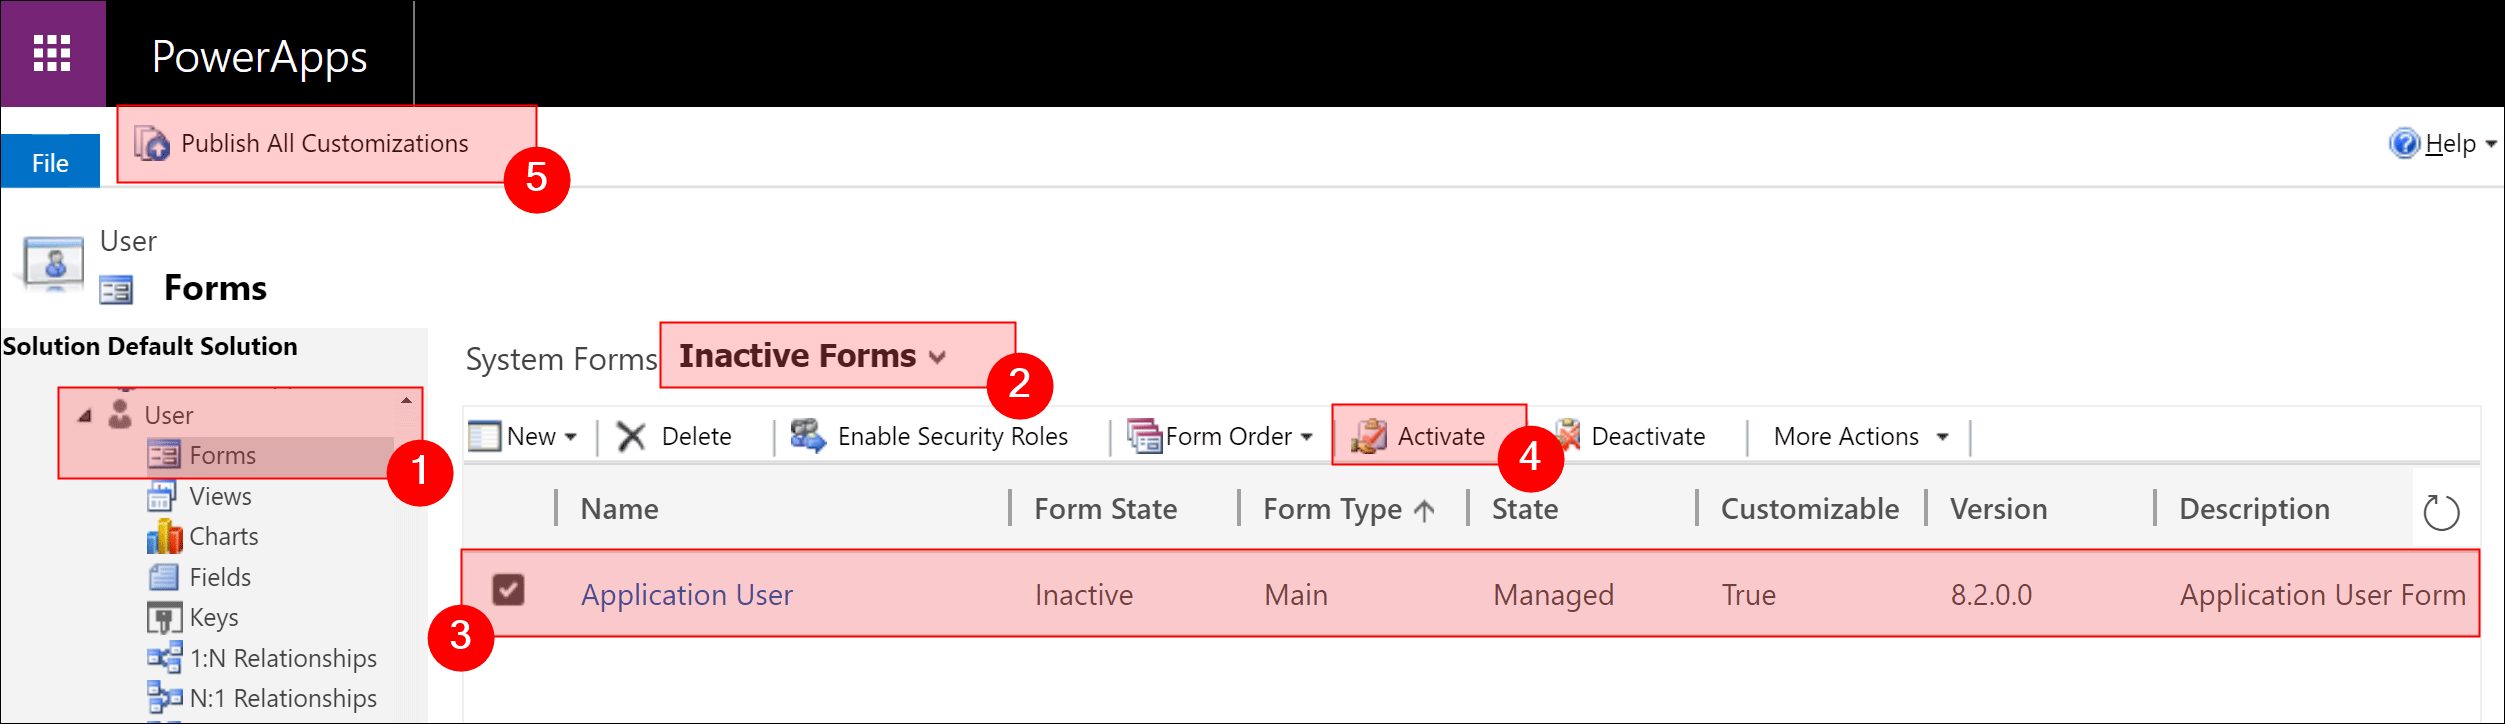
In the sidebar, expand the entity User (1) and under Forms (2) select the Inactive forms view (3).
Select the application user form (4) and click the Enable icon (5) on the menu bar .
Confirm activation and click Publish all customizations (6)
Configuration
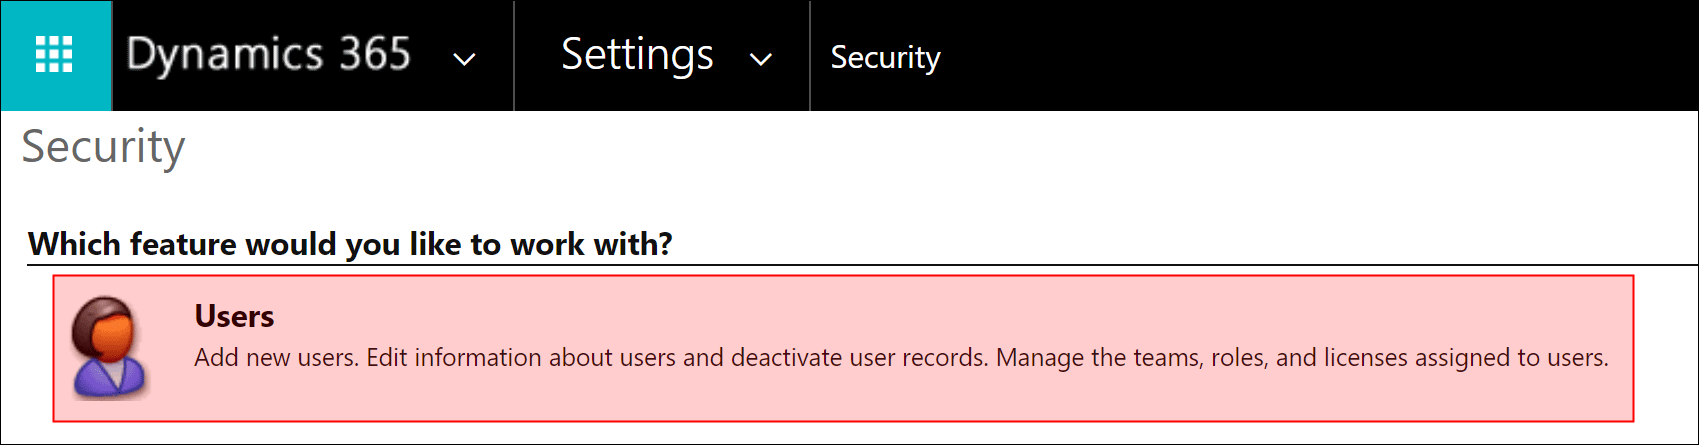
Go to Navigation Bar -> Settings -> Security
Open Users
Change the view to Application User and press +NEW in the menu bar
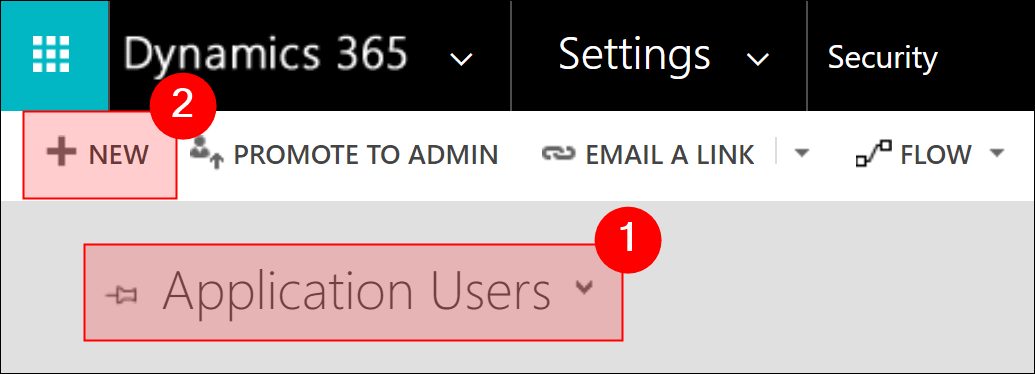
Switch the view to Application User, fill in the fields, and Save the record
You can enter the username, full name and email address of your choice, but the application ID is fixed.
Application ID: 8c445924-1ce9-4d09-b62c-ab17c9071c24
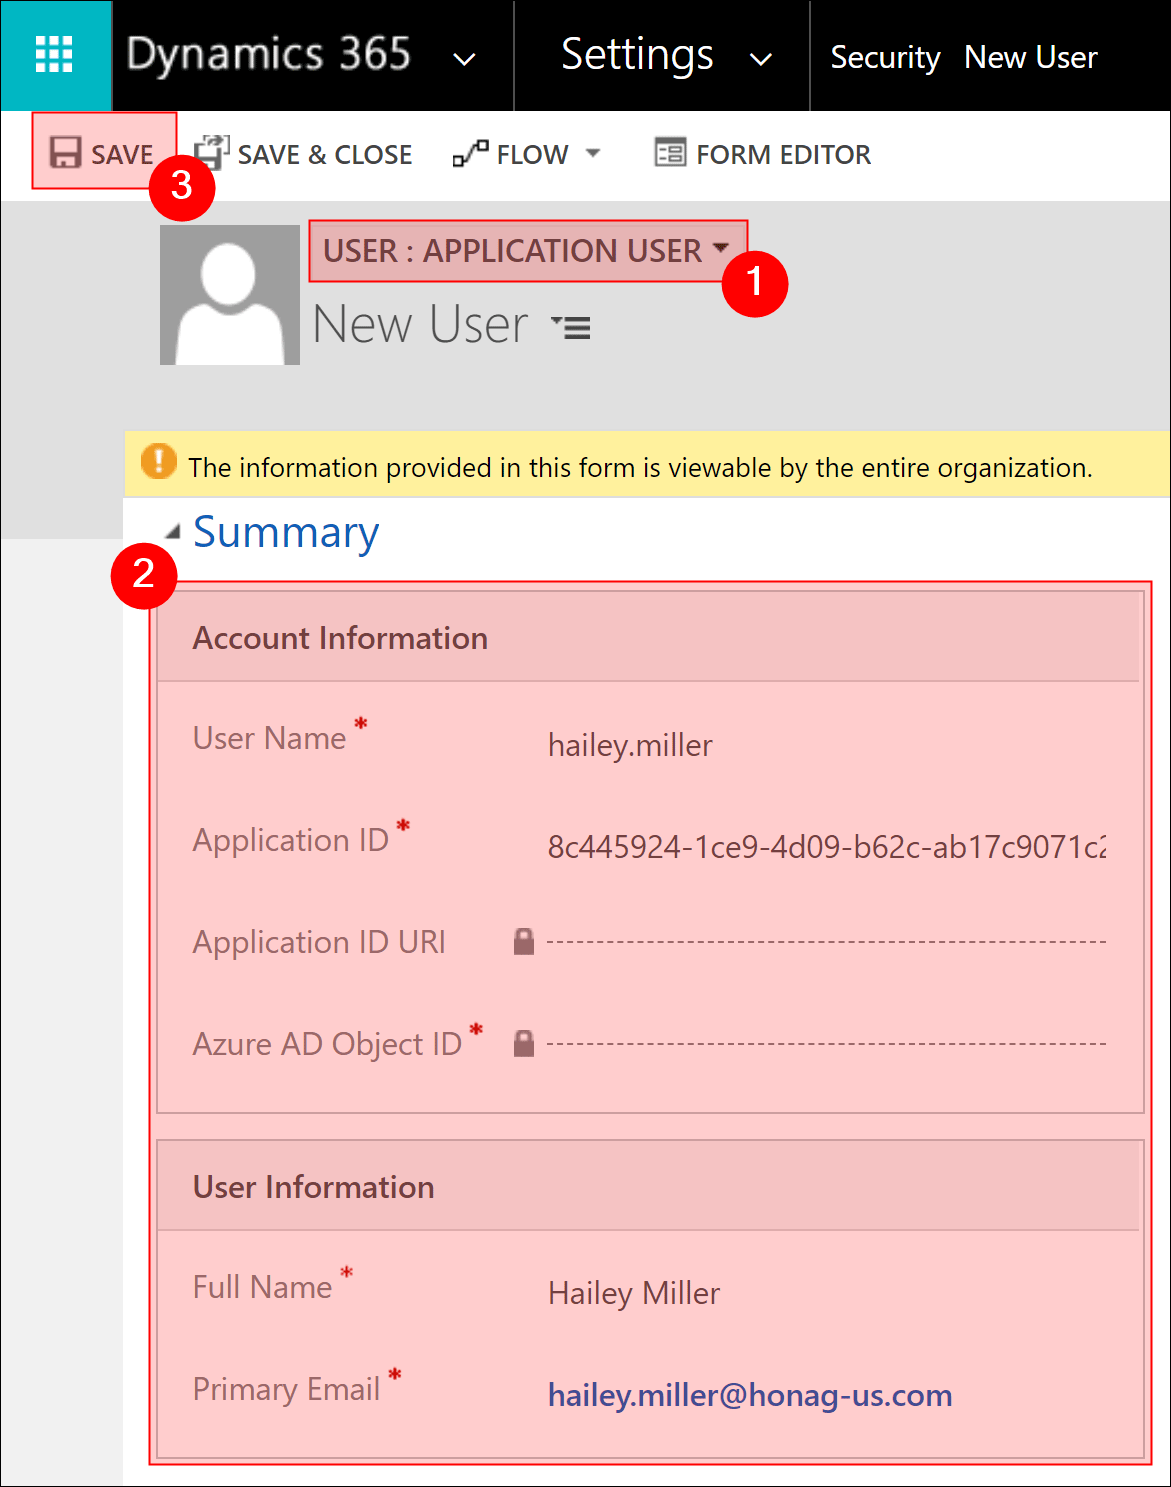
The locked fields are now automatically filled with the correct data.
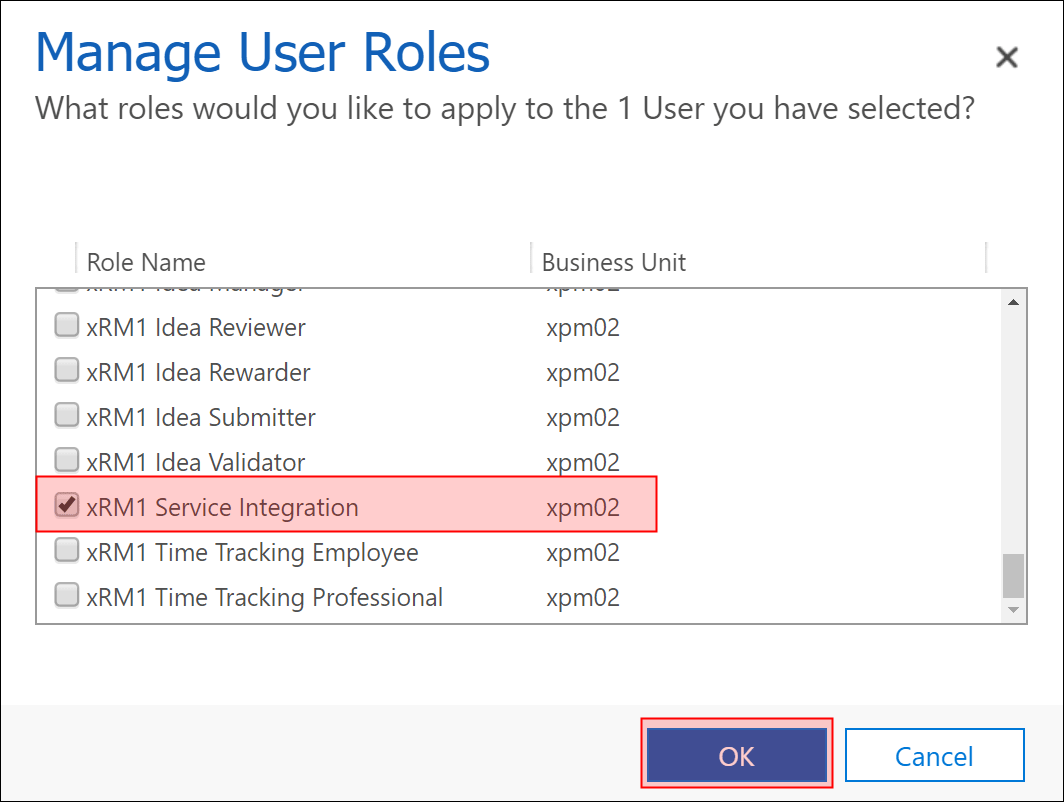
Click Manage Roles in the menu bar

Select xRM1 Service Integration and confirm with OK
Go to https://diserviceintegration.azurewebsites.net/ and log in with your Dynamics 365 Administrator account.
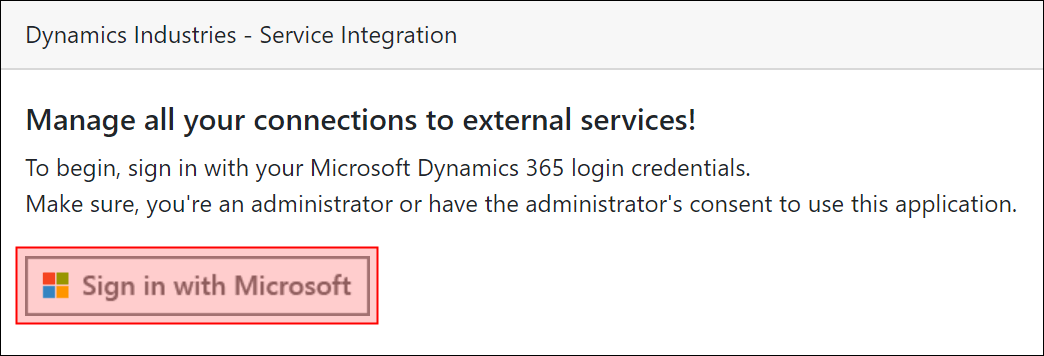
If necessary, select your organization.
You now have the option to connect Xing and StaffHub with Dynamics 365.
Click on the respective symbol and log in with your credentials.
Note that in order to publish on Xing job listings, you need to log in with a Xing Premium Account.
Disable Advanced Find
Depending on the configuration of your security concept, there may be a possibility that someone can use the Advanced Find to access records that they are not allowed or should not see for privacy reasons.
In order to prevent this in any case, we offer you a small free extension to deactivate the Advanced Find. In concrete terms, this means that although anyone can open the Advanced Find, the button for the results is not visible to everyone and therefore cannot be used.
The search can then only be used by people who are allowed to create new employees through their user role.
Attention: If you use additional modules in Dynamics 365 (such as Sales or Marketing), it is possible that authorized persons may no longer be able to use the Advanced Search, since the Sales Director security role, for example, does not automatically allow authorization to create new employees.
You can download the solution from the customer portal on our website: Addon: Deactivate Advanced Find
For more information about downloading addons, please see the top of this page: Download addons
How to customize workflows and personalize email and task content
Some of the workflows included in Dynamics HR Management create tasks or send emails to specific users. You can easily personalize the generic texts for all tasks and emails.
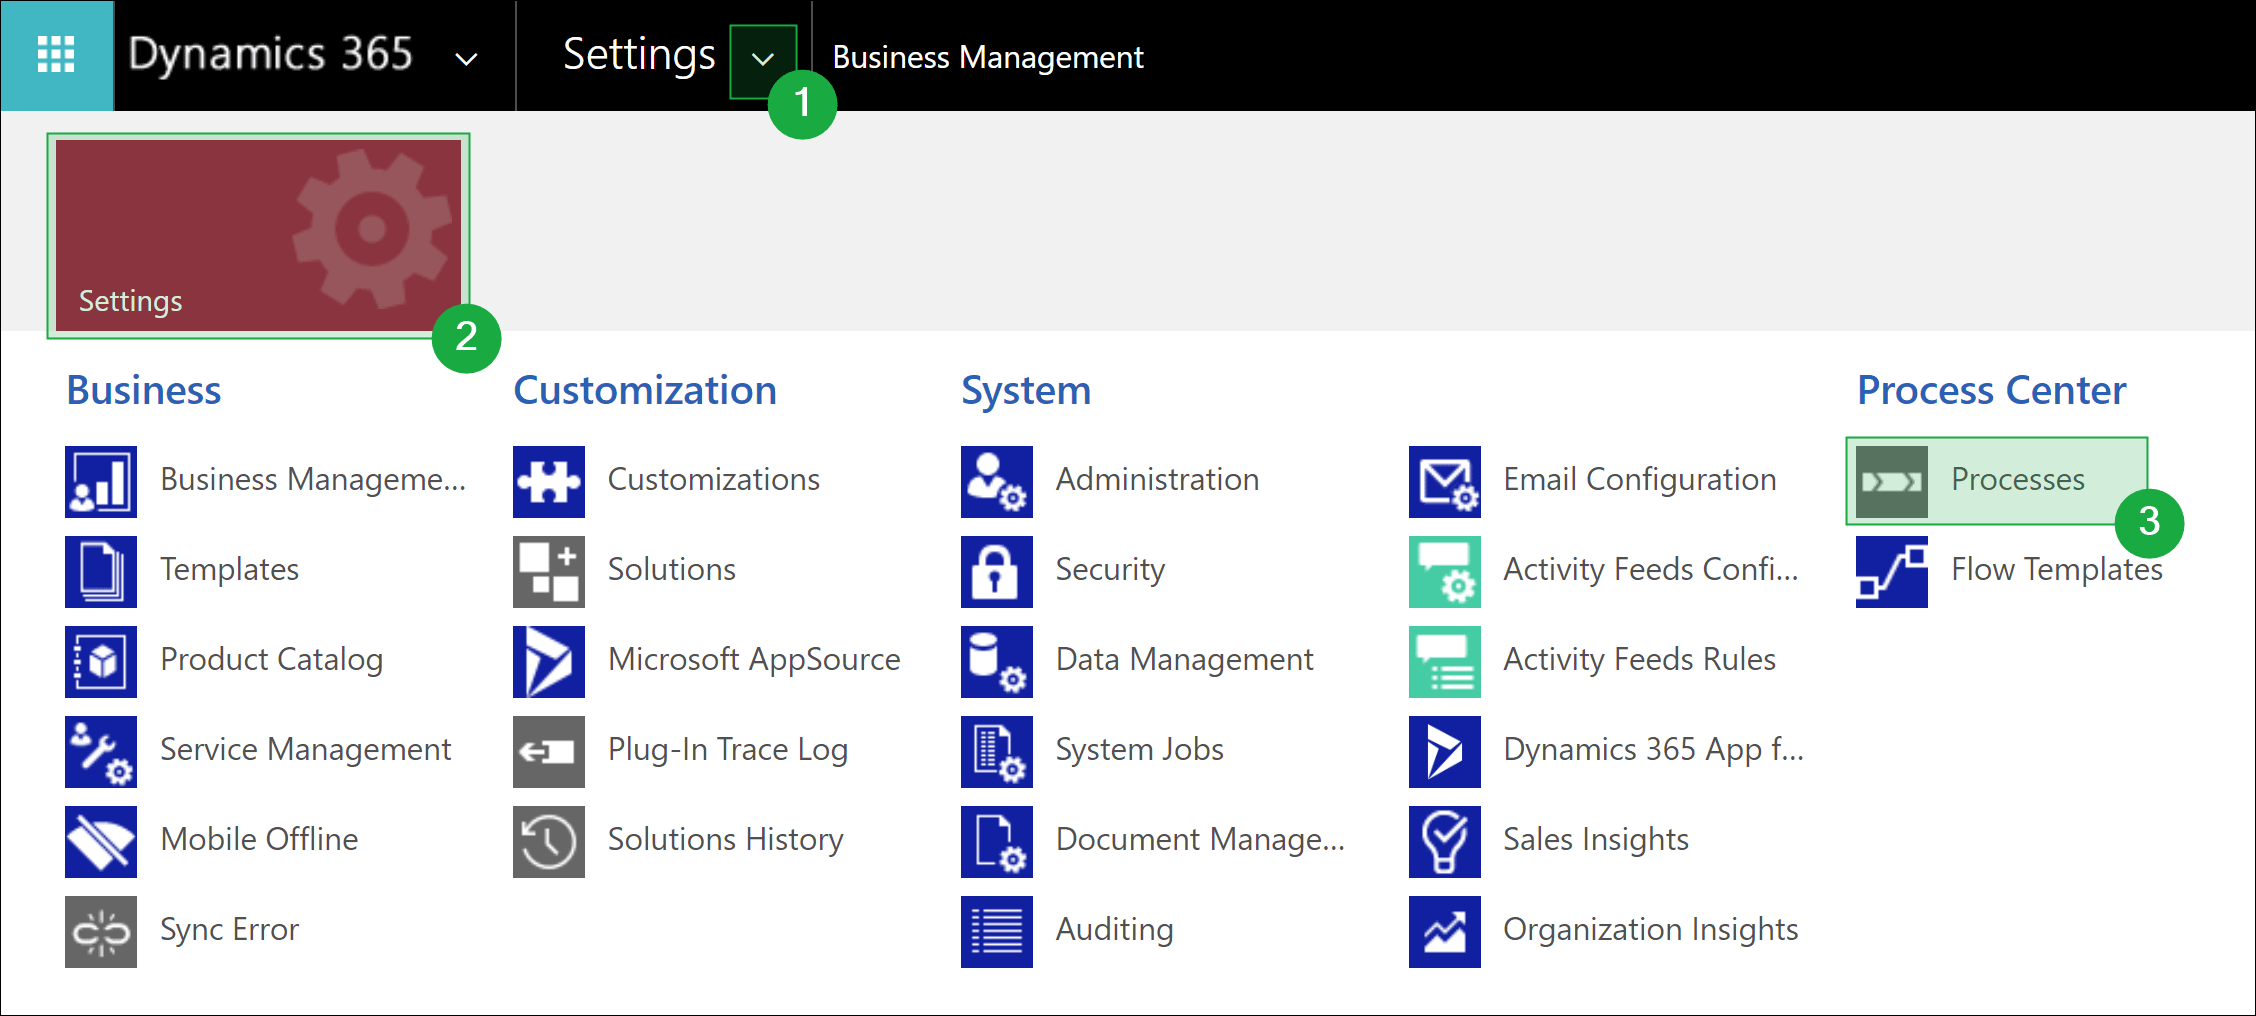
Go to the Advanced Settings
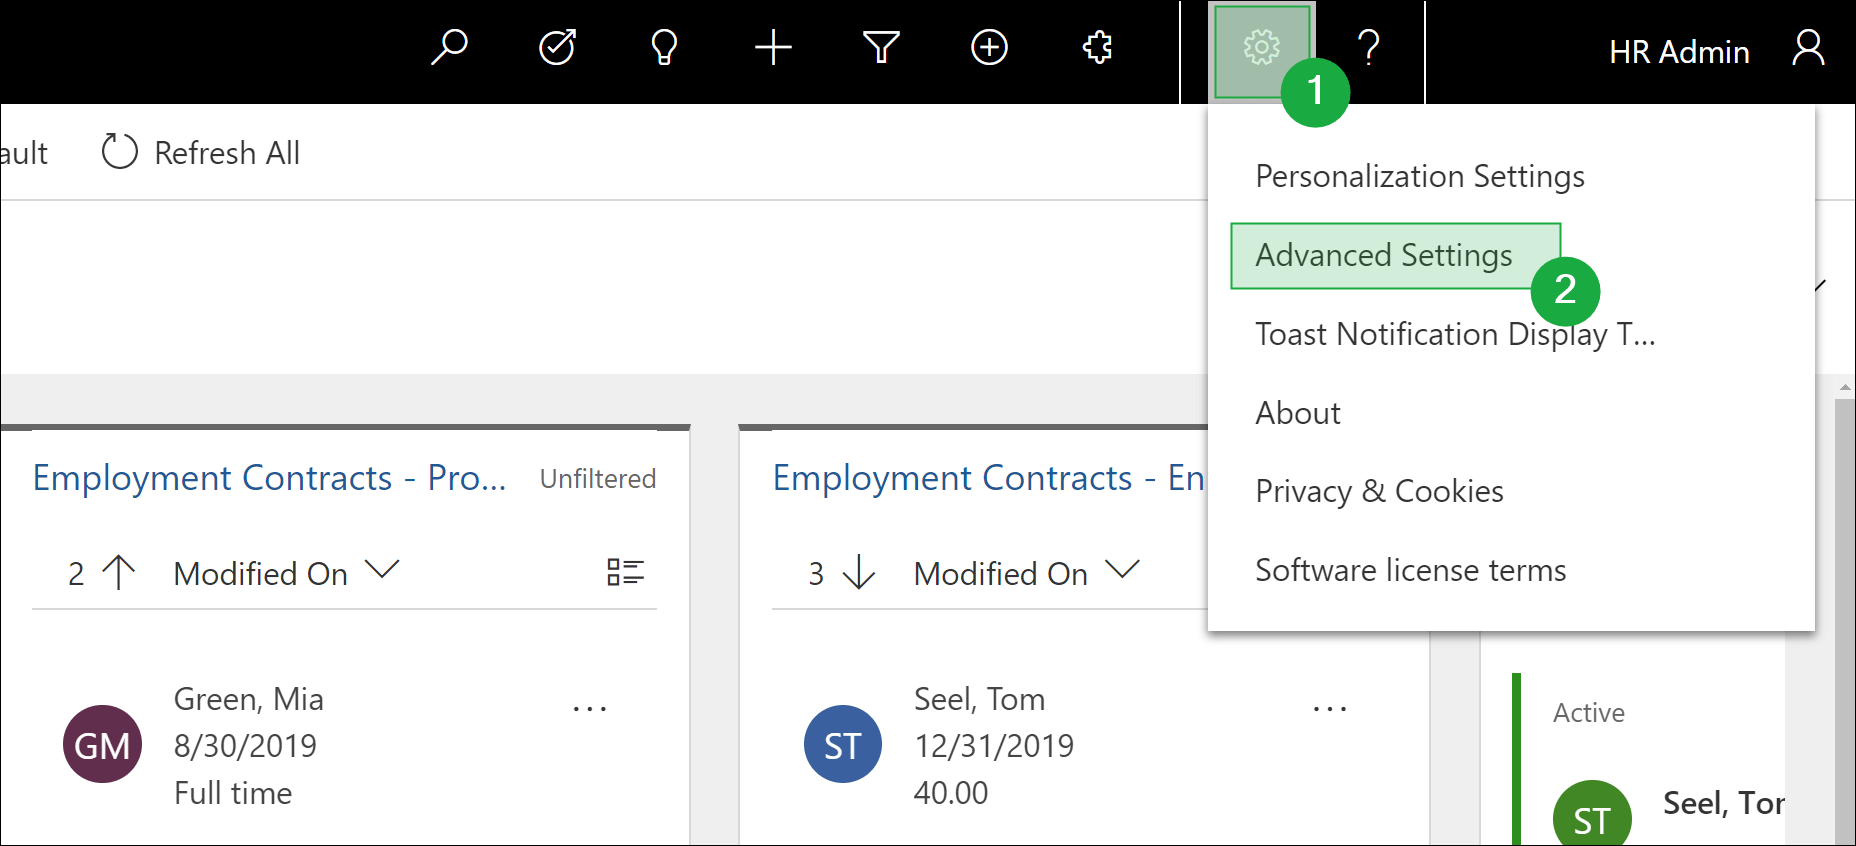
Open Processes
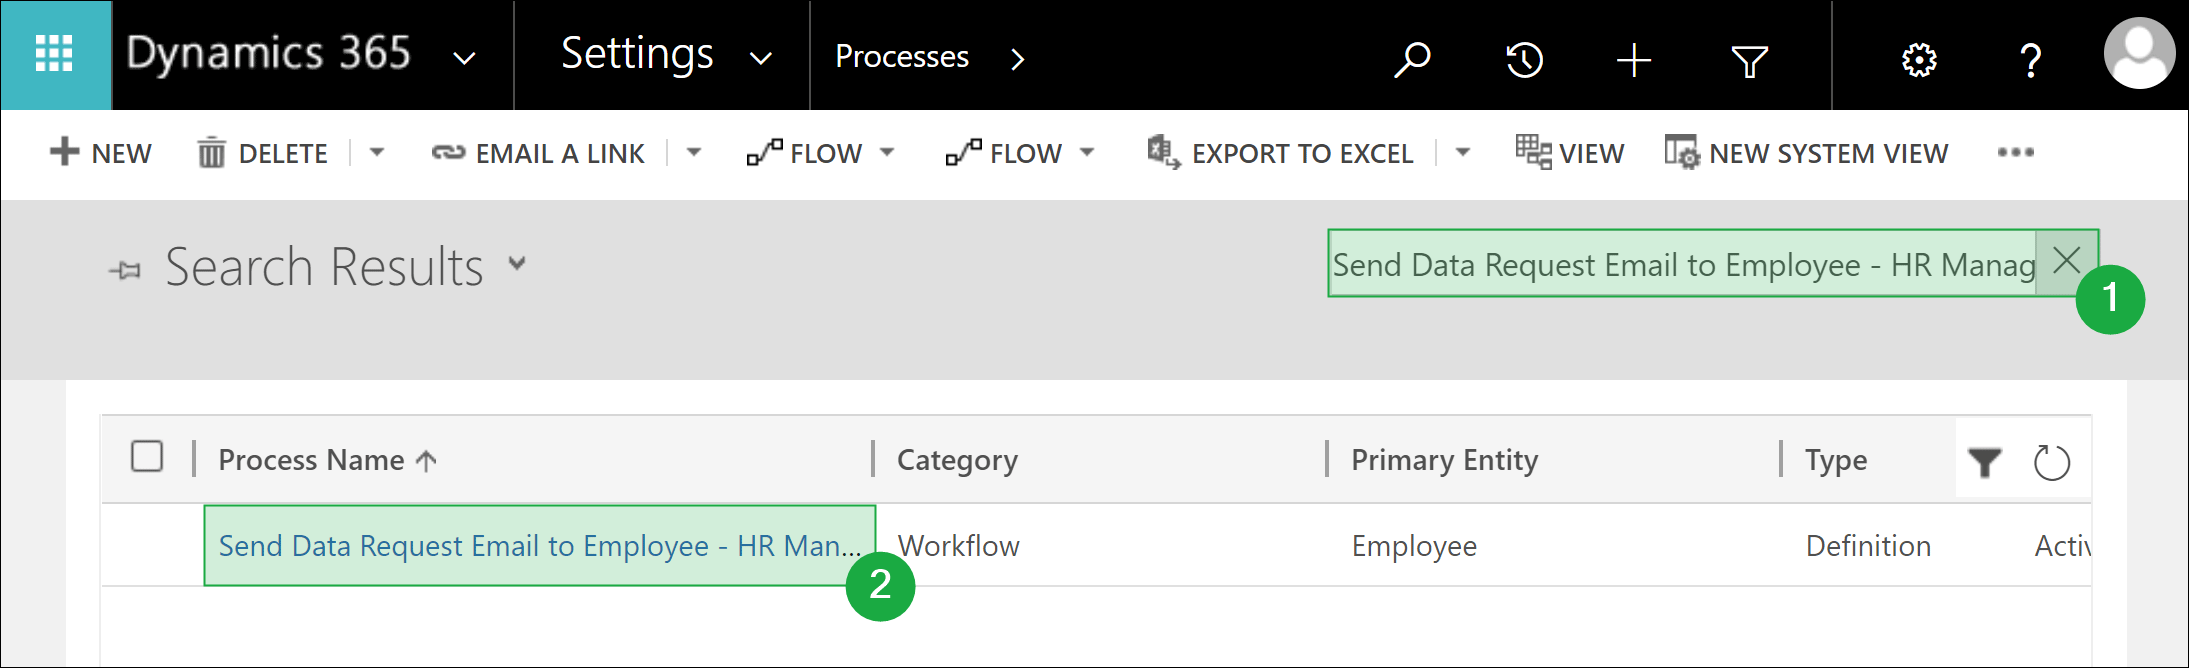
Use the search bar to look for the workflow you intend to customize and open it
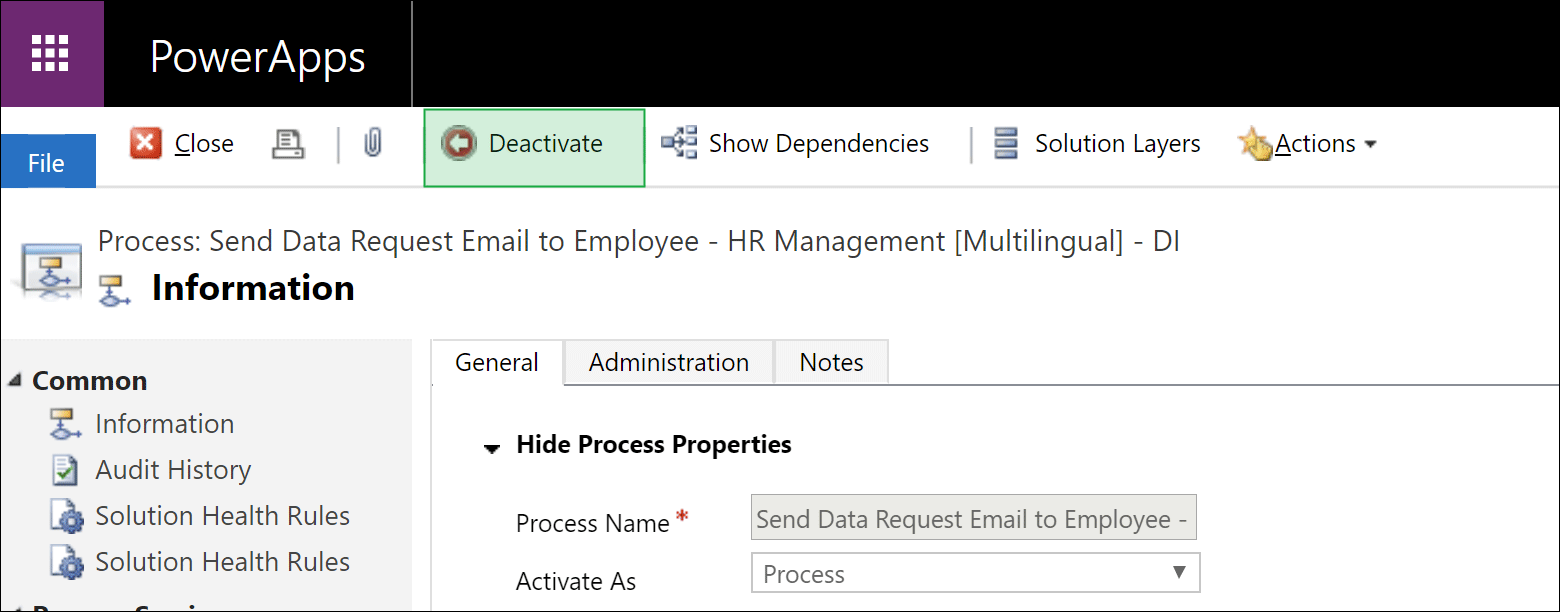
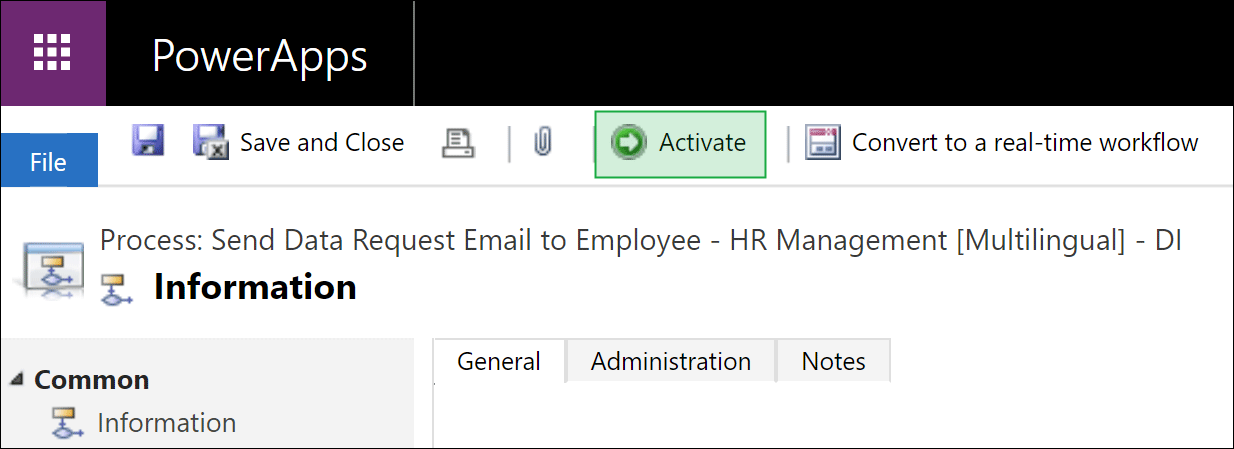
Deactivate the workflow
In the workflow steps, look for steps that include Create New Message or Create New Task and click on Set Properties
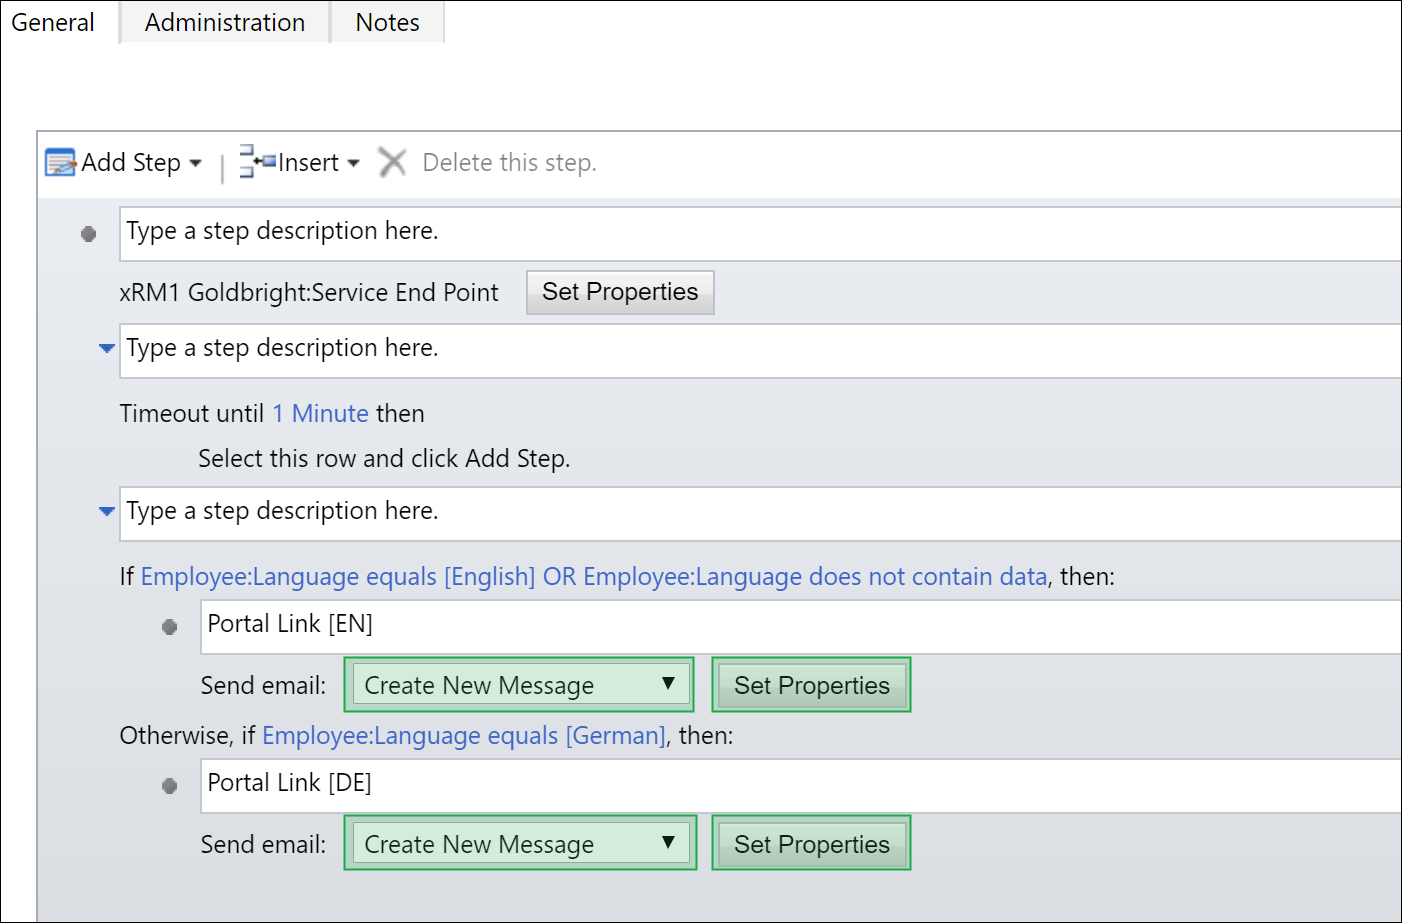
This will open the an editor for the email. In here you can use simple text or even dynamic content.
When you are done with your personalizations, press Save & Close
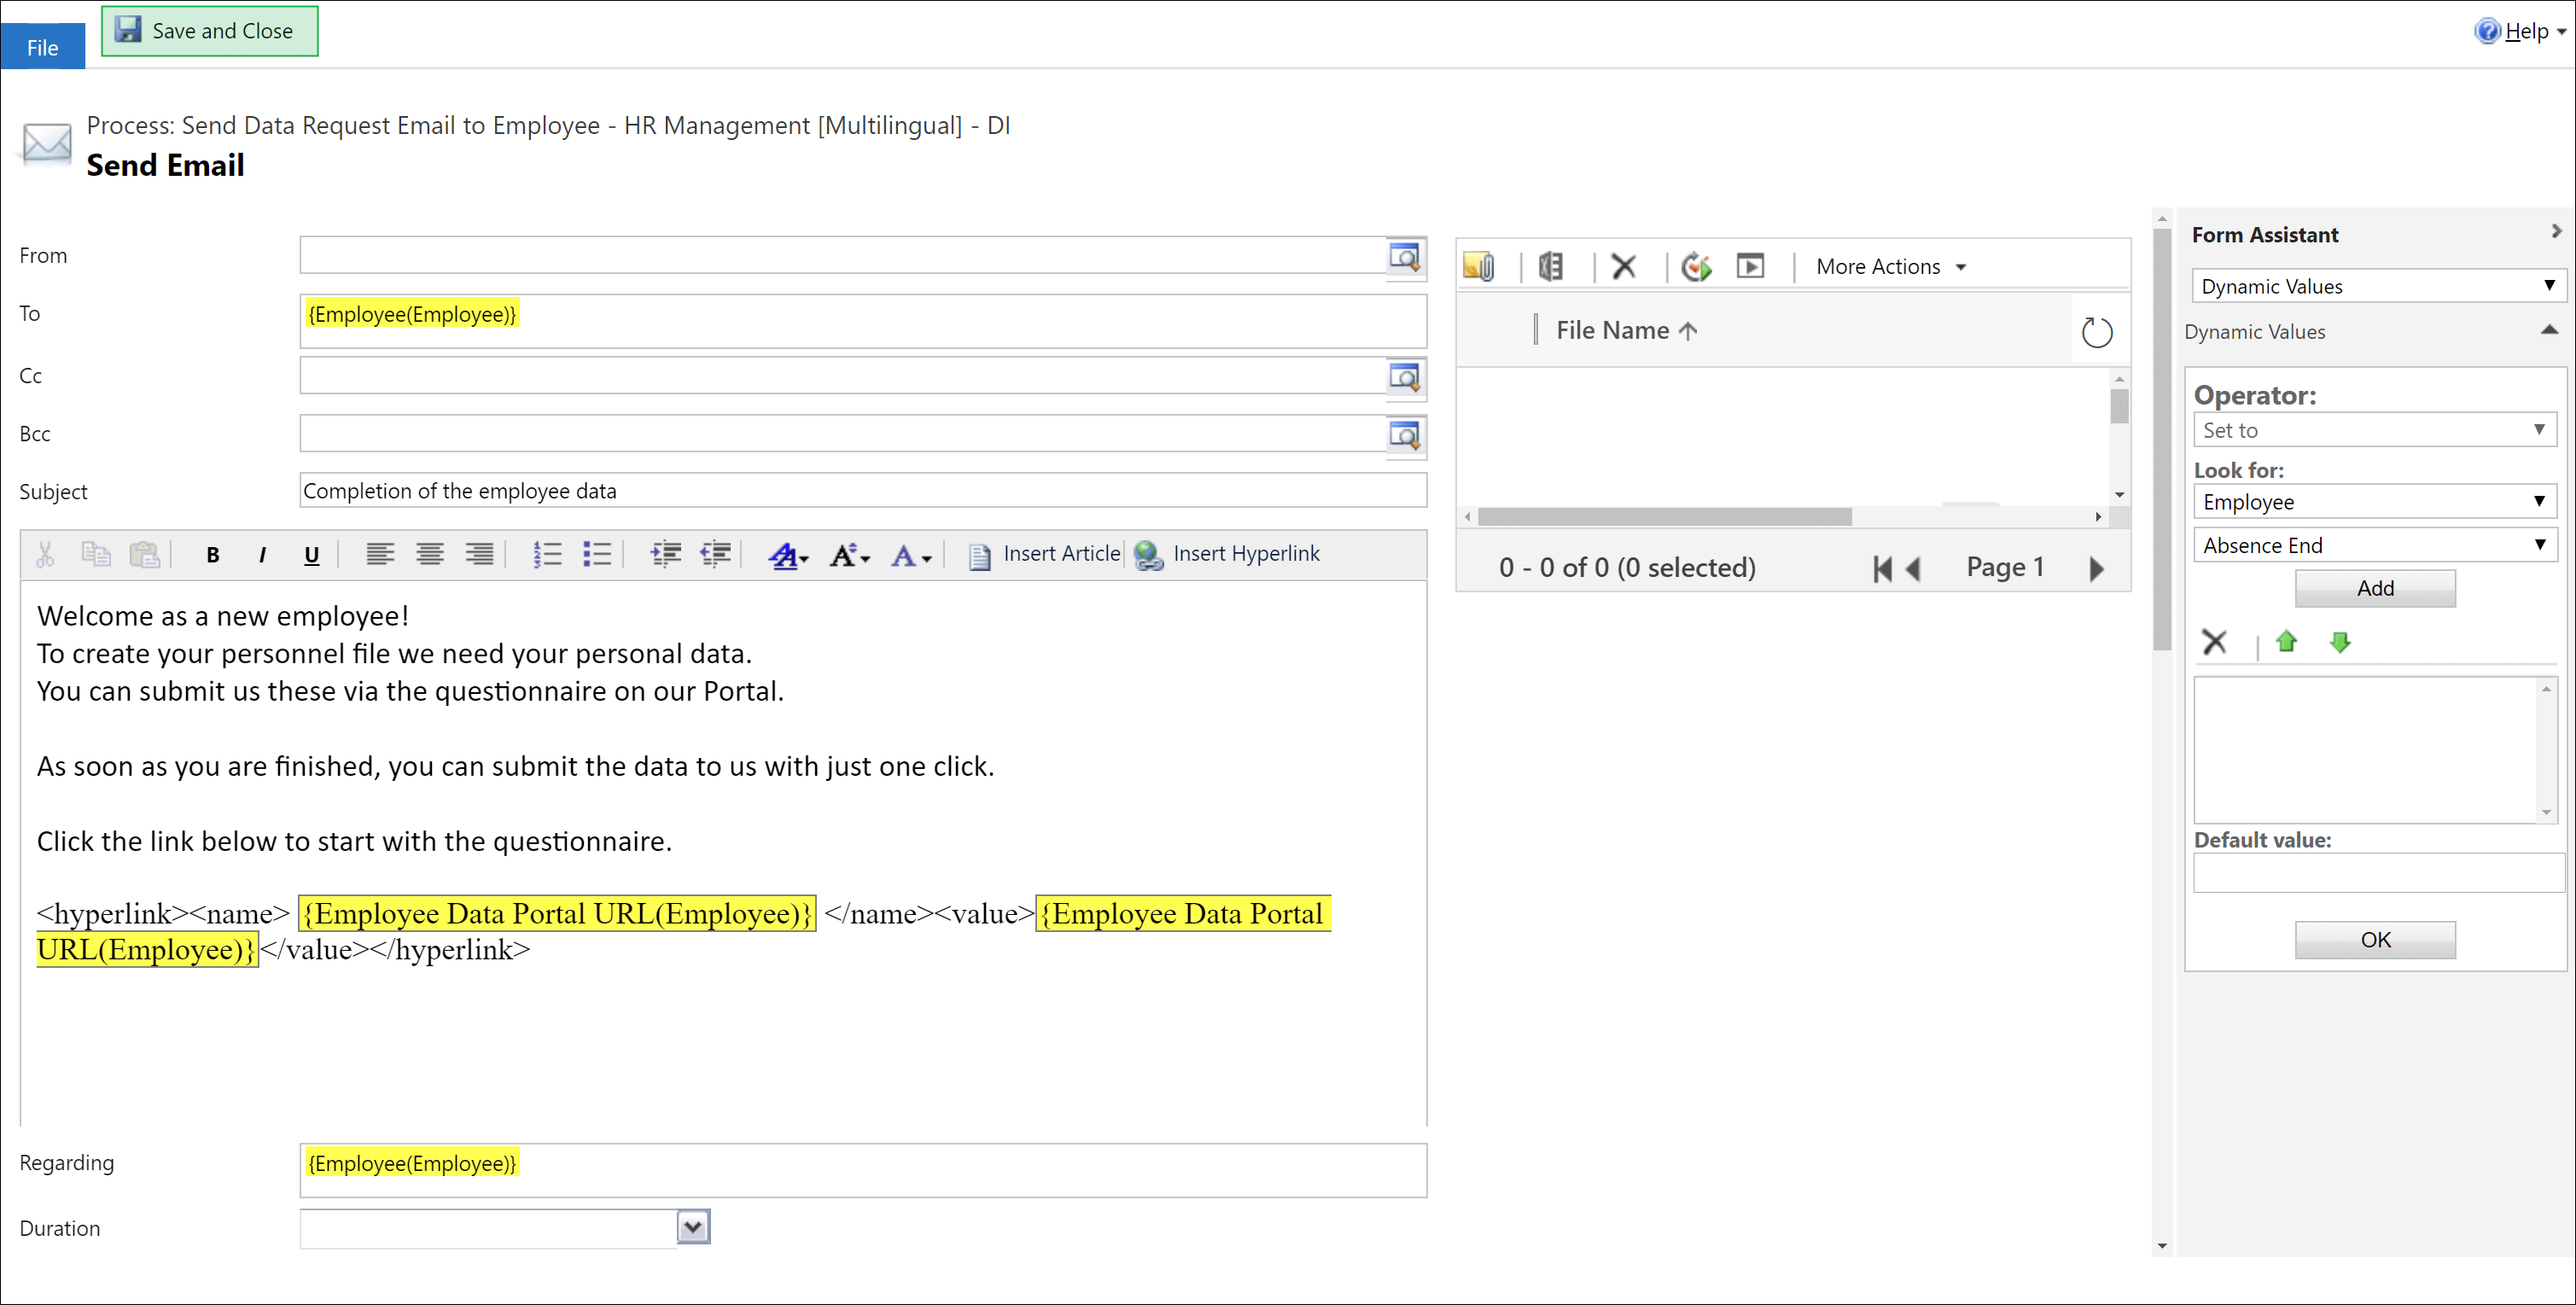
To finalize the personalization, Activate the workflow and you are done
Bulk-Import records
Log in to your Dynamics 365 and open the Advanced Settings

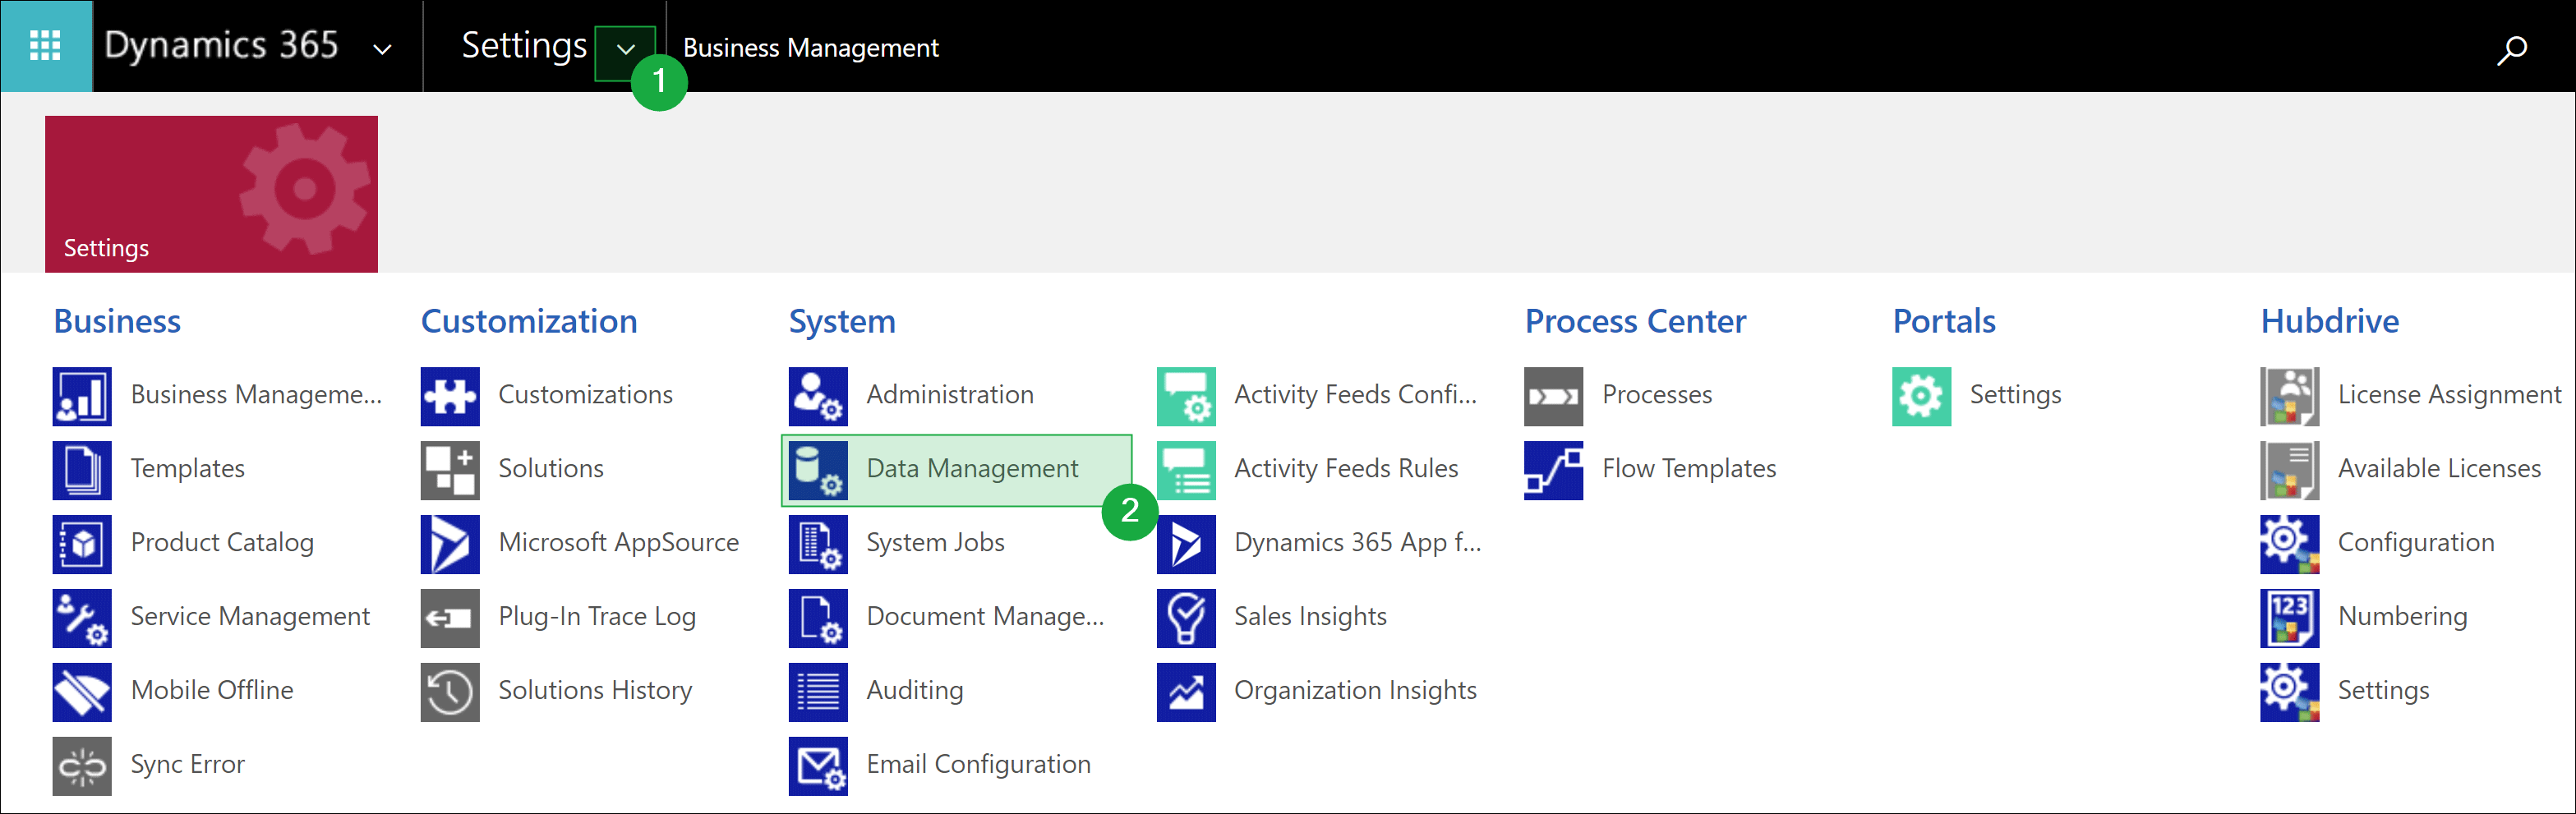
Go to Navigation Bar -> Settings -> Data Management
Open Imports
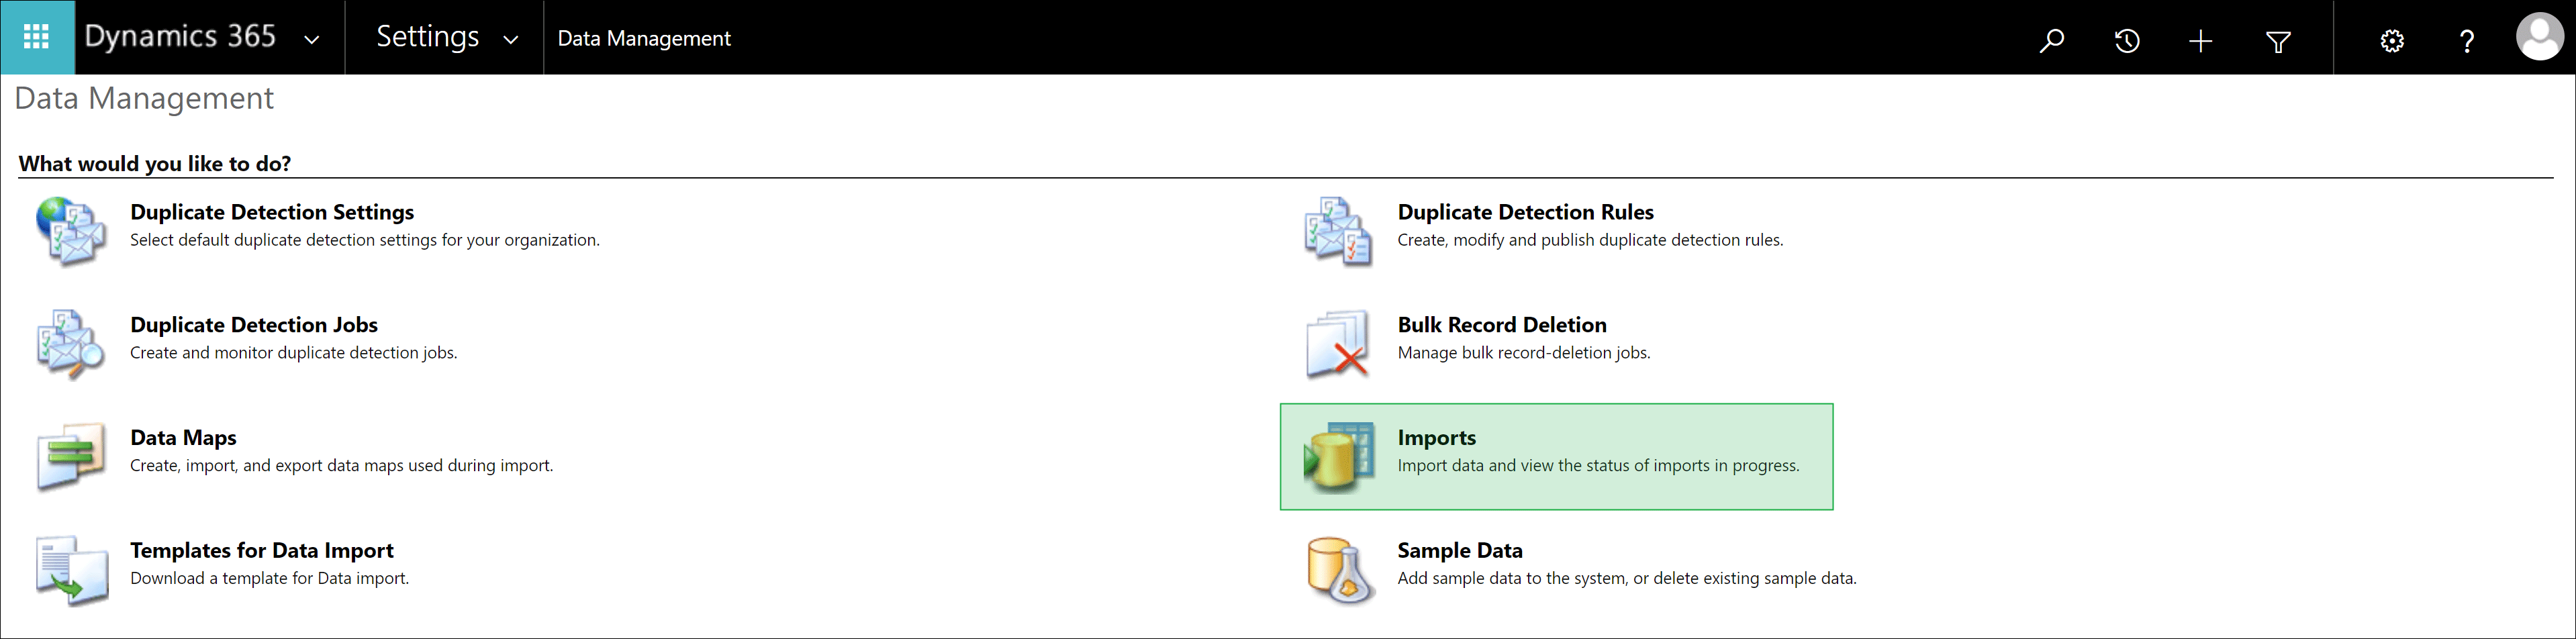
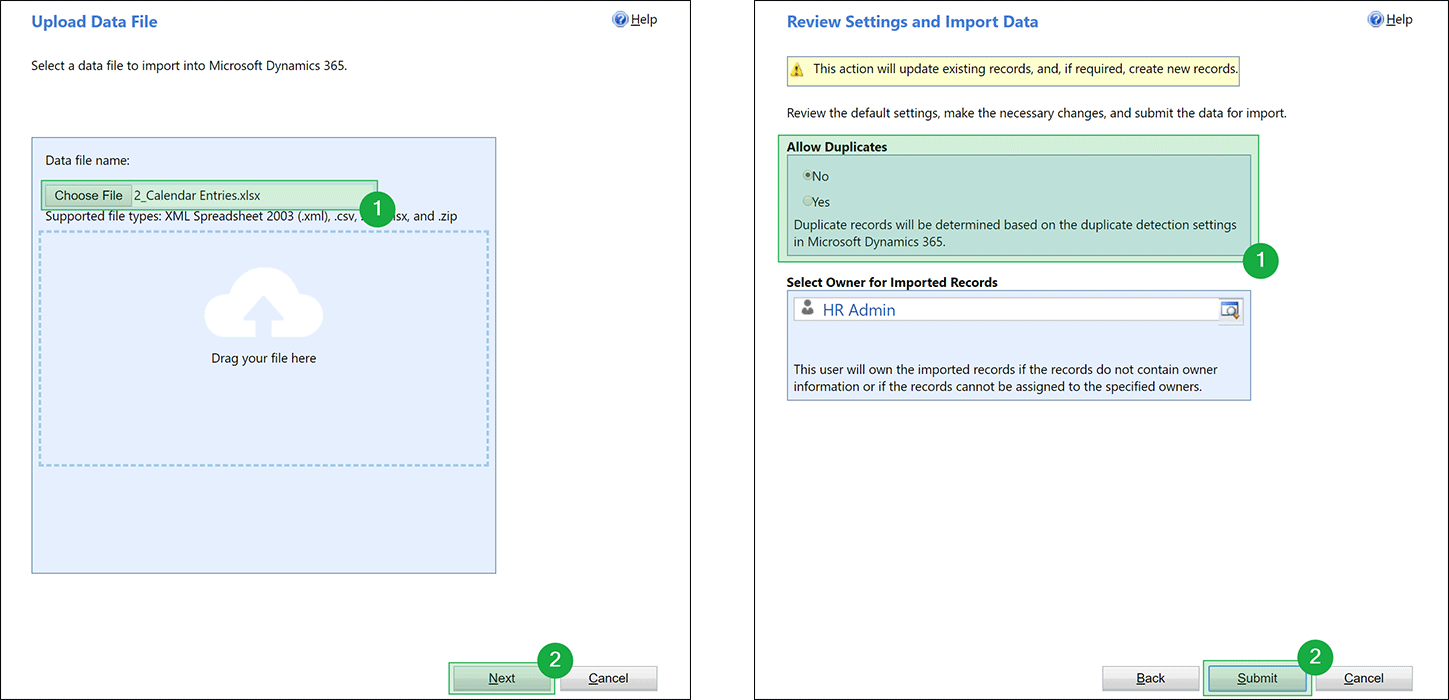
In the menu bar, click on Import Data

First select the file you want to import and click Next. Then select that you do not want to allow duplicates and confirm the import by clicking Submit
Depending on the number of records, the import may take a few minutes. Finally, you should see that all records have been imported successfully
