
Departments
1. Create Department
2. Edit and Maintain Departments
3. Rollout Leave Entitlements
4. Carry Forward Leave Entitlements
5. Export an Org Chart to Microsoft Visio
Dynamics HR Management makes it easy to create, customize, and maintain departments. You can quickly organize a hierarchical structure, carry forward remaining leave entitlements or rollout new leave entitlements for the department's employees.
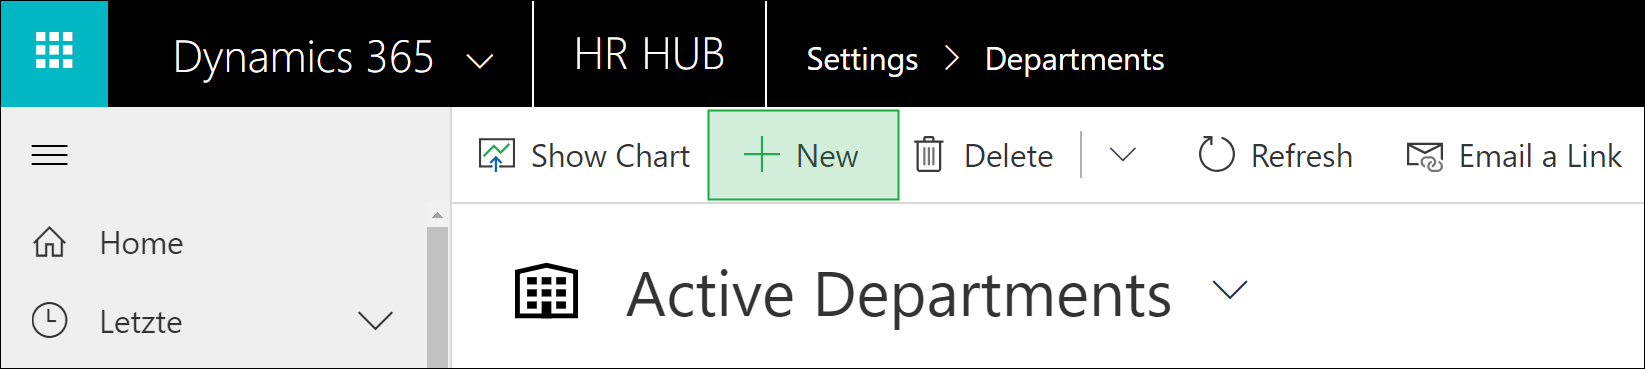
1. Create and organize Department
Go to Departments and press + NEW
Enter the name of the department in the required field Name. The best practice is to start from top to bottom of your organizations hierarchy. Save & Close the record.
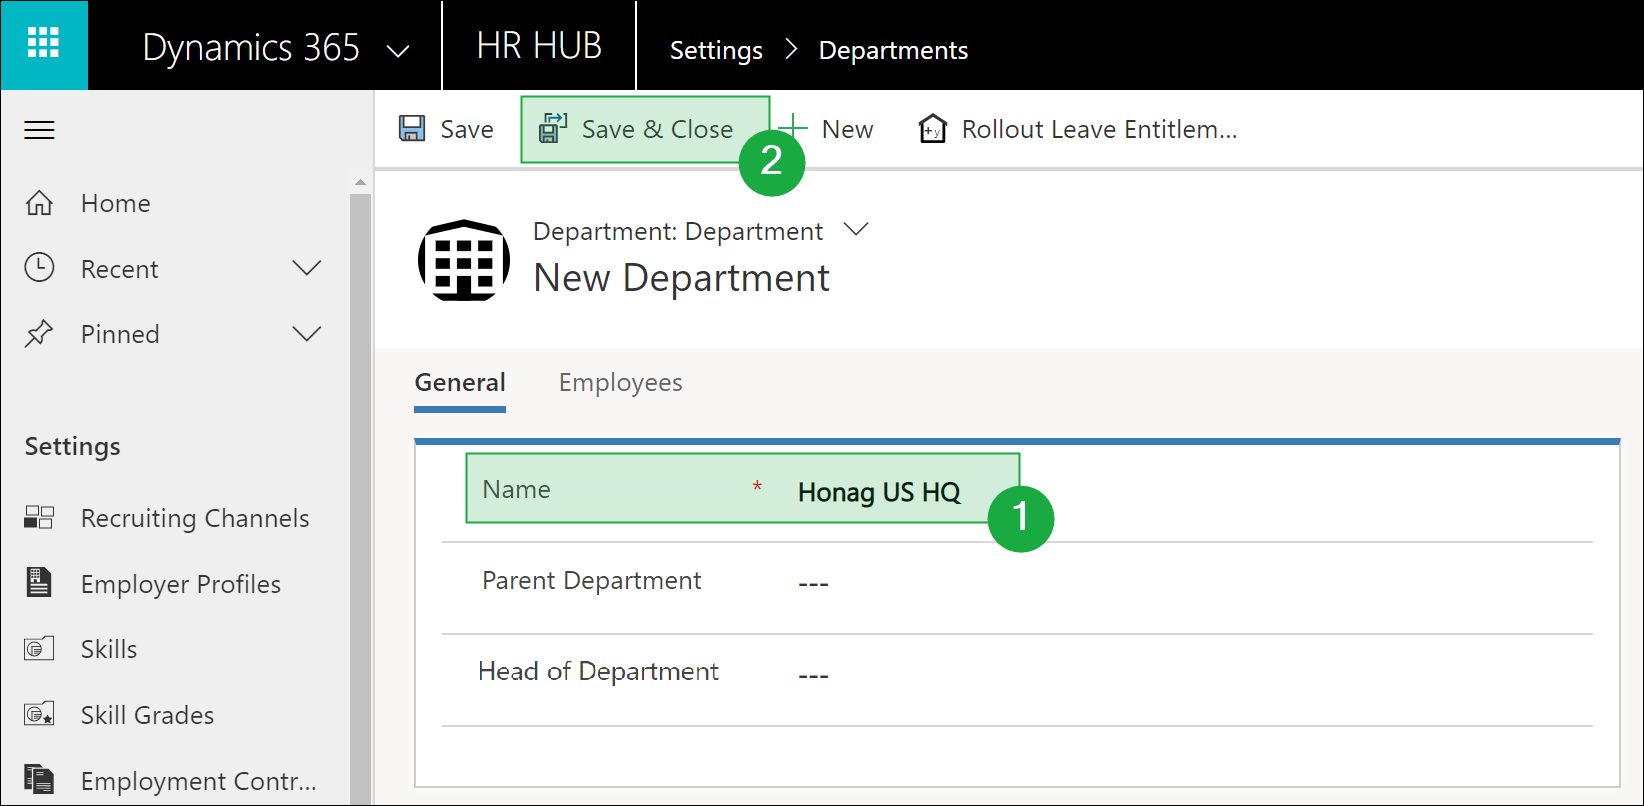
Now create a second department that is hierarchically beneath the department created before. Enter the Name of the department and select the department created before as the Parent Department. Save & Close the record.

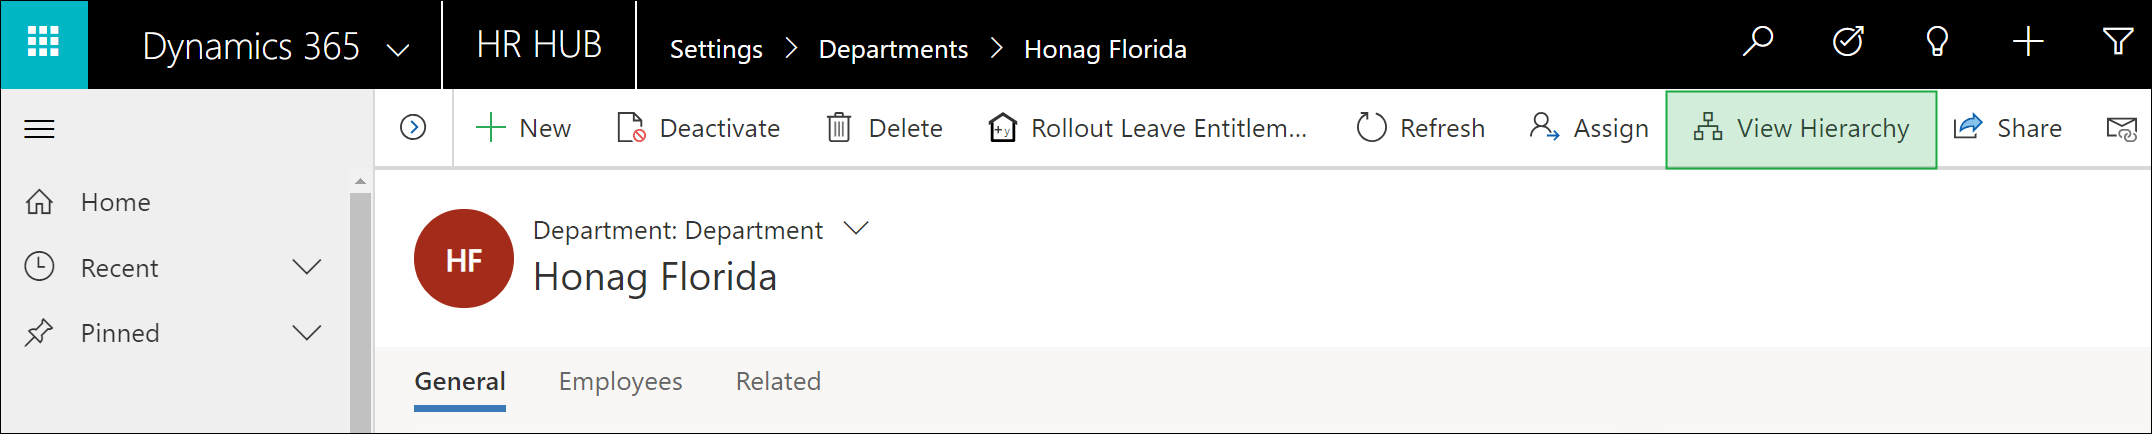
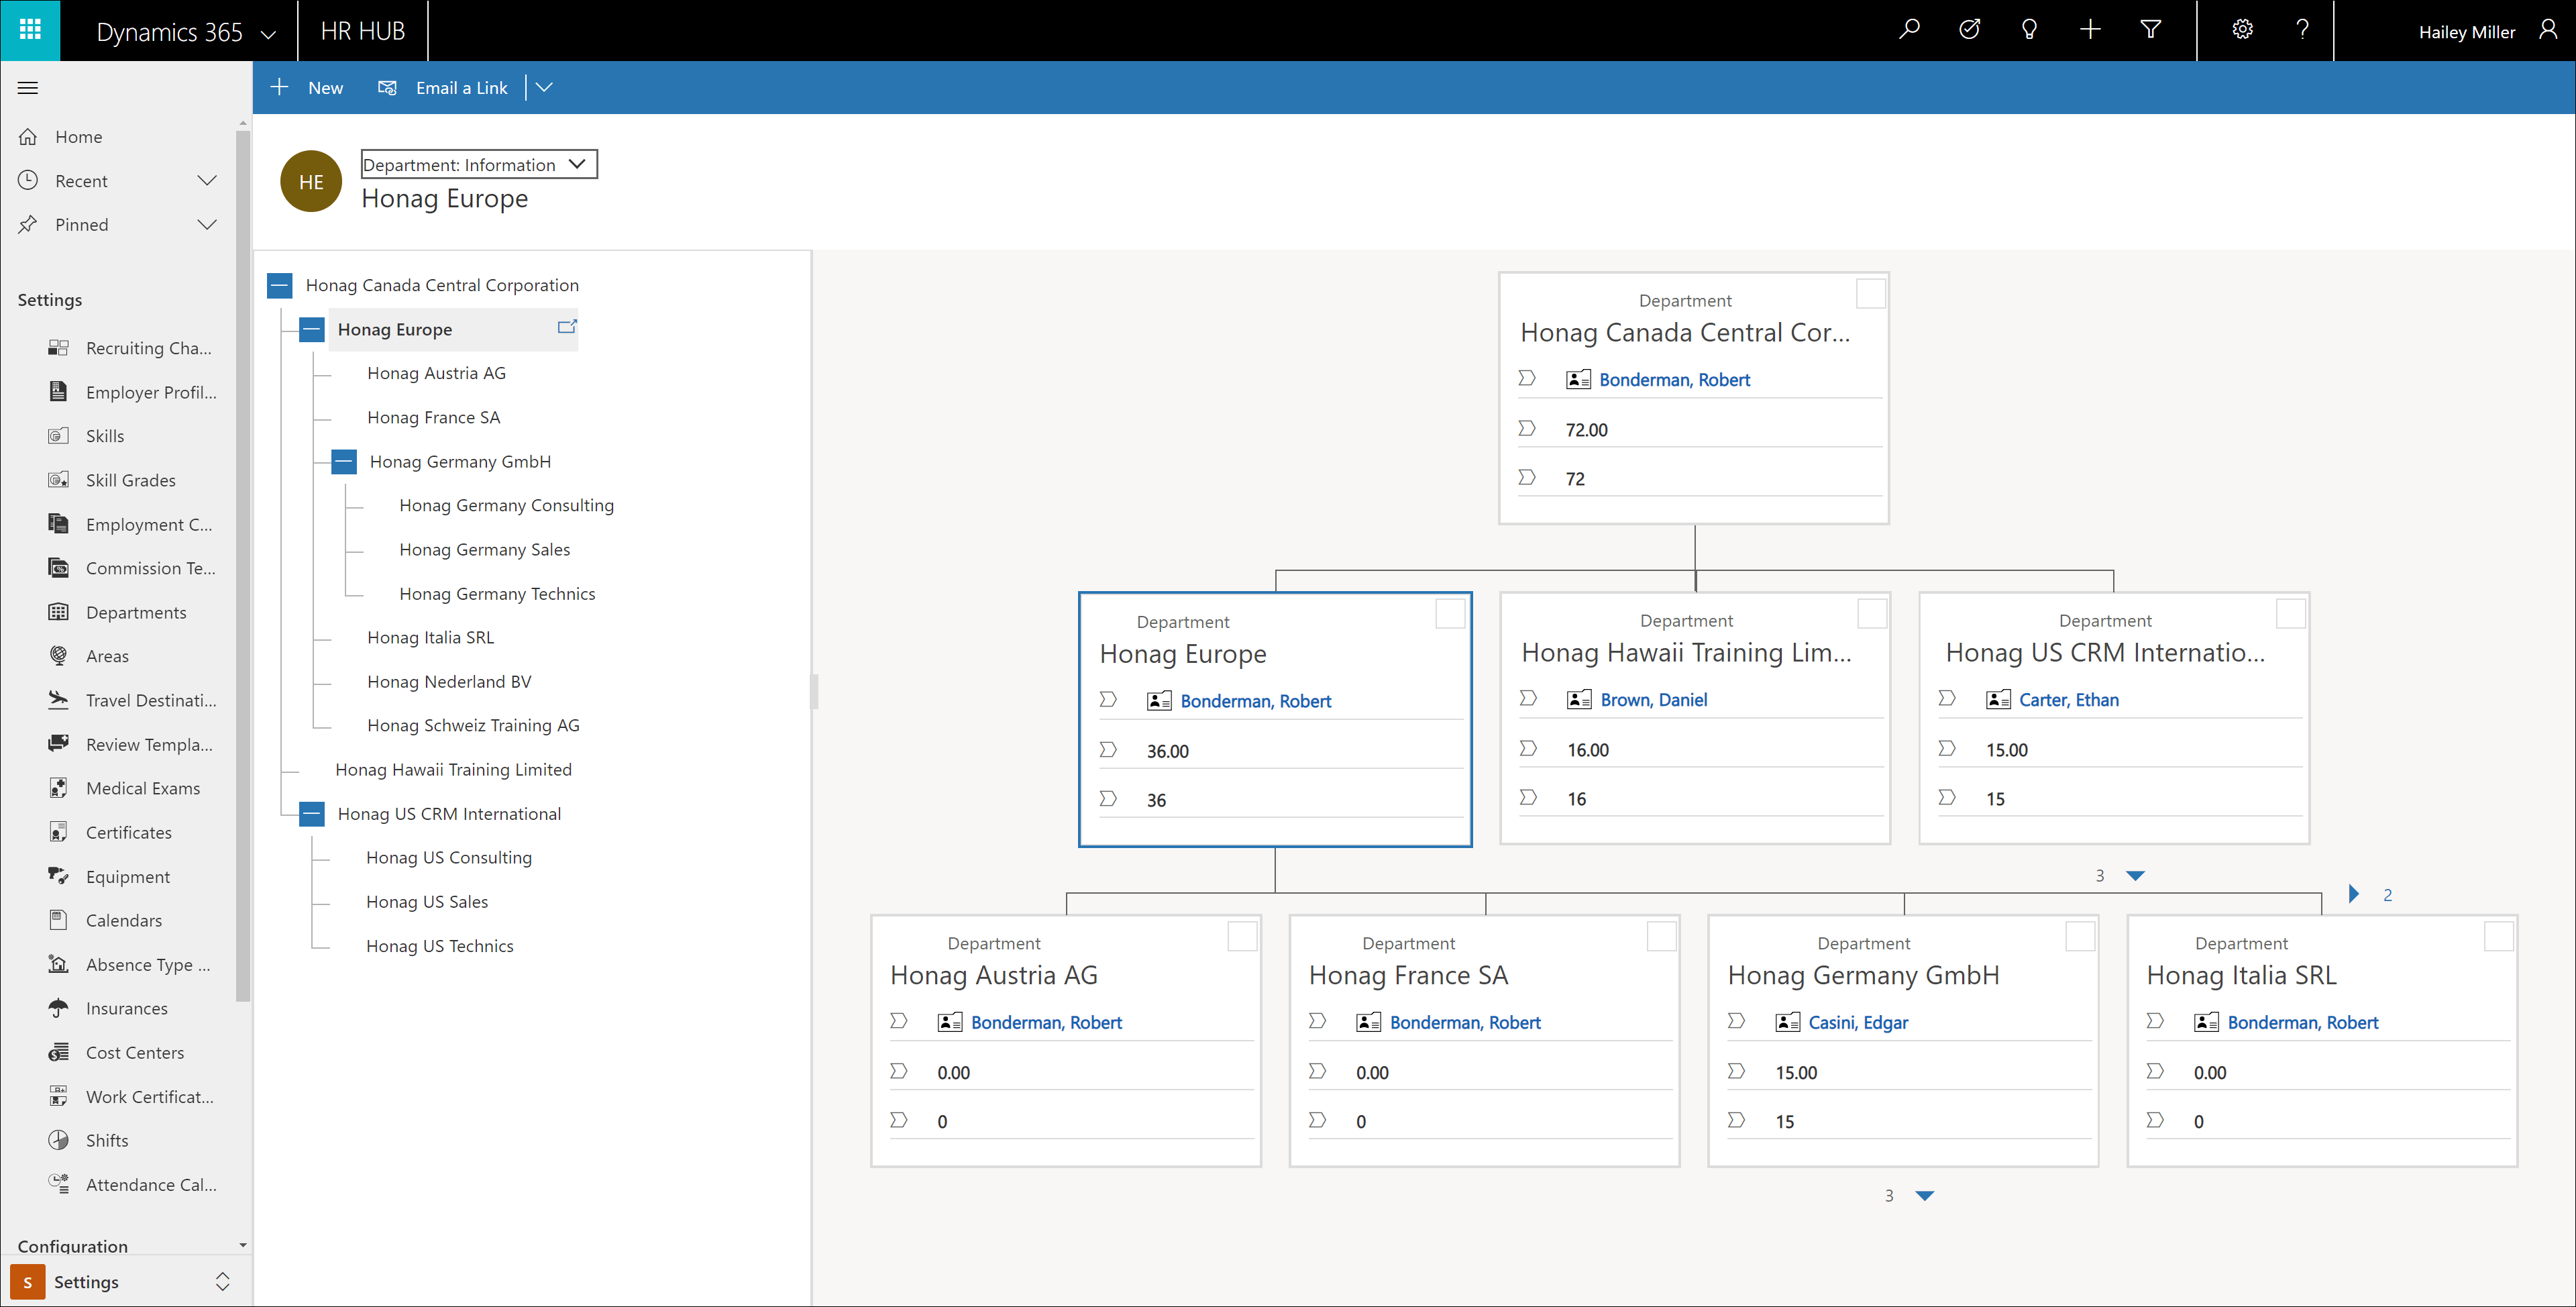
Continue this procedure until you have created all departments of your company. Selecting the parent department creates a hierarchical structure between the departments. You can display this hierarchy graphically. To do this, open any active department and click on View Hierarchy in the menu bar
2. Edit and Maintain Departments
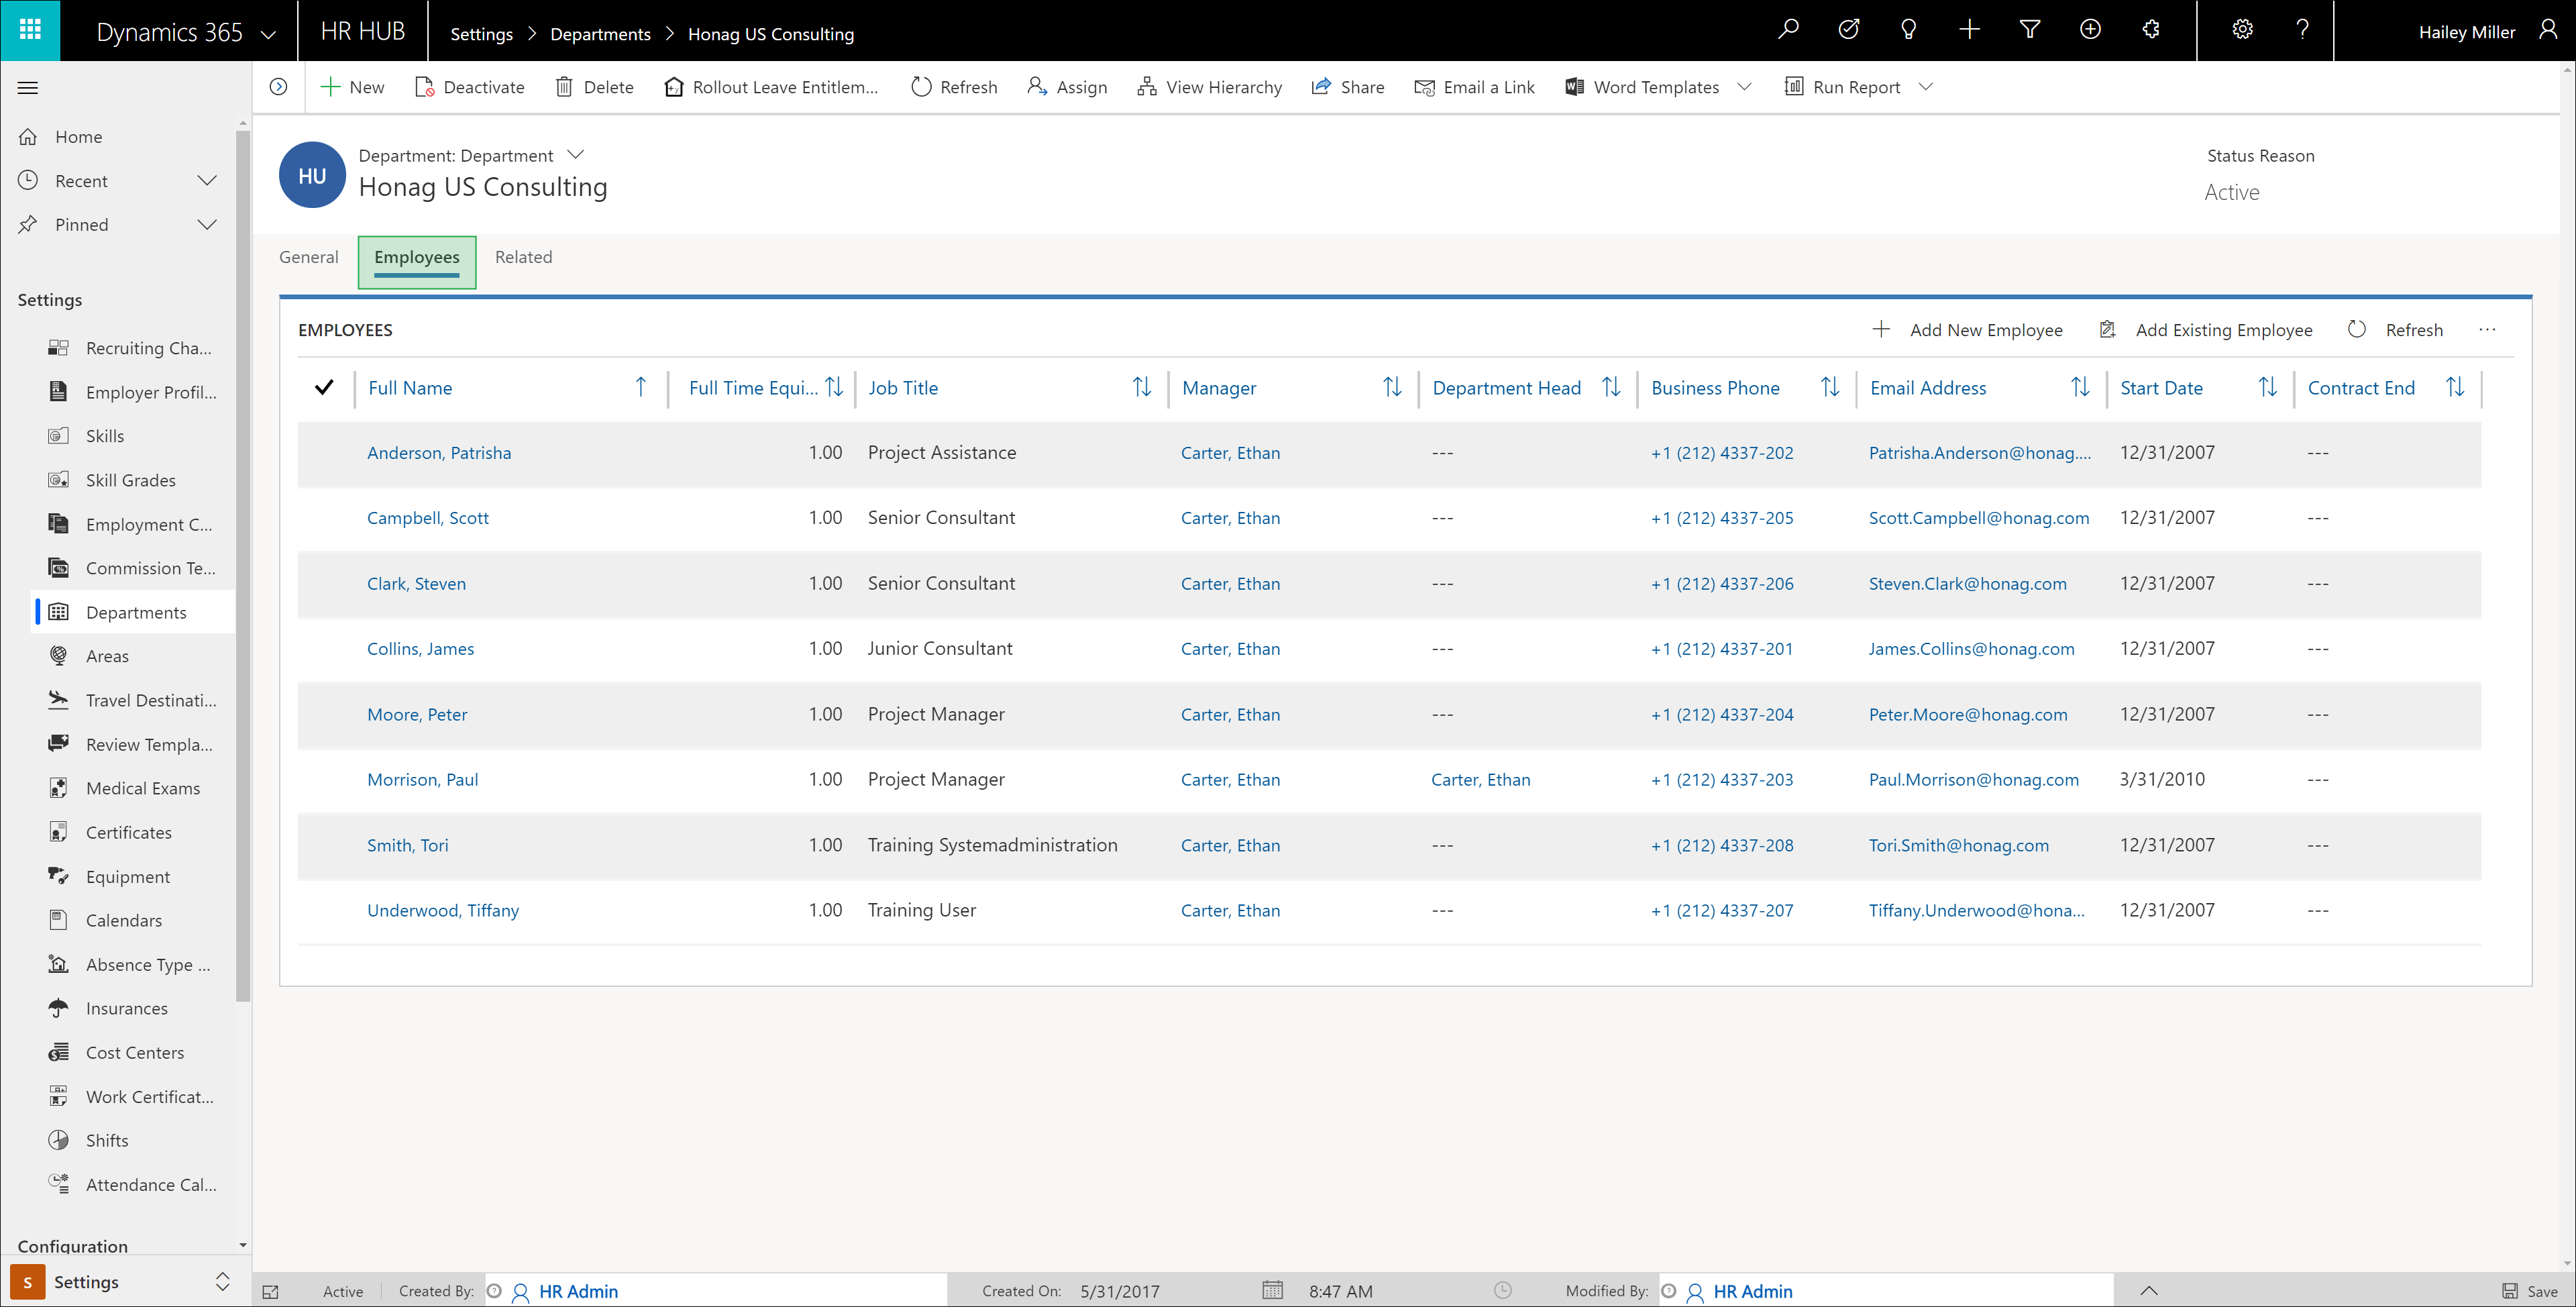
Changing or renaming departments can also be easily implemented. To do this, open the affected department and make the required changes: Change the name, assign the department to another higher-level department, or change the supervisor. All changes are immediately available in the system. As soon as you have also created employees in Dynamics HR Management, further information is available in the data record of the department.
Note:
You will have to set the field Department in the Employee's Digital Personnel File in order to be listed in the department record.
3. Rollout Leave Entitlements
You have the possibility to roll out the leave entitlement for the current year or any year in the future for a whole department. This will affect all employees of the selected department, as well as the employees of the departments that are hierarchically below the selected department.
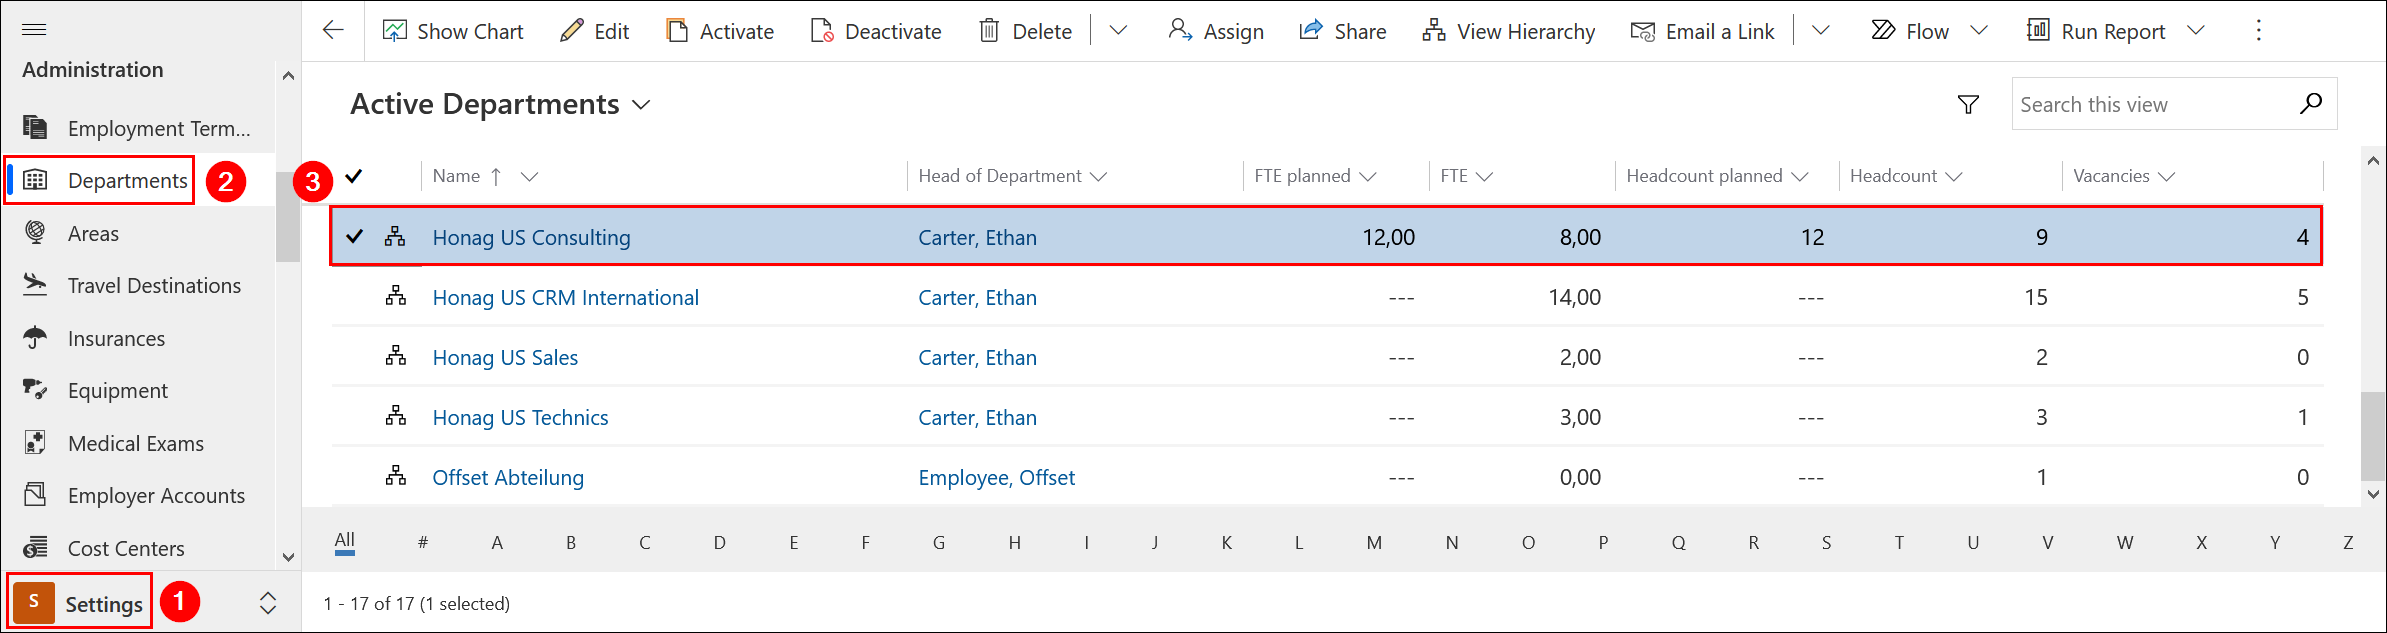
Please navigate to Settings - Departments and select the desired department in the overview by double-clicking on it.
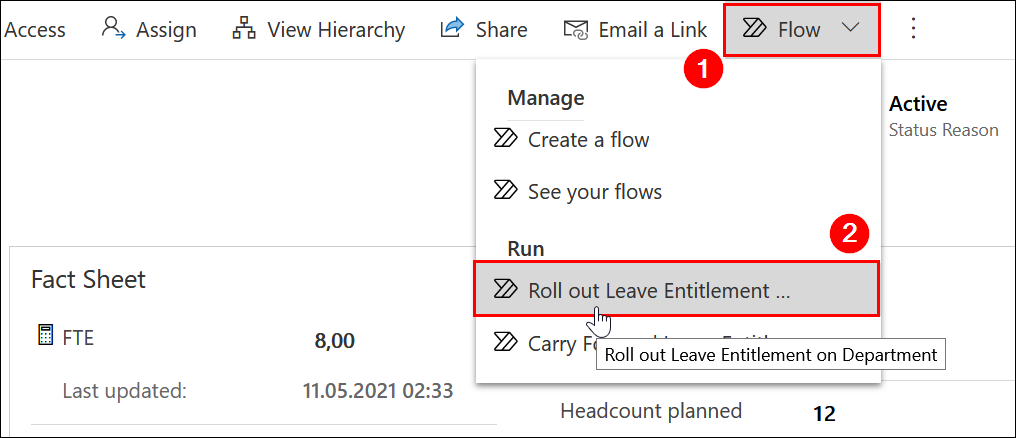
Now click on "Flow" in the navigation bar at the top and select "Roll out Leave Entitlement on Department".
A new dialog opens. Click on Continue. Now enter the current or a future fiscal year in the dialog.

Click on the button Run Flow.
The flow is now executed and the leave entitlement is rolled out. You can close the dialog.
4. Carry Forward Leave Entitlements
You can carry forward any remaining leave entitlements to the following year. All unused leave entitlements of the employees concerned are taken into account. The end date of the remaining leave entitlements is set as the expiry date of the old leave entitlement. The new expiry date is the same as the new end date.
Note: Before you execute the Carry Forward , please ensure that your system is compliant with the following checklist:
1. Update your System to the latest available Rollup Update and ensure, that all standard functions of the solution regarding the processing of Absence are not reverted or overwritten by customer individual adjustments. Eventually you have to manually merge your individual adjustments with the system standard.
2. Ensure that the System Settings for "Absence Type Settings" for all Absence Types that should be carried forward are set to "Process Carry Forward = Yes". Details on configuring the Absence Type Settings can be found here: Absence Type Settings
3. Ensure that the Leave Entitlements of the year that you want to carry forward, have correct data:
a. For Leave Entitlements that should be carried forward, the date "Transfer Until" has to be in the following (fiscal)year; the system standard is set to 3 months after the start of the (fiscal)year, but may be configured to your needs.
Hint: the date "Transfer Until" must be within the following year. A transfer date later than the following year is not supported by the system.
b. For Leave Entitlements for Overtime that are created out of Daily Summaries, the end date for all these entitlements of an employee within a year, must be set to the last day of this (fiscal) year. Otherwise the entitlements will not get consolidated by the system and the Carry Forward is not ensured to run properly.
c. For all Leave Entitlements of the year that should be carried forward, the attribute "Process Remaining" needs to be set:
- Please use the option "Transfer to new period" if the leave entitlement should be carried forward to the date "Transfer until";
- Use the option "Book out after expiration", if the remaining entitlement should be booked out at the "End date", and not get carried forward.
- Use the option "No action" if the system should not process the entitlement at all. Hint: only choose this option if you are absolutely sure that this will be compliant with the processes of your organization.
- Only select the option "Custom Transfer", if you have added custom processes to your system that will handle the carry forward individually.
We recommend that you check all these settings, by retrieving all affected data records of the type "Leave Entitlement" with an Advanced Find query and verify the records accordingly.
Hint: Use the information within the field "Considered for Transfer" on the Leave Summary to check the amount that should be carried forward to the next period, even before you execute the carry forward process.
If you carry forward leave entitlements, this will affect all employees of the selected department, as well as the employees of the departments that are hierarchically below the selected department.
The leave entitlement can also be transferred for individual employees only. To do this, open the employee's digital personnel file and start the flow "Carry Forward Leave Entitlement on Employee". The procedure is the same.
Example:
An employee has a vacation entitlement of 30 days from 01/01/2020 to 12/31/2020 and the expiration date is set to 03/31/2021. After the flow is executed, a new entitlement is created from 01/01/2021 to 03/31/2021. The expiration date for the new entitlement is also set to 03/31/2021. The vacation days must be in the range between the start date and the end date, otherwise they will expire.
Please navigate to Settings - Departments and select the desired department in the overview by double-clicking on it.
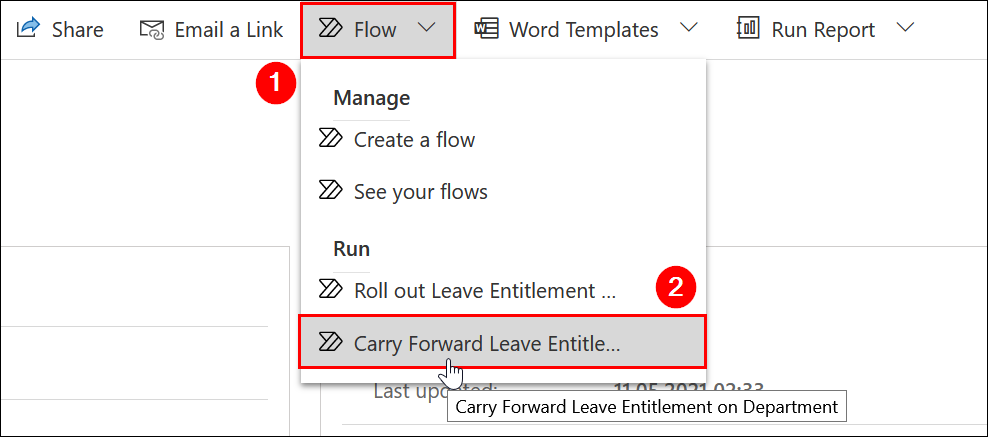
Now click on "Flow" in the navigation bar at the top and select "Carry Forward Leave Entitlement on Department".
A new dialog opens. Click on Continue. Now enter your completed fiscal year. The System will carry forward the leave entitlement to the next fiscal year.
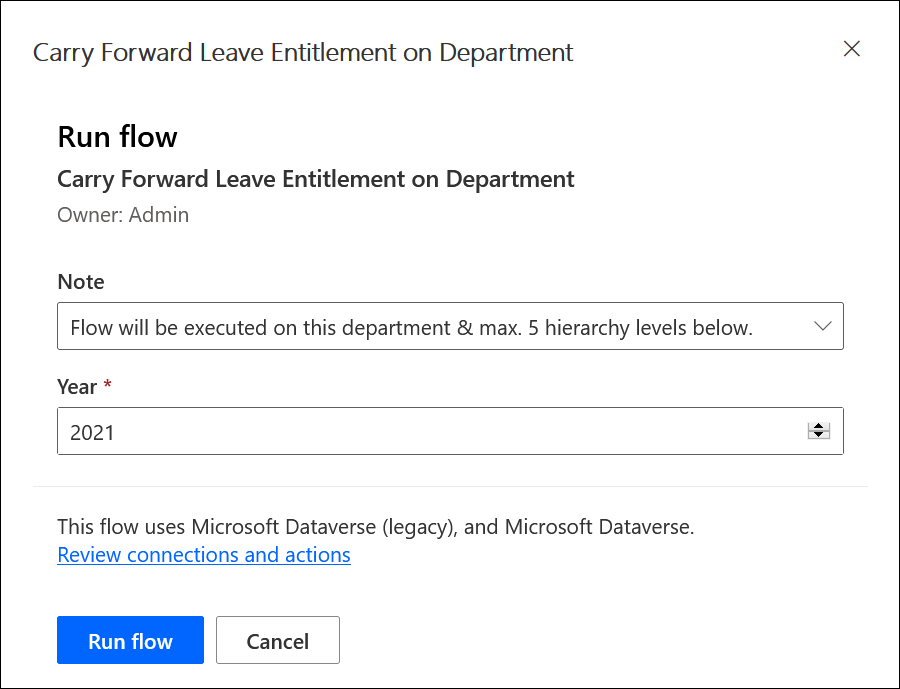
Click on the button Run Flow.
The flow is now executed and the leave entitlements are carried forward. You can close the dialog.
Depending on the amount of affected employees, it may take a few minutes until the leave entitlements have been carried forward completely.
5. Export an Org Chart to Microsoft Visio
Once you have created all the departments and assigned the respective employees, you have the opportunity to create an org chart with minimal effort. This requires Microsoft Visio, which is most likely included in your Office 365 package.
The result could look like this:
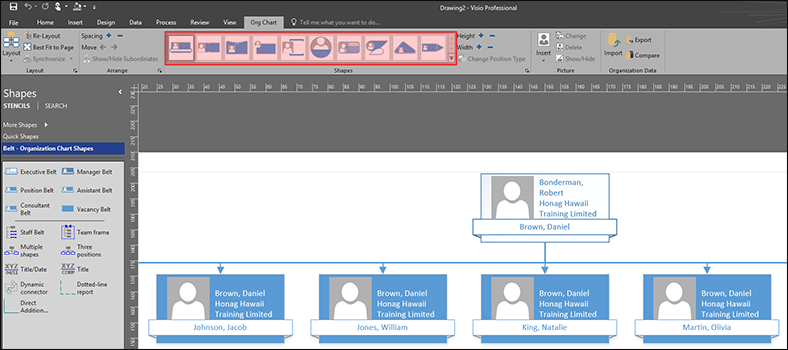
Detailed instructions can be found here: Export an Org Chart from Dynamics 365 to Microsoft Visio