
Update Guide
To update your system, please follow this instruction:
- Preparation - Save your Solution
Before updating your system, please ensure that your customizations are not overwritten or lost by the update. You do this by adding all your customizations into an unmanaged solution and exporting this solution as backup. Start with navigating to the Advanced Settings (gear on the top right).
Please note that it is necessary that you have admin rights.
.png)
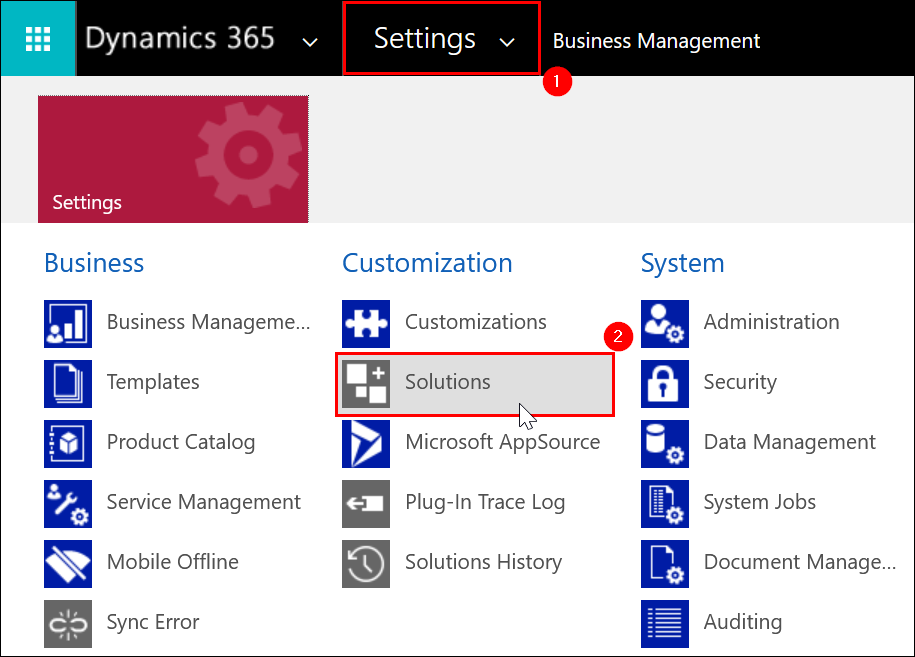
A new tab will open, where you are by default at the "Settings". Please click on it and then under "Customization" click on Solutions.
Now mark your solution and click on the Export button. Save it to your desired location. The file will be saved as ZIP file and will be needed later.

This step is very important, otherwise all the individual customizations will be lost. Do not forget to save your solutions beforehand.
Do this for ALL your unmanaged solutions, that are not the "Common Data Services Default Solution" (Display Name)
- Where to find the Solution Download for the Update
To update the HR Management solution in your system you need to download the latest solution. Please navigate to the Customer Portal and log in with your user credentials. After a successful login, click on the module Solution Download.
At the Top of the Page, please click on "Download". After the selection the download for the "Solution Installer incl. Base Data" and the additional mandatory download "HR for Dynamics Flows" comes up.

- Download Solution Installer incl. Base Data
Click on Download Solution Installer incl. Base Data to download the solution installer. Run the downloaded file and click on Install. The Package Deployer will then open. Click on the button Continue to start the process.
.png)
Now select "Office 365" as Deployment Type.
Select the "Display list of available organizations" option to get a list of all systems already installed (e.g. test system and production system). If you do not make a selection, the installation is performed on the first system in the list.
Click on the button Login.
.png)
Please ensure that you log in as the user that initially installed the solution and has system administrator privileges! The username and password is equal to your Dynamics Administrator Account.
.png)
After successful login, choose which Import Package you want to install and confirm it by clicking on the button Next. If you want to publish job advertisements for the German Labor Office in Germany, select the package "HR for Dynamics with Base Data for German Labor Office". If you do not need this function, you can import the package "HR for Dynamics Installer".
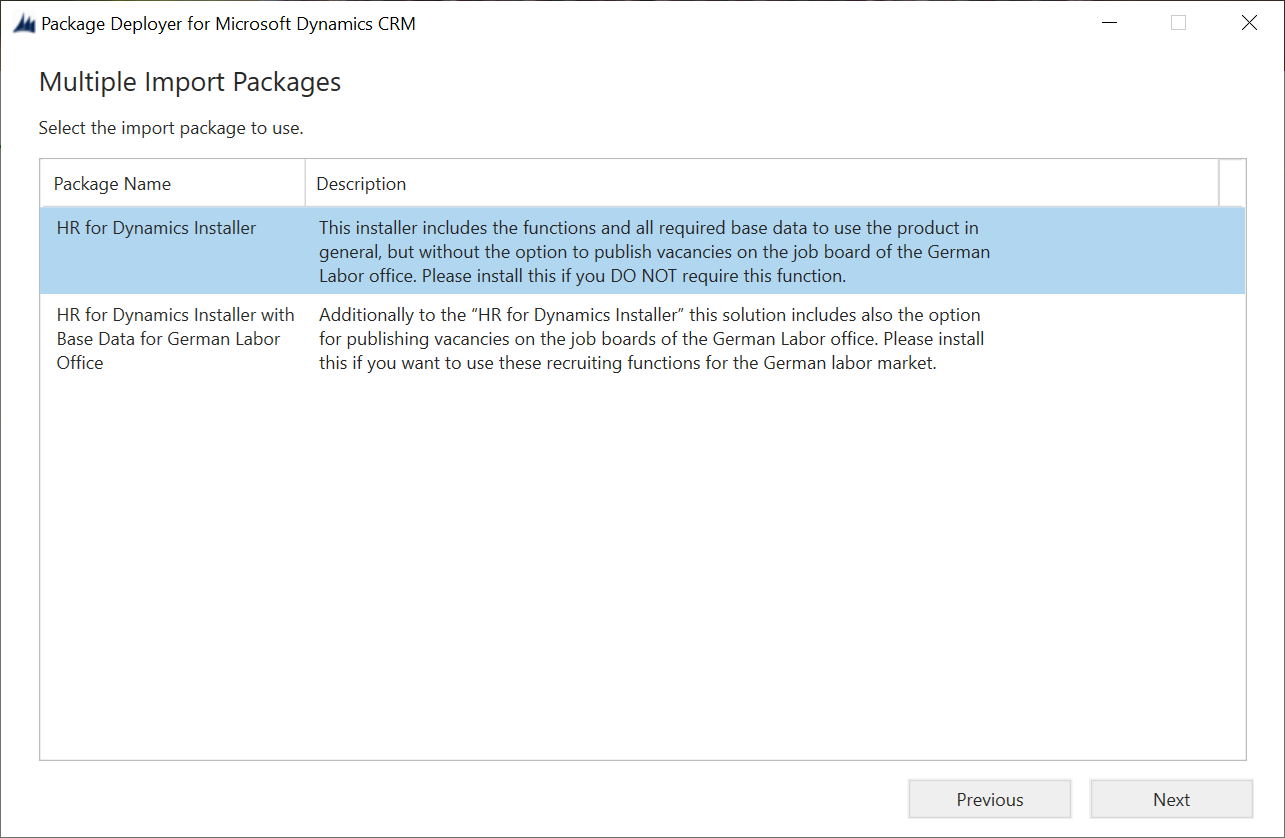
After clicking on Next, the "HR for Dynamics Installer" opens.
.png)
Click on the button Next and then check the information in the overview. If the information is correct, click on Next.
.png)
The latest version of the solution will now be installed. After the installation is successfully completed, close the dialog by clicking on the button Finish.
- Additional Mandatory Download HR for Dynamics Flows
Now the mandatory Download for HR for Dynamics Flows needs to be downloaded. Please click on it and save the ZIP file.
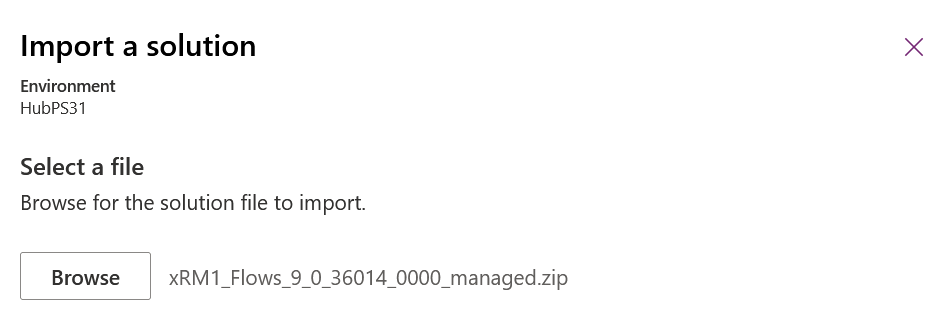
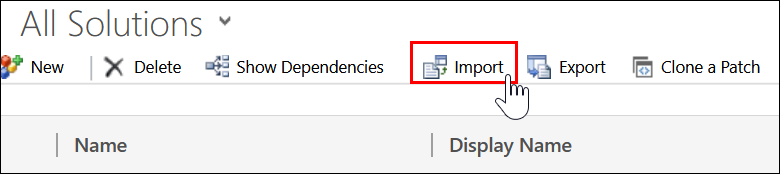
The saved ZIP file must now be imported. To do this, switch to https://make.powerapps.com/ and choose the environment you want to update. Then click on "Solutions" . Now click on "Import Solution".

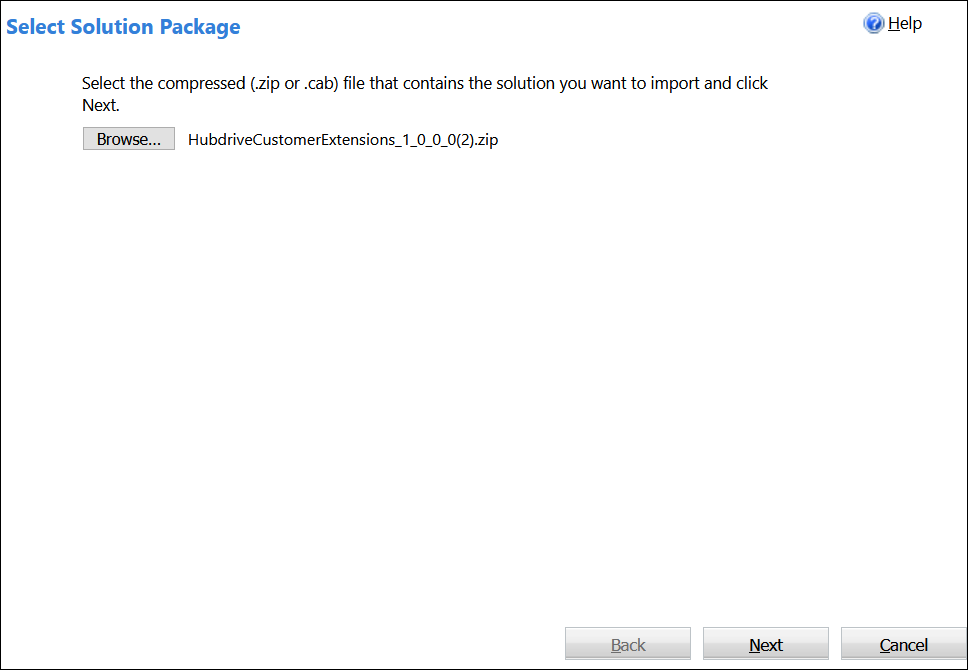
On the right side, click on "Browse" and choose the downloaded Flow Solution. Click next.
On the next page please choose "Update" and click on the "Import" button.
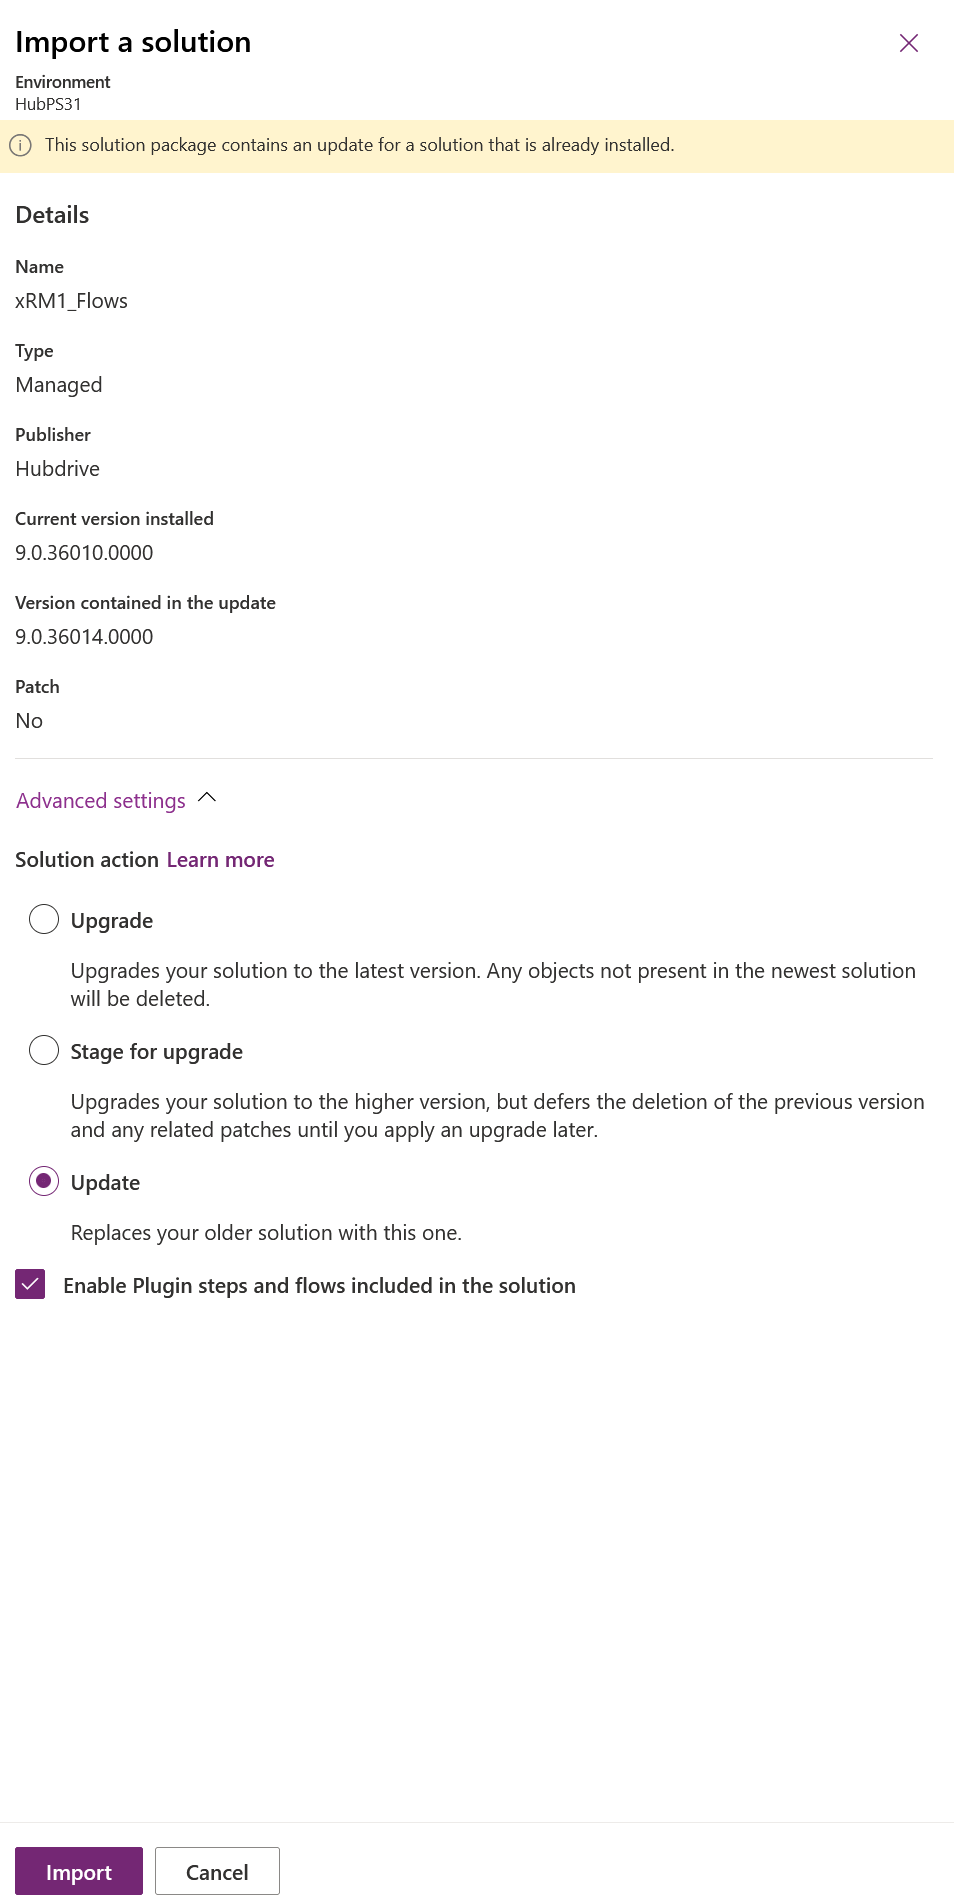
Depending on the solution, you might get asked to update your connections. Please choose every connection item and update them.
Click Next.
Open the just imported Dynamics HR Management Flows solution by clicking on the entry. Now it is necessary to activate the flows, since the status of them is "Off". The first entry "(Deprecated) Daily Summary update for empty attendance" can be ignored.
Make sure to activate all the Flows you want to use. Please note that the child flows must be activated first. Therefore, it is important to start with these two flows:
- Child Flow-Carry Forward Leave Entitlements of Employee
- Child Flow-Roll out Leave Entitlements of Employee
When you click on the flow, a new tab opens. After that, click on Edit.

The connections are listed. You could also create a new one if you want to. Click on Continue.
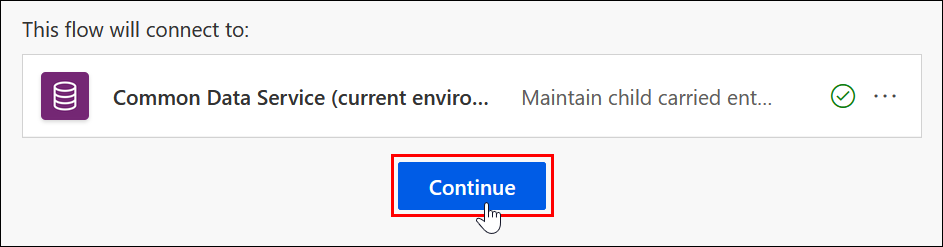
After that, click on Save.
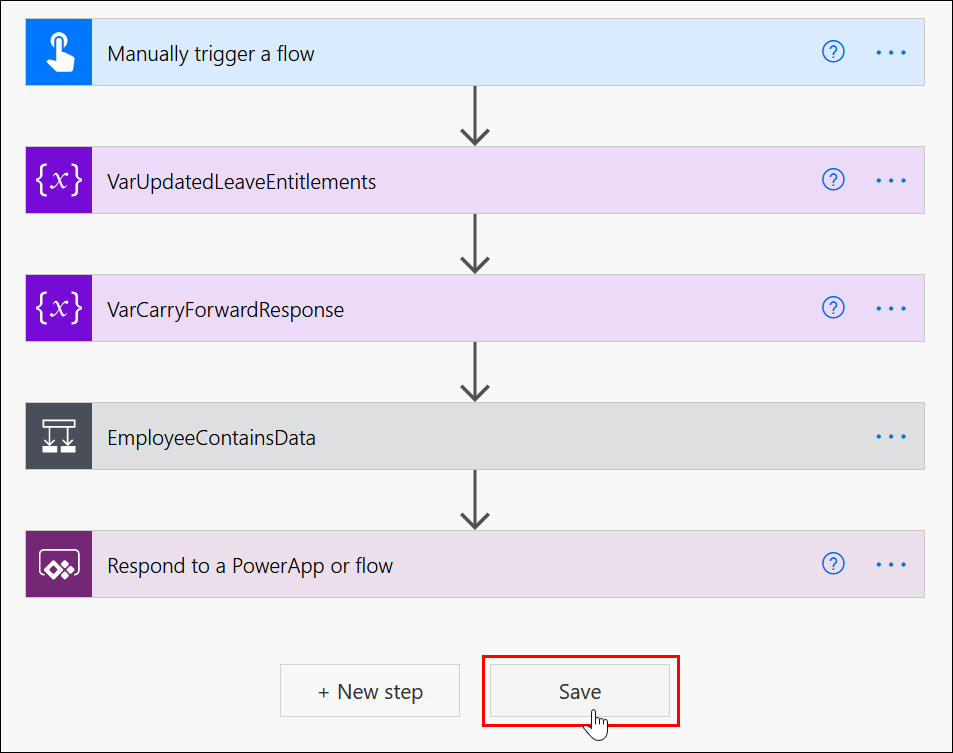
After it is saved, you can go back using the arrow in the upper left corner.

Please check if the flow has been activated. You can recognize this by the fact that the button shows "Turn off". If the button shows "Turn on", please click on it to activate the flow.

Afterwards you can close the window. Now please do this procedure for all the flows that have the status "Off".
If you don't use Dorma Kaba for time & attendance and access control, you don't need to activate the flows for it.
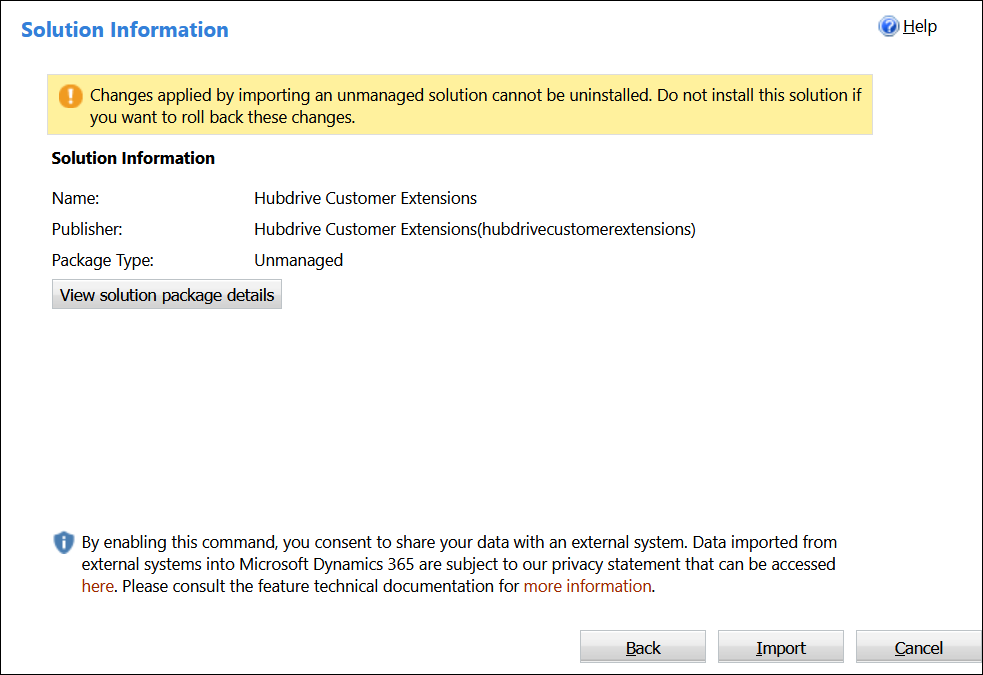
- Optional: Import your customized Solution to Dynamics 365
Please check the functionalities of your customizations before reimporting your previously exported solutions as due to new merge functionality the customizations might still be working along with the newest rollup. Before updating the solution, you started by creating a backup of your customized solutions to save all your customizations. In this step, you can now import your saved customizations back into Dynamics 365. To do this, go to the Advanced Settings again and click on "Solutions" under "Customizations". Now click on Import.
A new window opens, select the ZIP files you have saved separately.
Click on Next.
Start each import individually.
Please click on Publish all Customizations after importing. Otherwise they won't be shown in your solution.
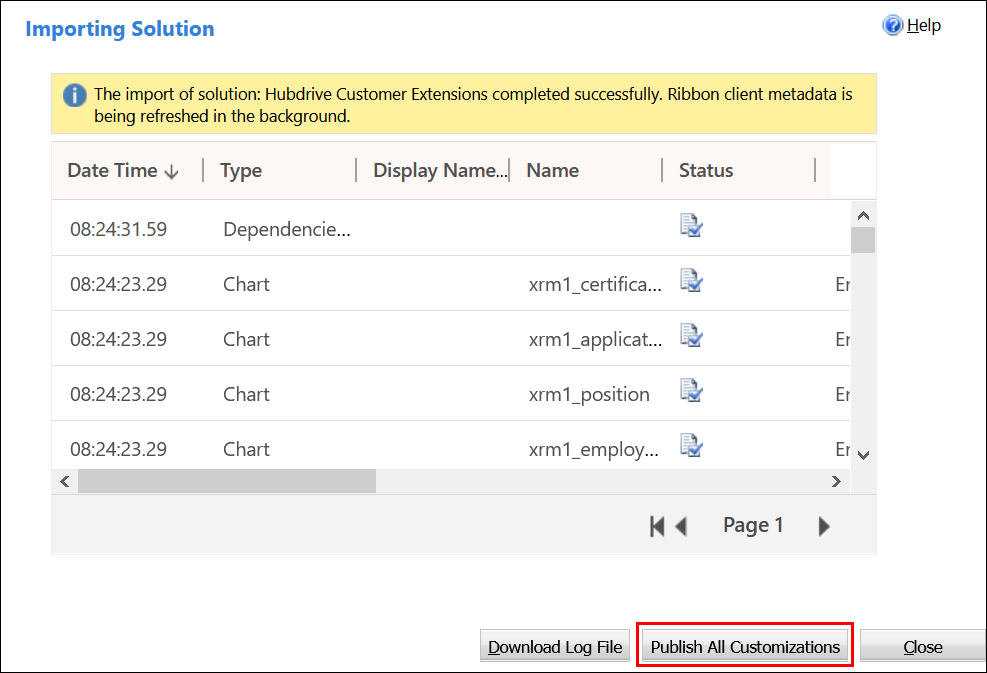
As soon as the publishing is done, you can close this window.