Create and customize Business rules

Objective

In this comprehensive guide, we will walk you through the process of creating and customizing business rules in Power Apps, an essential aspect of the Power Platform. Business rules allow you to automate and enforce specific logic and behaviors in your app, enhancing data quality and user experience.


The Purpose of Creating Business Rules:
Creating and customizing business rules in Power Apps serves several key purposes:
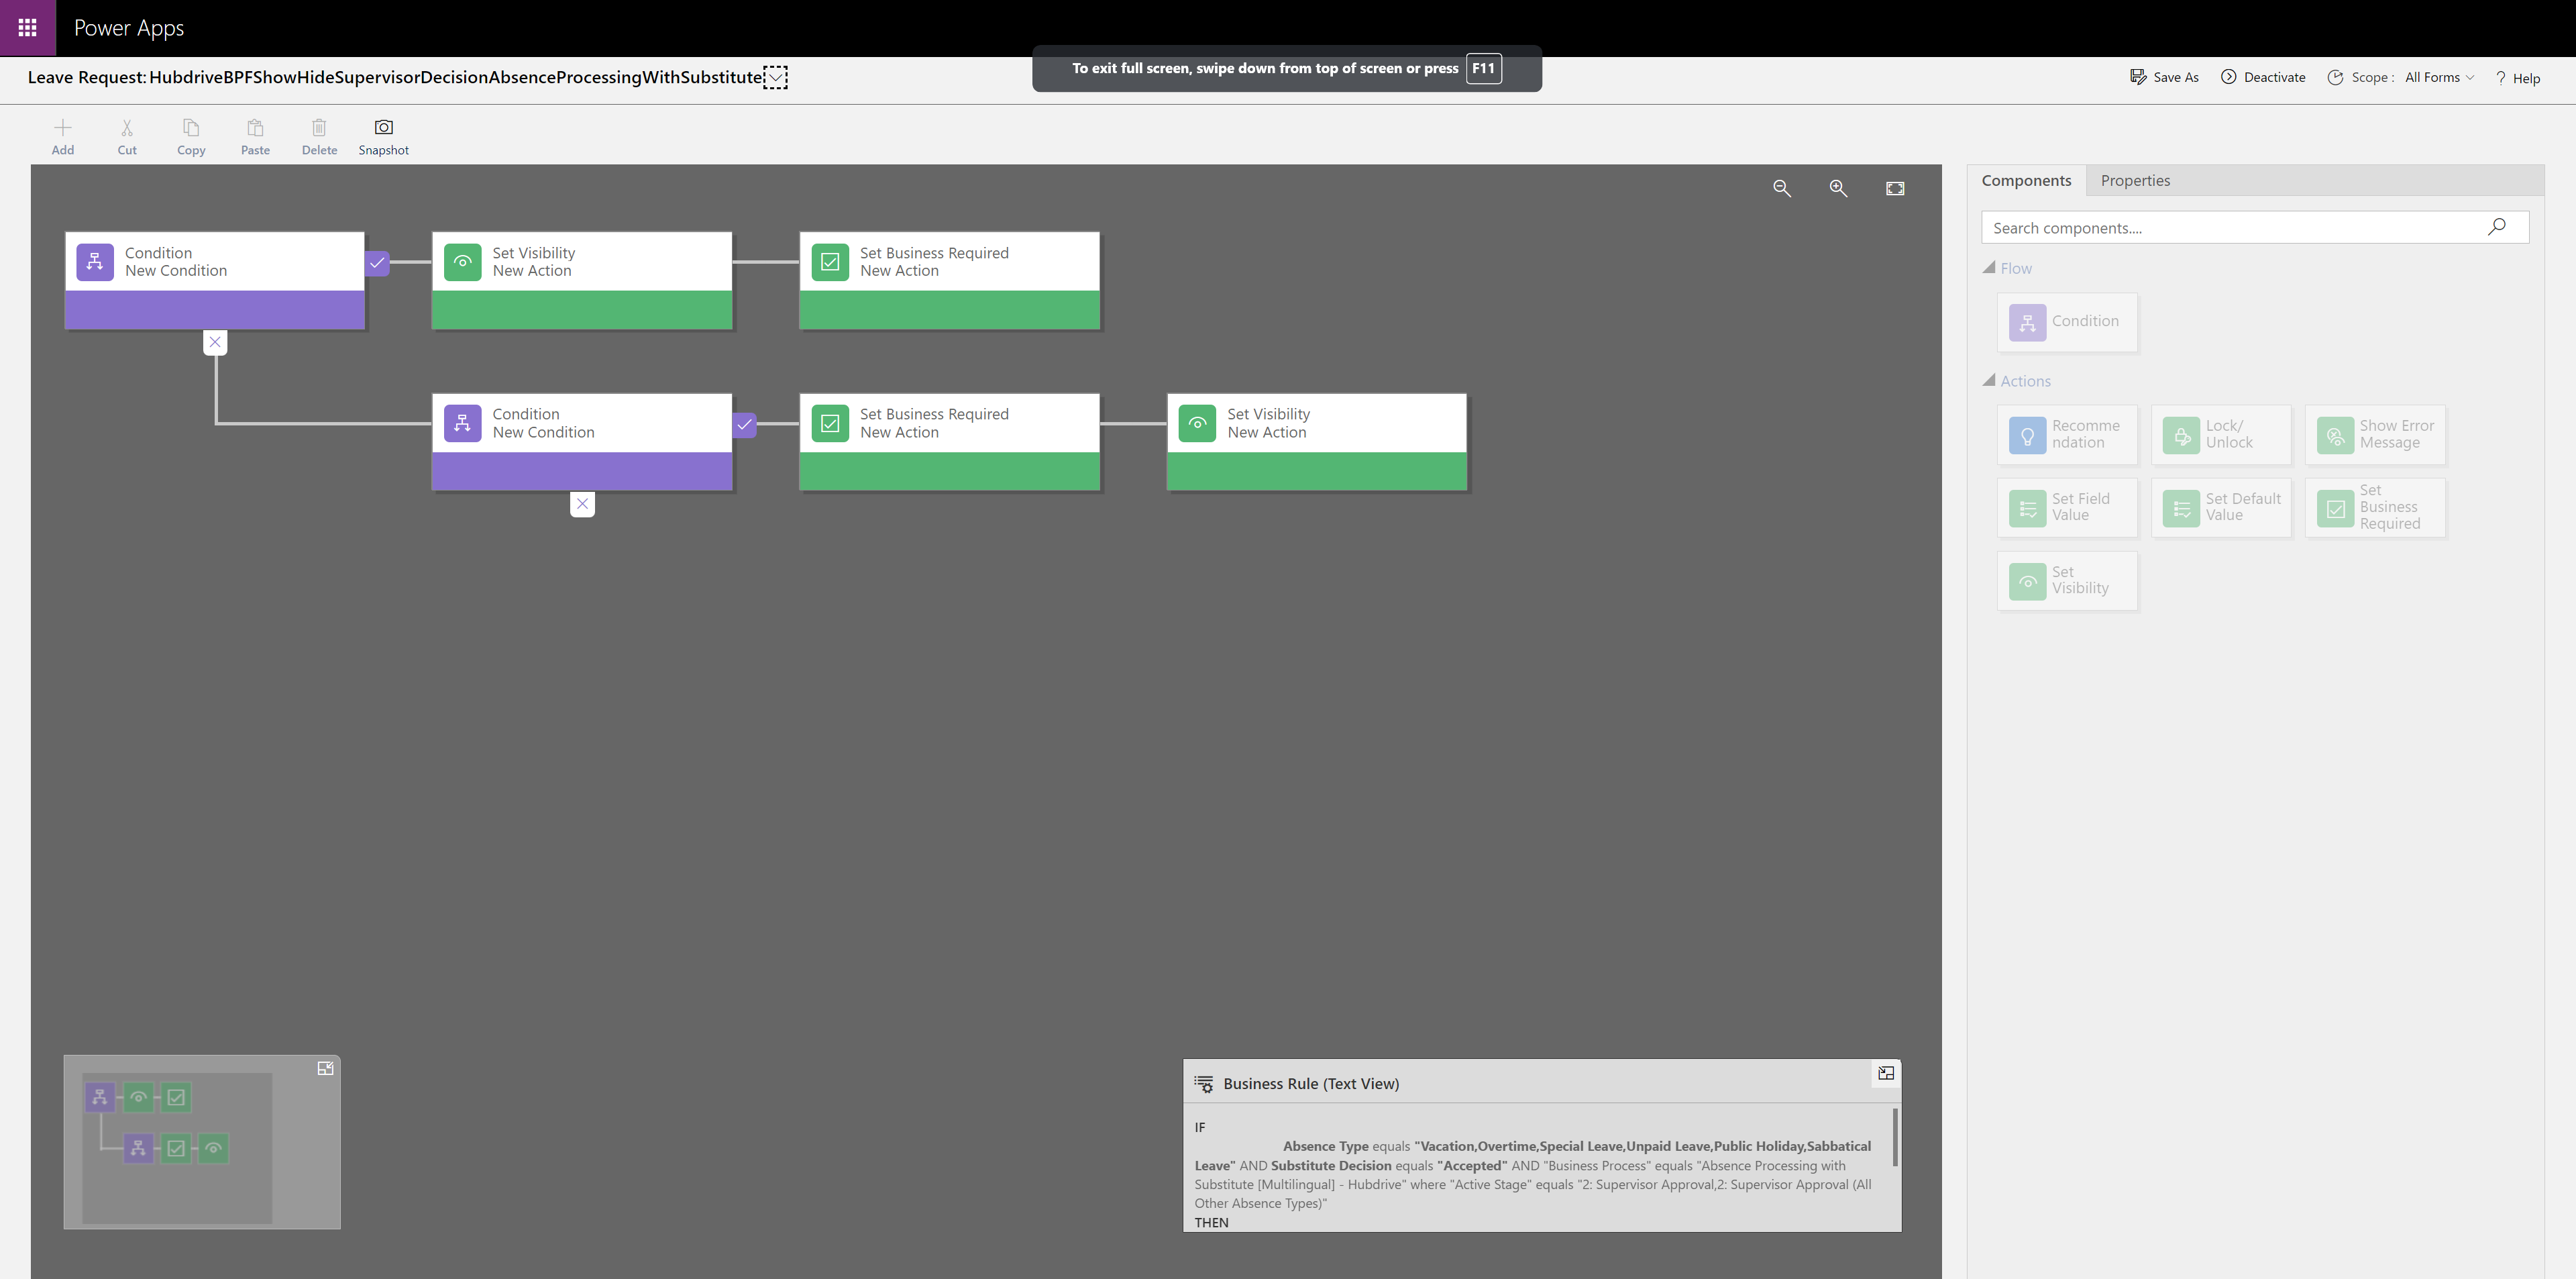
- Automate Logic: Business rules allow you to automate decision-making processes and enforce specific logic without the need for coding.
- Data Validation: Implement data validation rules to ensure data accuracy and consistency.
- User Experience: Enhance the user experience by guiding users through data entry processes and ensuring data integrity.

Prerequisites

  • Access Permissions: Make sure you have the necessary permissions to create or modify Business Rules within the app. (Minimum 'System Customizer'-Security Role or Admin)
  • Data Sources: Familiarize yourself with your app's data model, including the entities and fields you want to create business rules for.

Click Through

Step 1: Open the Power Platform Step 2: Navigate to the Environment
  • Choose the specific environment where you want to customize business rules. Click on the top-right environment name to enter it.
Step 3: Navigate to the correct Solution
  • Click on Solution in the left navigation.
  • Open your storage for customization (see a guide on how to create one here)
Step 4: Access the Entity (Table) for Customization
  • In your chosen Solution, you see all Objectives
  • Navigate to Tables and click on the little arrow
  • Now choose the specific entity (table) or data source on which you would like to perform the business rule
Step 5: Create a New Business Rule (optional)
  • If you want to create a new business rule, click on the New Business Rule button and give it a name.
  • Or select an existing Business Rule which you would like to customize, by clicking on its name.
Step 6: Define Business Rule Conditions
  • While in customization mode, define the conditions under which the business rule should be triggered. This includes setting up logical conditions based on field value.
  • For example you would like to create a Business Rule for the Attendance entity which shows a field ("Please make not so much breaks") based on the condition if the field value of Break [hrs] equals 4 
  • Click on Condition
  • Source - Entity
  • Field - Breaks [hrs]
  • Operator - Is greater than
  • Type - Value
  • Value - 4
  • Click Apply
  • Click on + Add
  • Select Set Visibility
  • Click on "+" next to Condition
  • In the Visibility area
  • Give the condition a Display Name
  • Select in the first row your Custom Field (for example called "Notice")
  • Select in the second row Yes
  • Click again on + Add
  • Select Set Visibility
  • Give the other condition a Display Name
  • Select in the first row your Custom Field (for example called "Notice")
  • Select in the second row No
  • Save

Step 7: Specify Actions and Recommendations

  • Specify the actions and recommendations that the business rule should take when the defined conditions are met. These actions can include setting field values, showing error messages, or guiding users through data entry.
Step 8: Test and validate the Business Rule
  • Before saving, thoroughly test and validate the business rule to ensure it behaves as expected.
  • Click on Validate
Step 9: Save your Changes
  • Once you've made the desired modifications, don't forget to save your changes, by clicking Save on the top

Hint

  • Business Rules are automatically active since you save the Business Rule. Before you can modify an existing Business Rule you have to Deactivate it.

Result

Your customized business rule is now ready to enforce specific logic and behaviors in your Power App. Business rules enhance data quality, streamline data entry, and improve the user experience.

Below, you see an example for a customized business rule.

Image
HR