The purpose of customizing views
Views customization in the Power Platform is essential for several reasons:
- Data Organization: Customized views help in organizing data to be more logical and user-friendly.
- Efficient Data Retrieval: It allows users to quickly access the information they need without navigating through extensive records.
- Enhanced User Experience: Tailored views improve the user experience by presenting data in a way that is most relevant to the user's role and tasks.
Adapt and complete views
Objective
In this comprehensive guide, we will take you through the process of customizing views in the Power Platform. Views are essential for filtering, organizing, and presenting data in a way that best suits your organization's needs.
Prerequisites
- Access Permissions: Ensure you have the necessary permissions to modify views within the app. (Minimum System Customizer - Security Role or Admin)
- Knowledge of Data Structure: Understand the entity's structure, including its fields and relationships.
Click Through
Step 1: Open the Power Platform
- Launch the Power Platform by visiting the page make.powerapps.com
- Choose the specific environment where you want to customize views. Click on the top-right environment name to enter it.
- Click on Solution in the left navigation.
- Open your storage for customization (see a guide on how to create one here)
- In your chosen Solution, you see all Objectives
- Navigate to Tables and click on the little arrow
- Now choose the specific entity (table) or data source that contains the view you want to customize. Click on the relevant entity.
- Once in the entity, find and click on the Views section. This is where you will be customizing how the data is displayed.
- In the "Views" section, you will see a list of available views. Choose the view you want to customize by clicking on its name.
- Click on the "Edit" button to enter the customization mode for the selected view.
- Here, you can modify various aspects of the view, such as changing the criteria for records displayed, selecting the columns to be shown, and adjusting the sorting order.
- You can modify Filters towards the Data - this is important, because here you can decide which Data should be shown inside this View.
- For example you are in the Attendance entity and you would like to create a view which shows the Attendance for the Logged in User.
- Create a View
- Add some columns (+ column), like Employee, User, End Time, Start Time, Status...
- Add a Filter by clicking on the right hand side on Edit filters
- Click on + Add - Add row
- Select User and in the second column choose Equals current user
- This view contains now all Attendances depending on the logged in User, that means each User sees different records.
- Once you've made the desired modifications, don't forget to save and publish your changes, by clicking on Tables in the left Navigation bar (Objects) and press the Button Publish all customizations
Hint
- It's good practice to leave a note or description of the changes made in the view. This can be helpful for you and your team members in understanding the purpose of the customized view.
- If you want to create later Dashboards, Views are always needed, so that the Dashboard can show the correct Data, because inside Views you would set the relevant Filters.
Result
Your customized view is now ready to use. Users can access this view to see data that aligns with their specific requirements and workflows. Customized views enhance the efficiency and usability of your Power Platform app.
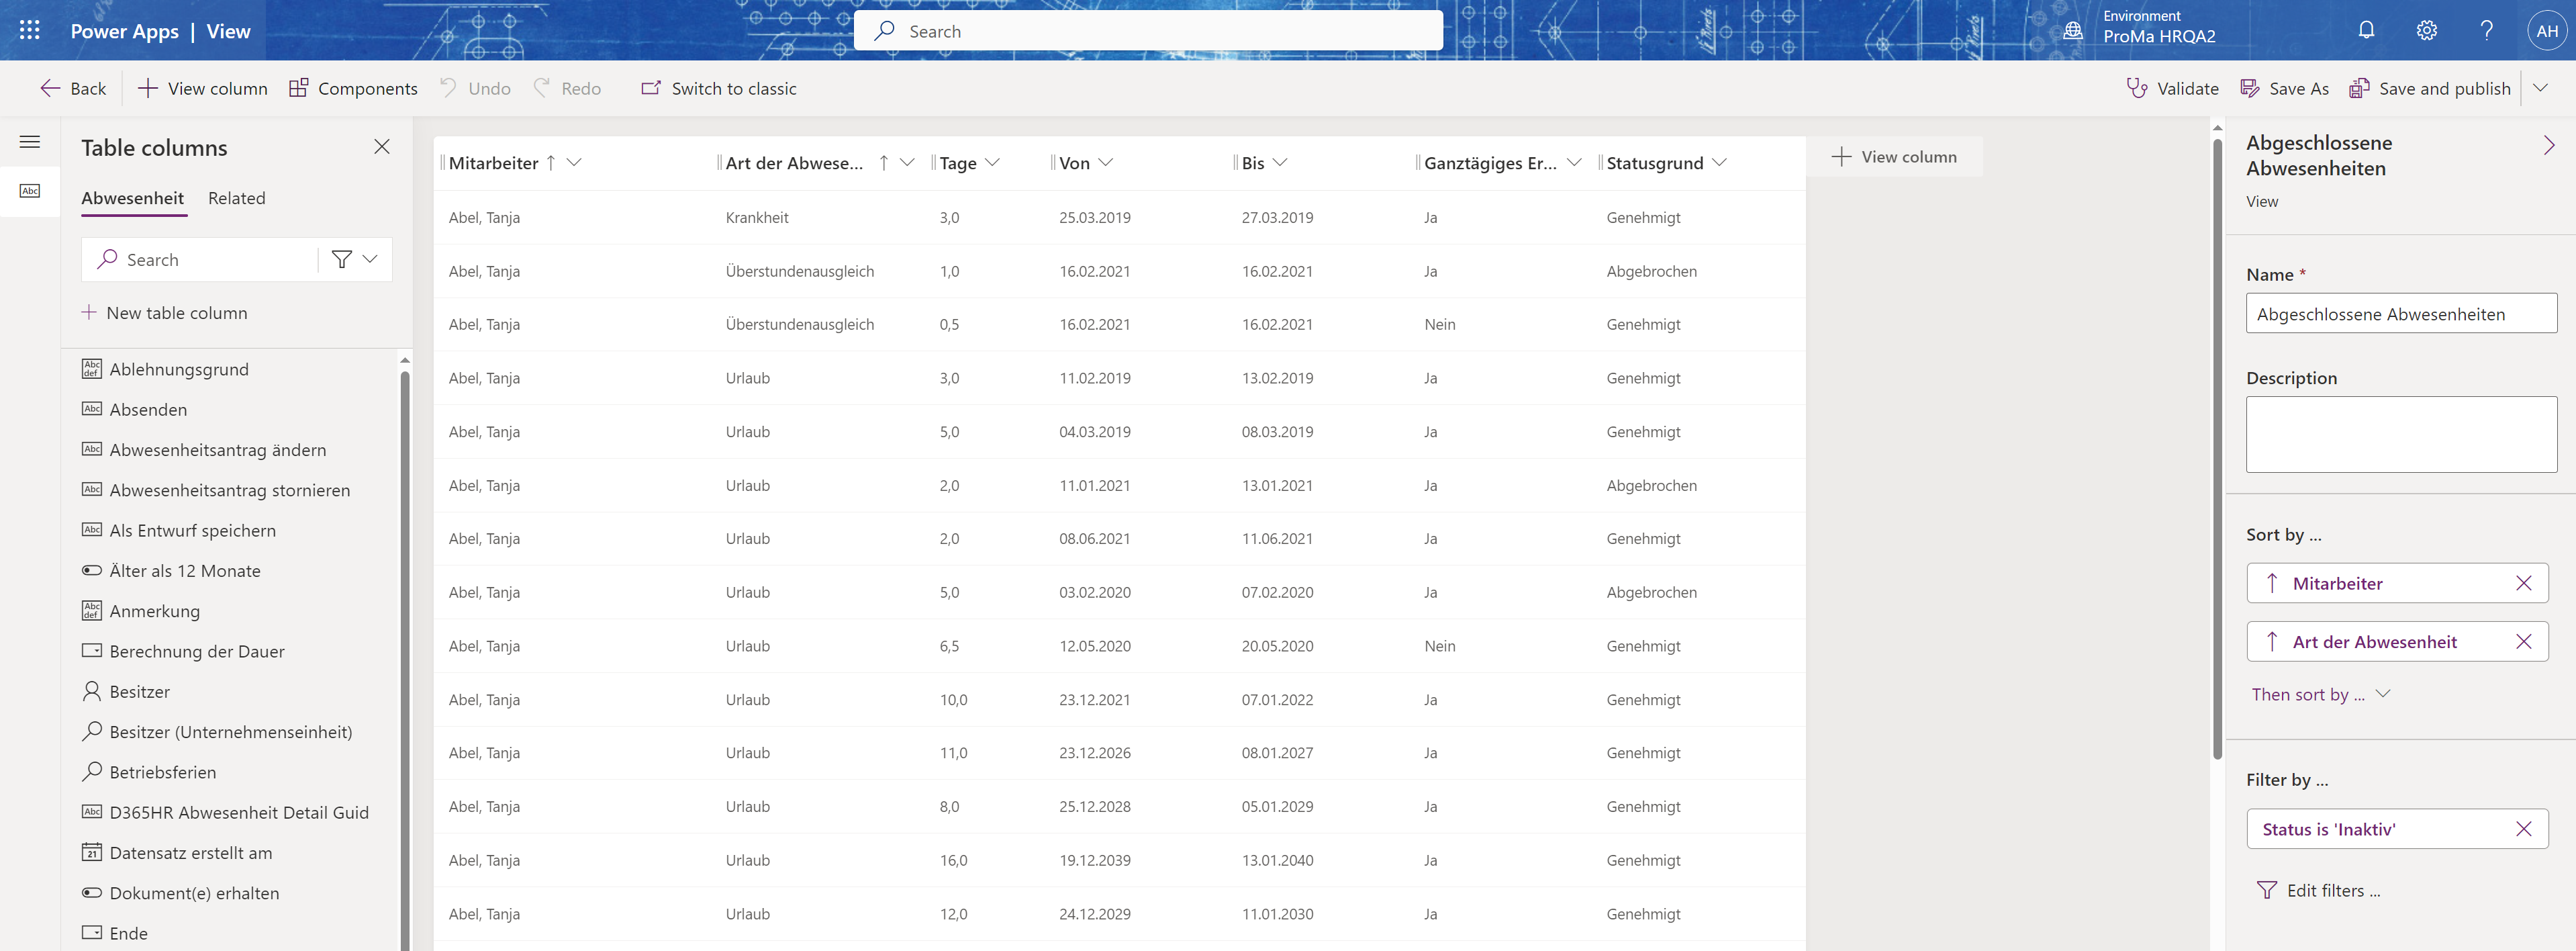
Below, you find an example for a customized view.
Below, you find an example for a customized view.