

If this is not your first import, please take a look at the Update Guide.
1. Import
Before you start importing Dynamics HR Management in an online Dynamics 365 platform, please make sure you fulfill the following pre-requisites:
- You meet the minimum system requirements
- You have set up Dynamics 365
- You have an administrator access to the Dynamics 365 instance
1.1 Download solution Installer incl. Base Data
Log in to the Customer Portal with your login credentials. Click on Solution Download and select your required version.
Online: The system is located in the cloud
On Premise: The system is located on your own servers
Now please select the solution you would like to install:
- HR for Dynamics only
- Dynamics Project Management only
- Dynamics Project Management and HR for Dynamics
After the selection the downloads for the "Solution Installer incl. Base Data" and the additional mandatory download "HR for Dynamics Flows" are displayed.

Click on Download Solution Installer incl. Base Data to download the installation package.
Please consider the system requirements:
- Dynamics 365 cloud version 9.2.x or Dynamics 365 on-premise version 9.0.15 (or higher) or Microsoft Power Platform
- Usage of a supported browser in the current version
- Other system requirements regarding network and operating system
Run the downloaded file and click on Install. The Package Deployer will then open. Click on the button Continue to start the process.
.png)
Now select "Office 365" as Deployment Type.
Select the "Display list of available organizations" option to get a list of all systems already installed (e.g. test system and production system). If you do not make a selection, the installation is performed on the first system in the list.
Click on the button Login.
.png)
Please ensure that you log in as system administrator! The username and password is equal to your Dynamics Administrator Account.
.png)
After successful login, choose which Import Package you want to install and confirm it by clicking on the button Next. If you want to publish job advertisements for the German Labor Office in Germany, select the package "HR for Dynamics with Base Data for German Labor Office". If you do not need this function, you can import the package "HR for Dynamics Installer".
.png)
After clicking on Next, the "HR for Dynamics Installer" opens.
.png)
Click on the button Next and then check the information in the overview. If the information is correct, click on Next.
.png)
The solution will now be installed. After the installation is successfully completed, finish the process by clicking Finish.
1.2 Additional Mandatory Download HR for Dynamics Flows
Now the mandatory Download for HR for Dynamics Flows needs to be downloaded. Please click on it and save the ZIP file.
Next, navigate to Power Apps and please make sure you are in the correct environment.
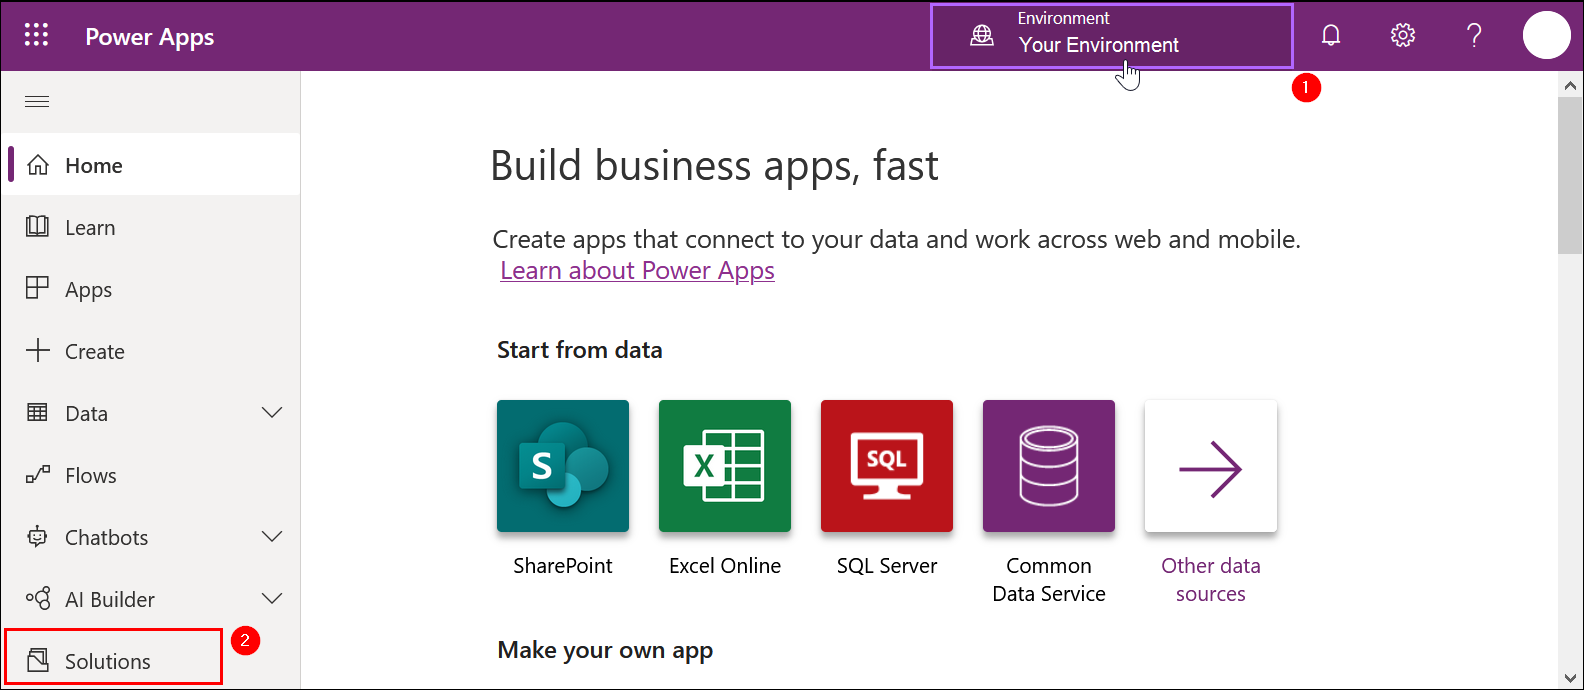
Go to the Solutions on the left side in the menu and import the file you just downloaded by clicking the Import button.

Select the file and click on Next.
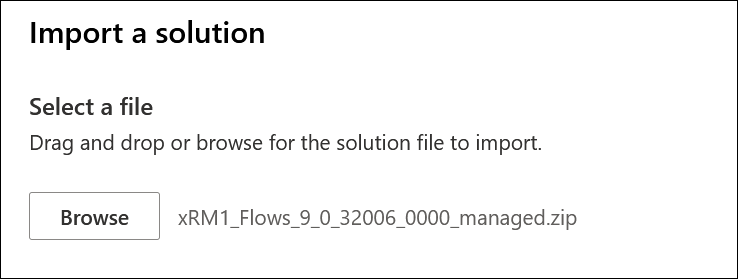
The details of the solution are displayed. "Enable Plugin steps and flows included in the solution" (Advanced settings) is enabled by default. Click on Next.
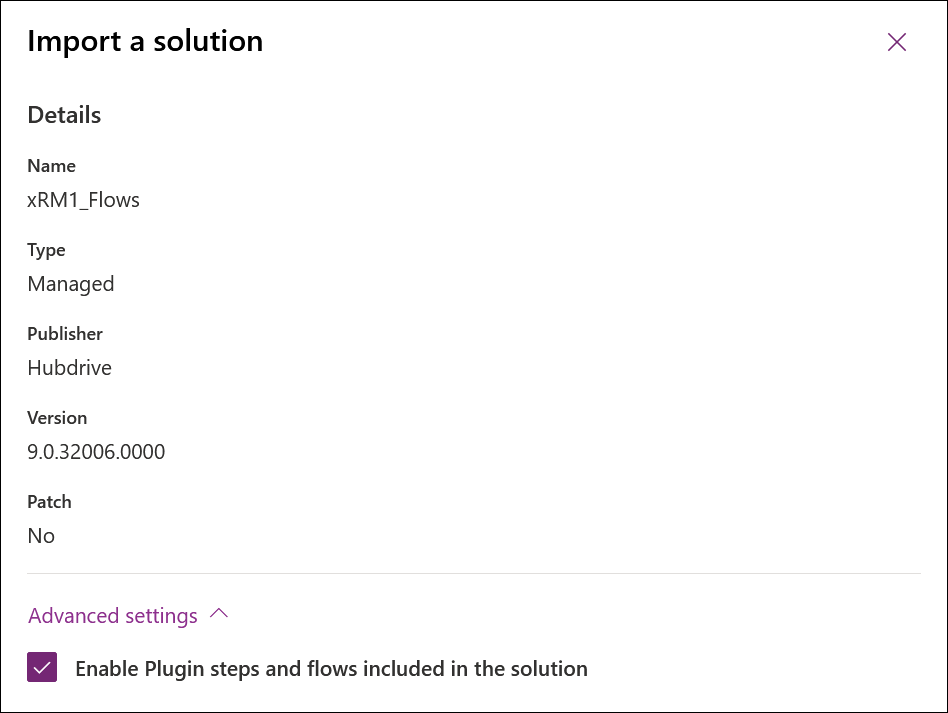
The connections are listed. You could also create a new one if you want to. Click on Import.
After importing, the solution appears at the top of the list of the solutions.

Now it must be checked whether the contained flows are activated. This is indicated by its status ("On" or "Off").
Open the just imported "Dynamics HR Management Flows" solution by clicking on the entry. Activate the flows with the status "Off". The first entry "(Deprecated) Daily Summary update for empty attendance" can be ignored.
Please note that the child flows must be activated first. Therefore, it is important to start with these two flows:
- Child Flow-Carry Forward Leave Entitlements of Employee
- Child Flow-Roll out Leave Entitlements of Employee
When you click on the flow, a new tab opens. After that, click on Edit.

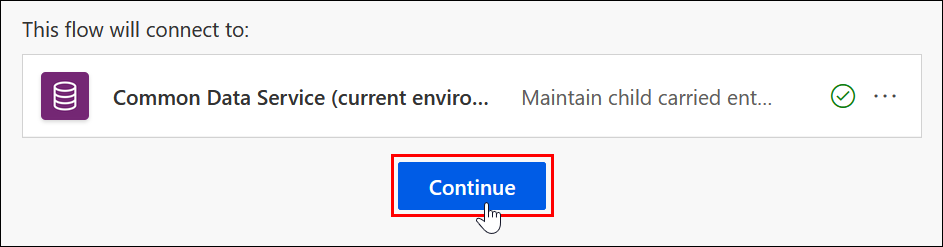
The connections are listed. You could also create a new one if you want to. Click on Continue.
After that, click on Save.
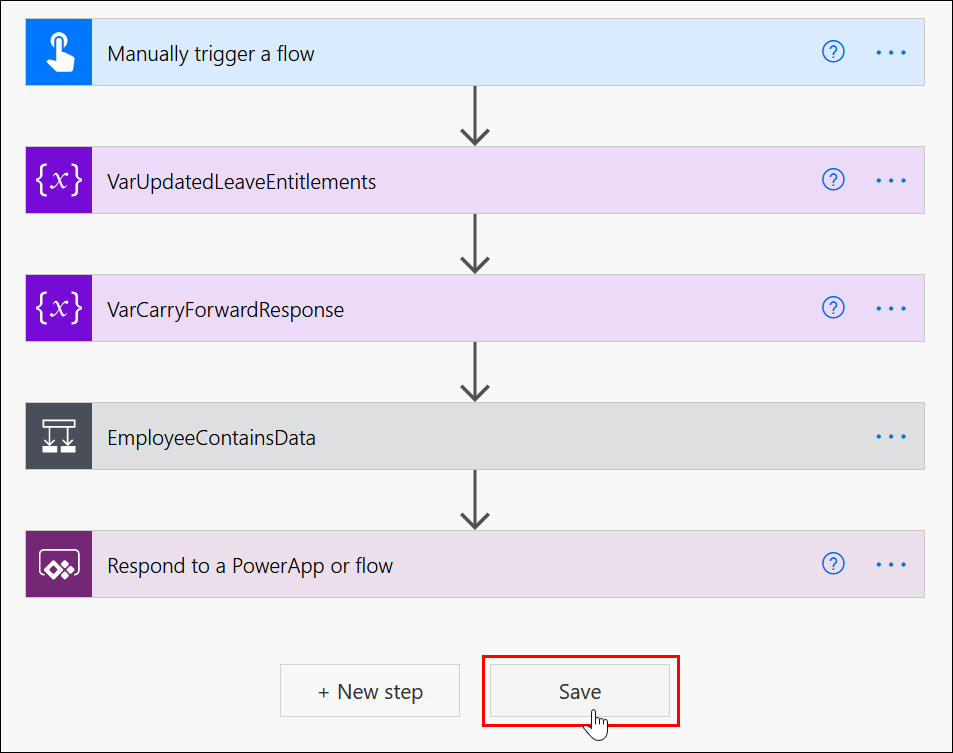
After it is saved, you can go back using the arrow in the upper left corner.

Please check if the flow has been activated. You can recognize this by the fact that the button shows "Turn off". If the button shows "Turn on", please click on it to activate the flow.

Afterwards you can close the window. Now please do this procedure for all the flows that have the status "Off".
If you do not have Dorma Kaba integration, it is not necessary to activate the flows for Dorma Kaba.
An automatic trial of the solution is now activated for 14 days. You can test Dynamics HR Management extensively and without any restrictions for this period.
In addition, the following base data has been created to help you get started:
- Absence Type Settings
- Work Pattern Templates
- Work Certificate Ratings
- Calendars
- Areas
- Travel Destinations
- Skills
- Skill Grades
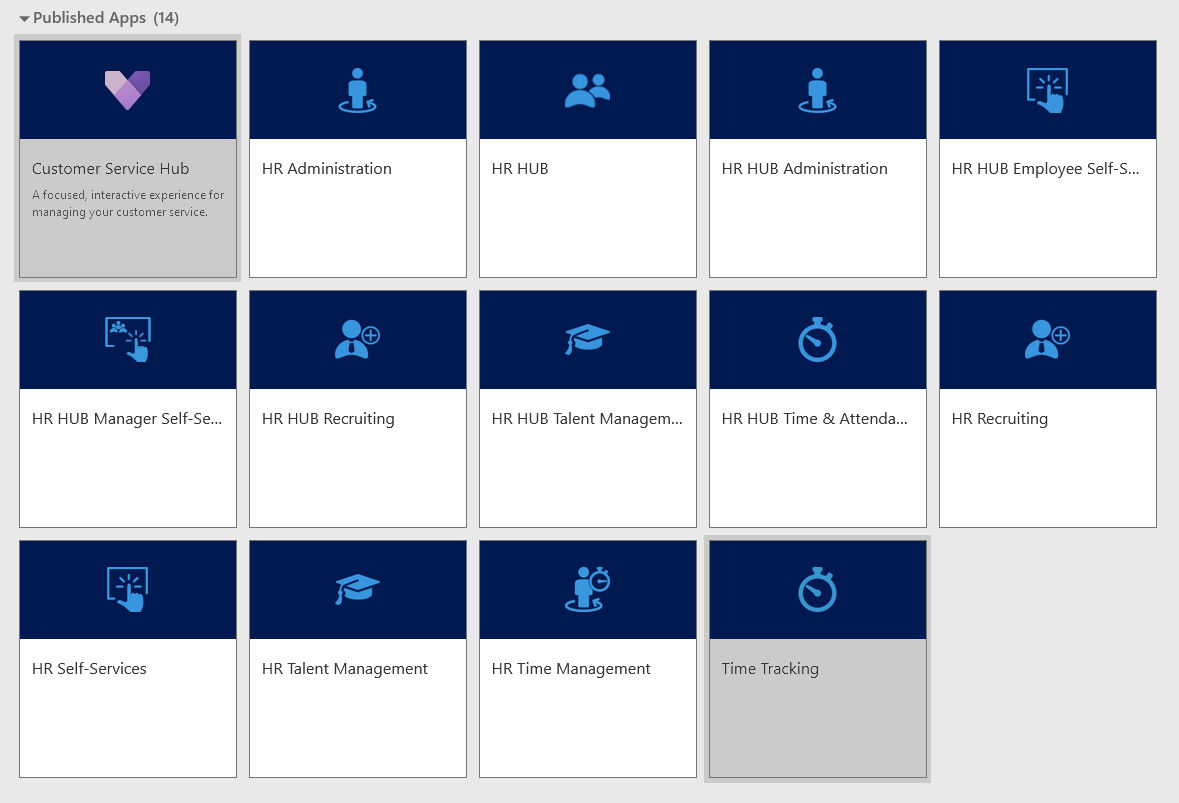
Log in to your Microsoft Dynamics. You can now select your required HR HUB app. If you are already logged in it is possible that you have to log out and log in a second time.
1.3 How to find the Unique Name of your Environment
To find the Unique Name of your Environment, go to the Advanced Settings.
Click on the downward arrow next to Settings, then select Customization, then Developer Resources.
Here, you find the Unique Name of your Environment.
When you send us the Unique Name, please copy it - do not send a screenshot. This reduces the probability of errors.
2. Licensing
Apply License
If you already own a license, you can activate it directly. If you want to use the demo version, you can skip this step.
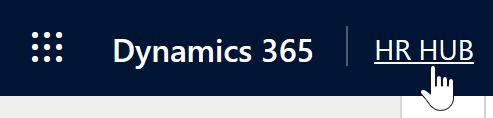
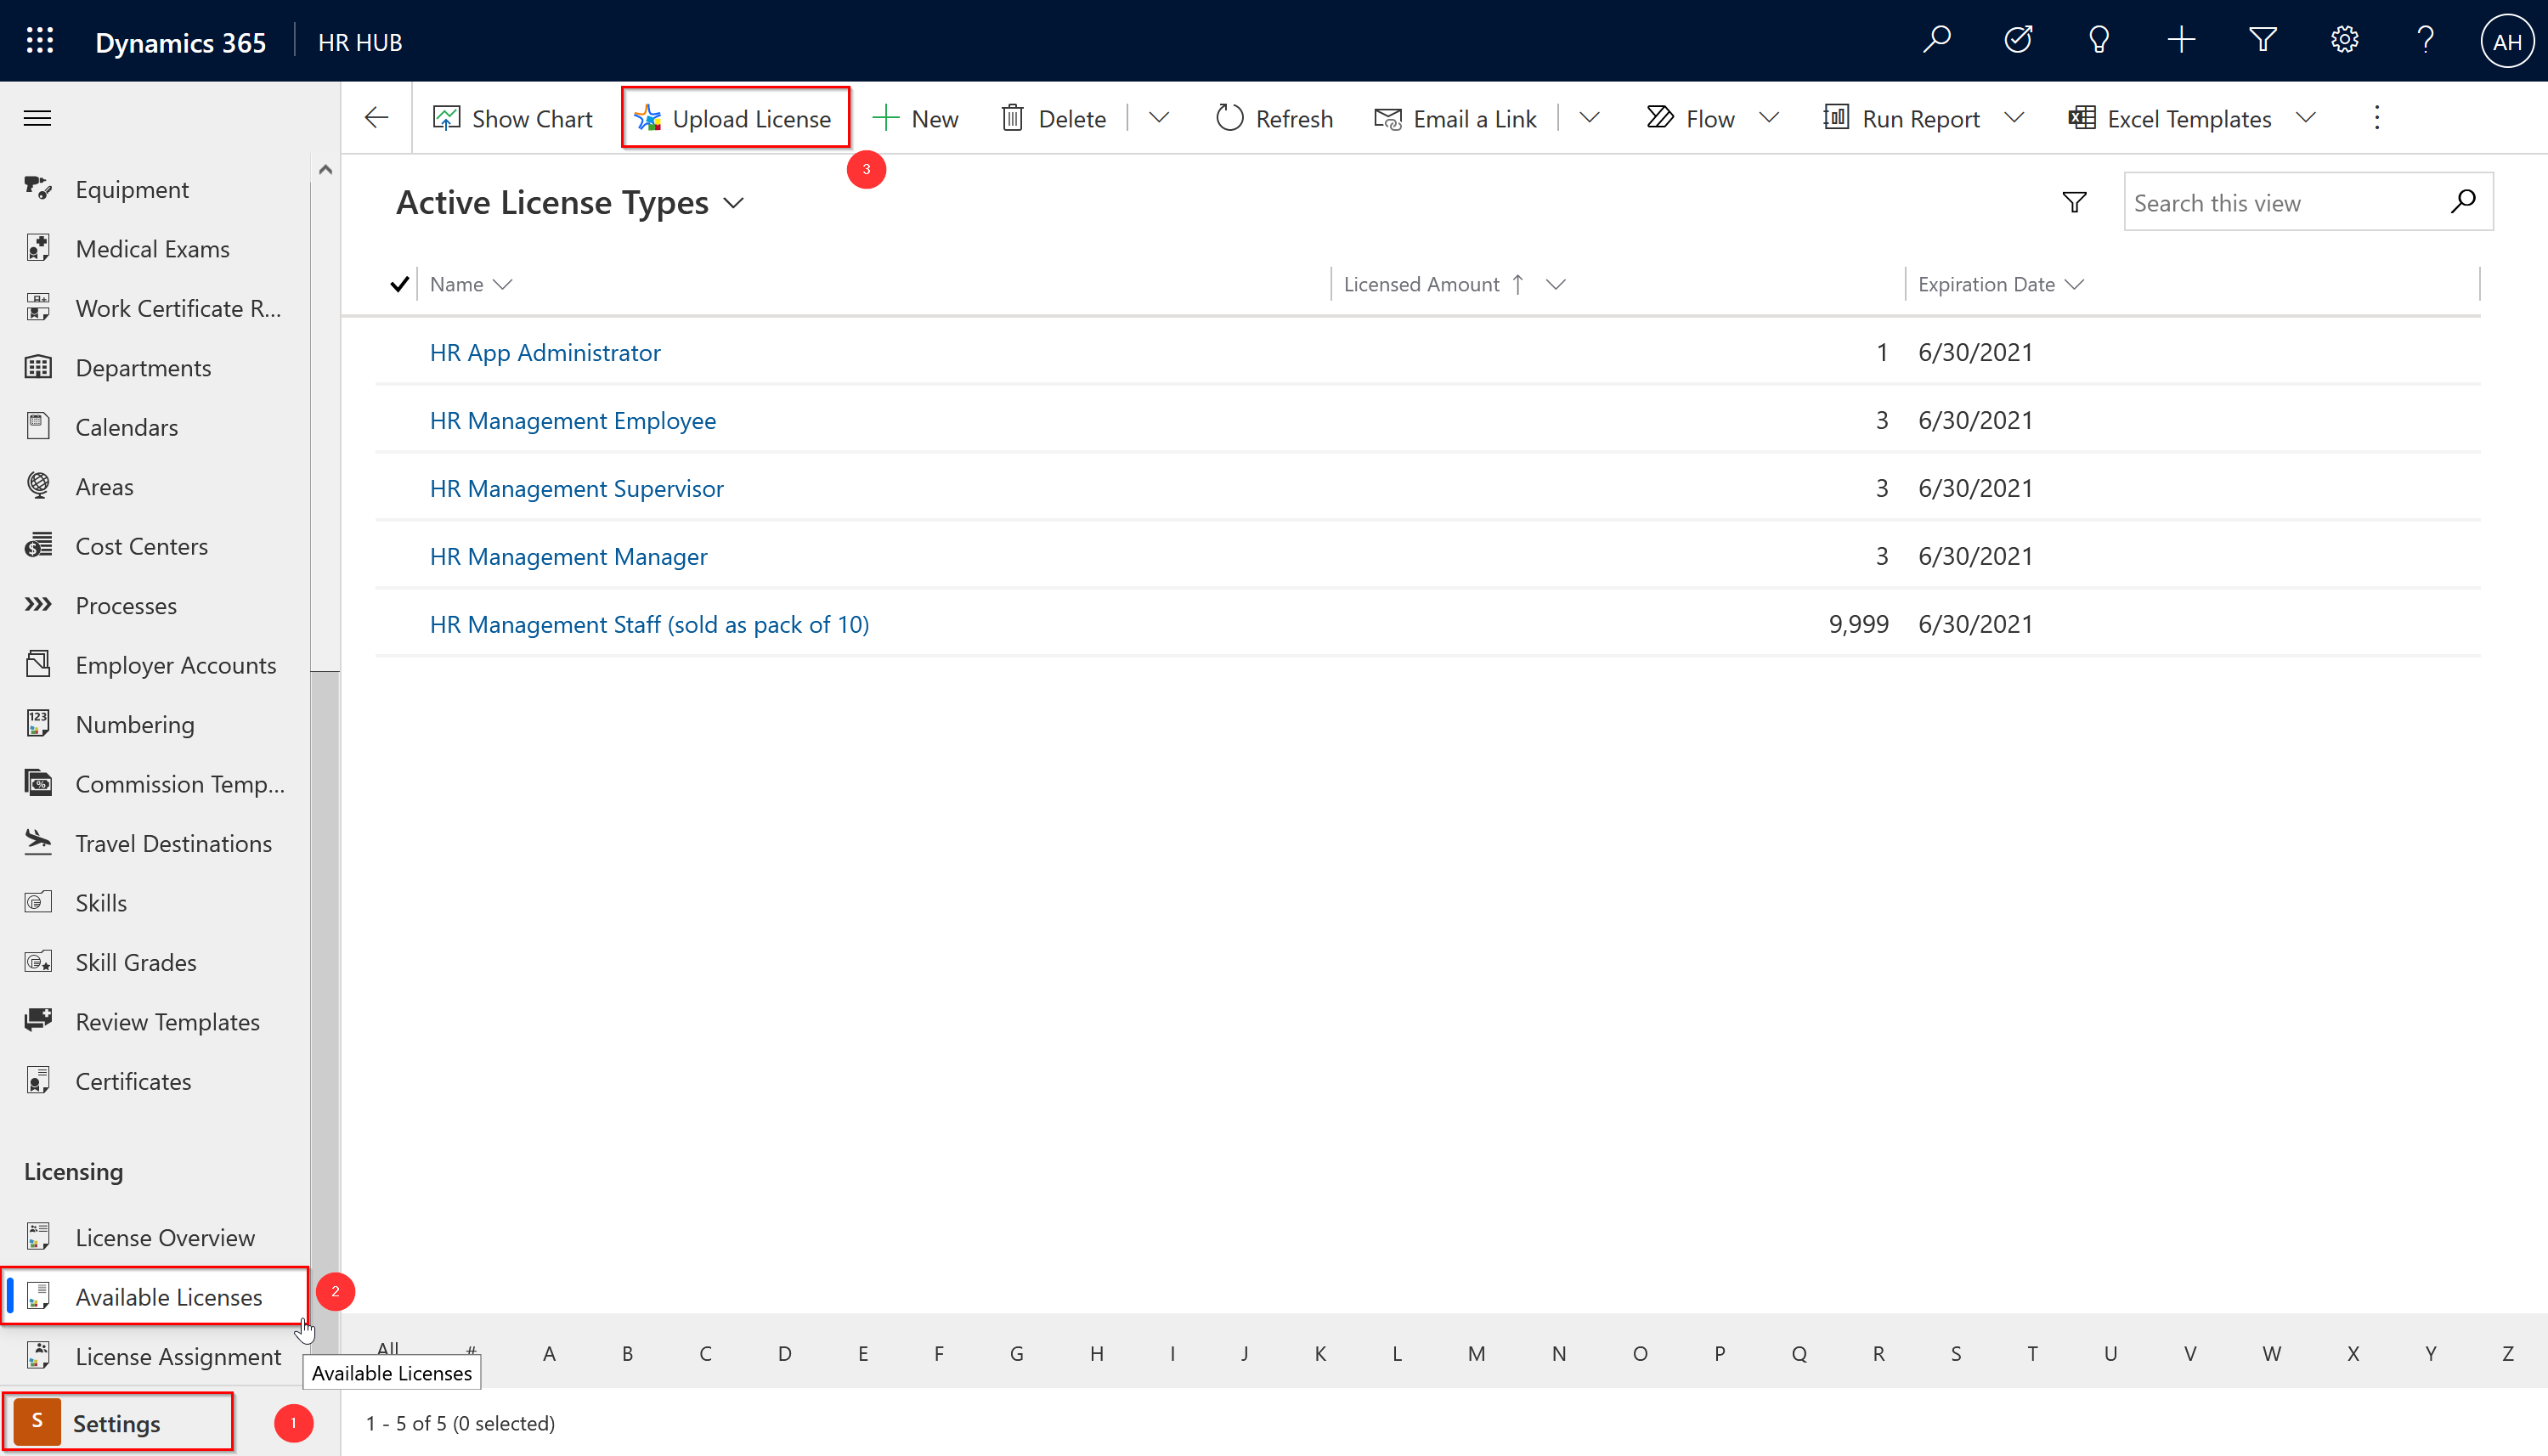
To apply a license, open Dynamics 365 and switch to the HR HUB if it is not already selected.
Go to Settings at the bottom left and then navigate to Available Licenses underneath the point Licensing and click on Upload License.
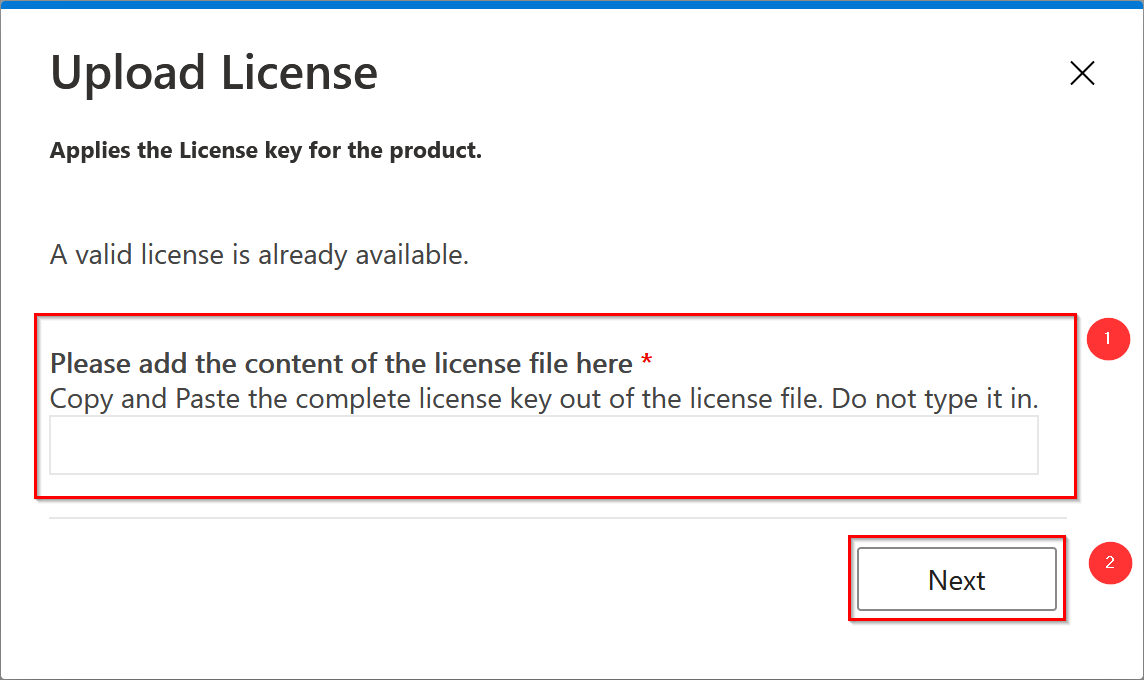
A new dialog opens. Please insert the license key for the product as indicated in the dialog. To do this, open your license file (*.lic) with an editor of your choice (e.g. Notepad), select the entire content (CTRL + A), copy it (CTRL + C) and paste it into the field in the dialog (CTRL + V). Confirm the entry of your license key by clicking Next.
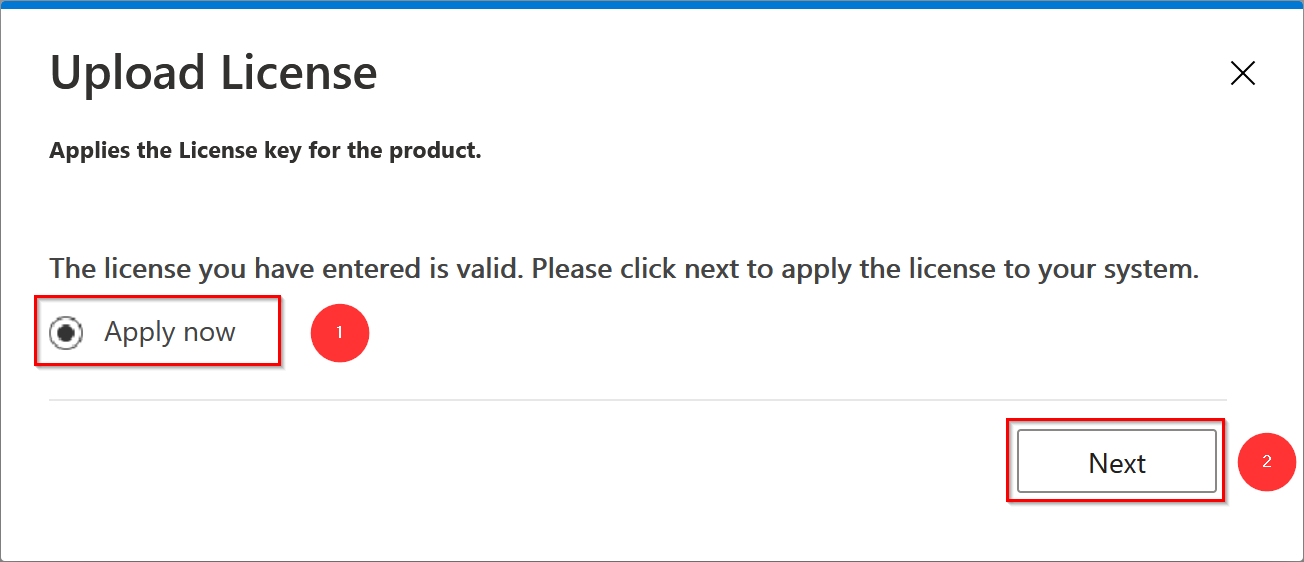
Now that your license has been verified and is valid, select Apply Now (already selected by default) and click Next.
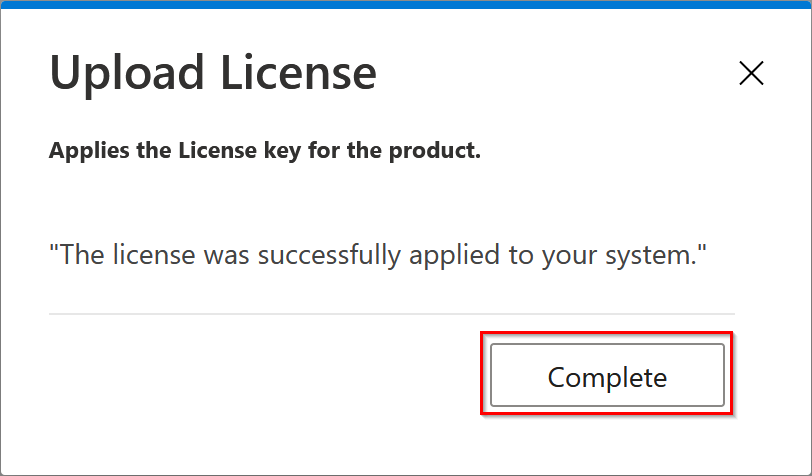
Once your license has been successfully uploaded, close the process by clicking Complete.
3. Configure important Time & Attendance functions
Time and Attendance
Monthly Rollout of Daily Summaries
Update missing attendance details
List of workflows that send emails or create tasks
Monthly Rollout of Daily Summaries
Download add-on
- Go to the Download Page in the Customer Portal
- Download the solution you need
- Download the file Flow: Monthly Rollout of Time Summaries for Employees (do not extract the file)
Install add-on
In the menu bar click on My flows

In the top right corner click on Import

Select and import the file you downloaded before
When the import is finished, click the option shown below in the section Review Package Content and select the connection to your Dynamics 365
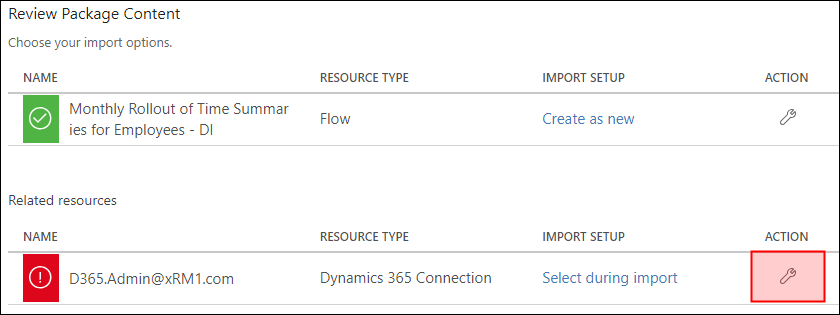
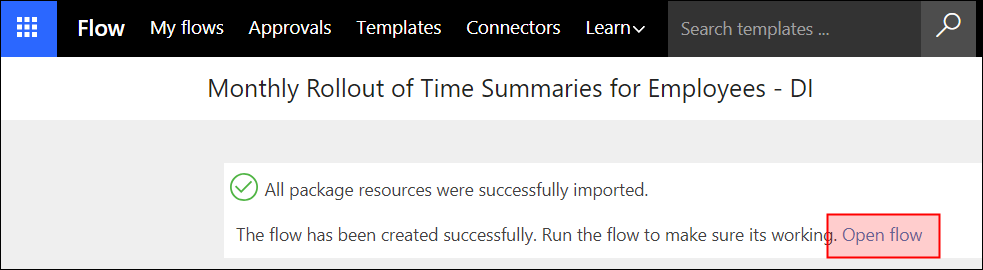
Click on Import and wait a moment to finish the process. You will get a notification about the successful import. Click on Open Flow
Click on Create a record and press the X to delete the organization name
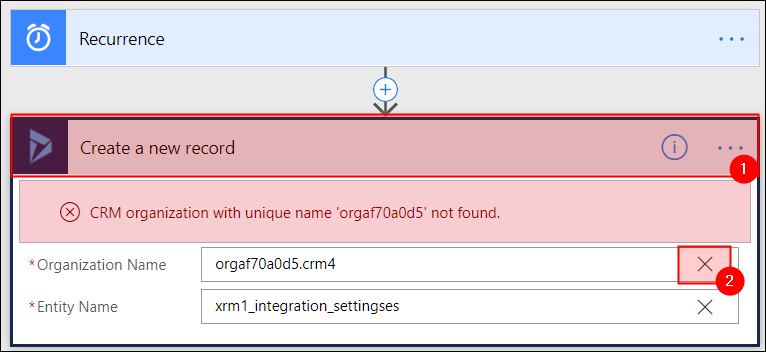
It may take a moment till the drop-down menu opens. Choose your organization and confirm by pressing Save

In the menu bar click the ellipses and select Run now
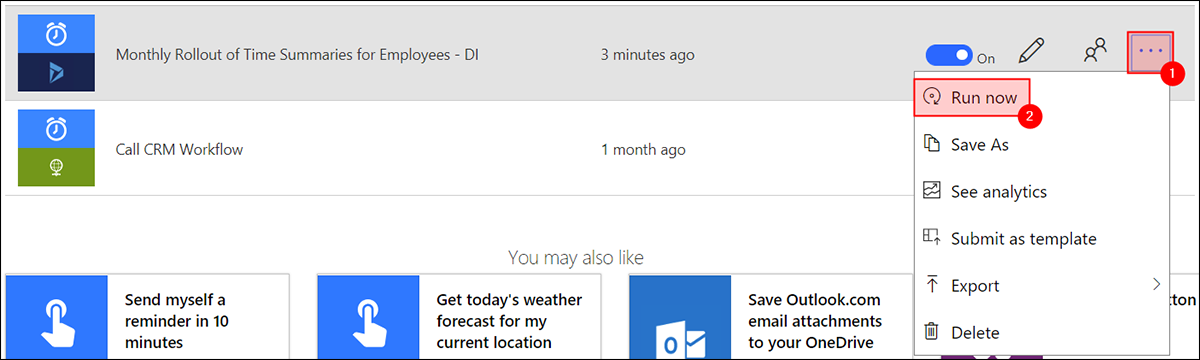
Press Run flow

If you click on See flow run activity, you can check the success of the flow
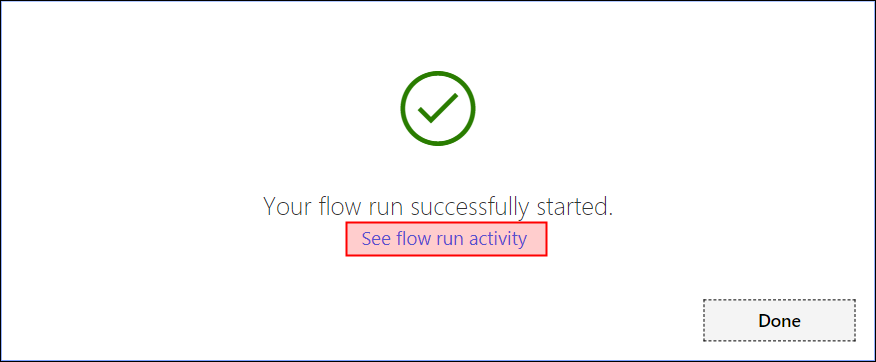
You should see the notification about the status, the start time and the duration

Depending on the number of employees it may take some minutes to create all records. When finished, all Time Summaries, Time Sheets and Daily Summaries are available for all employees. All records created start next month. If you want to use all functions of time and attendance immediately, you need to create the data one time only manually. You can use the import function, so you don't have to create everything manually.
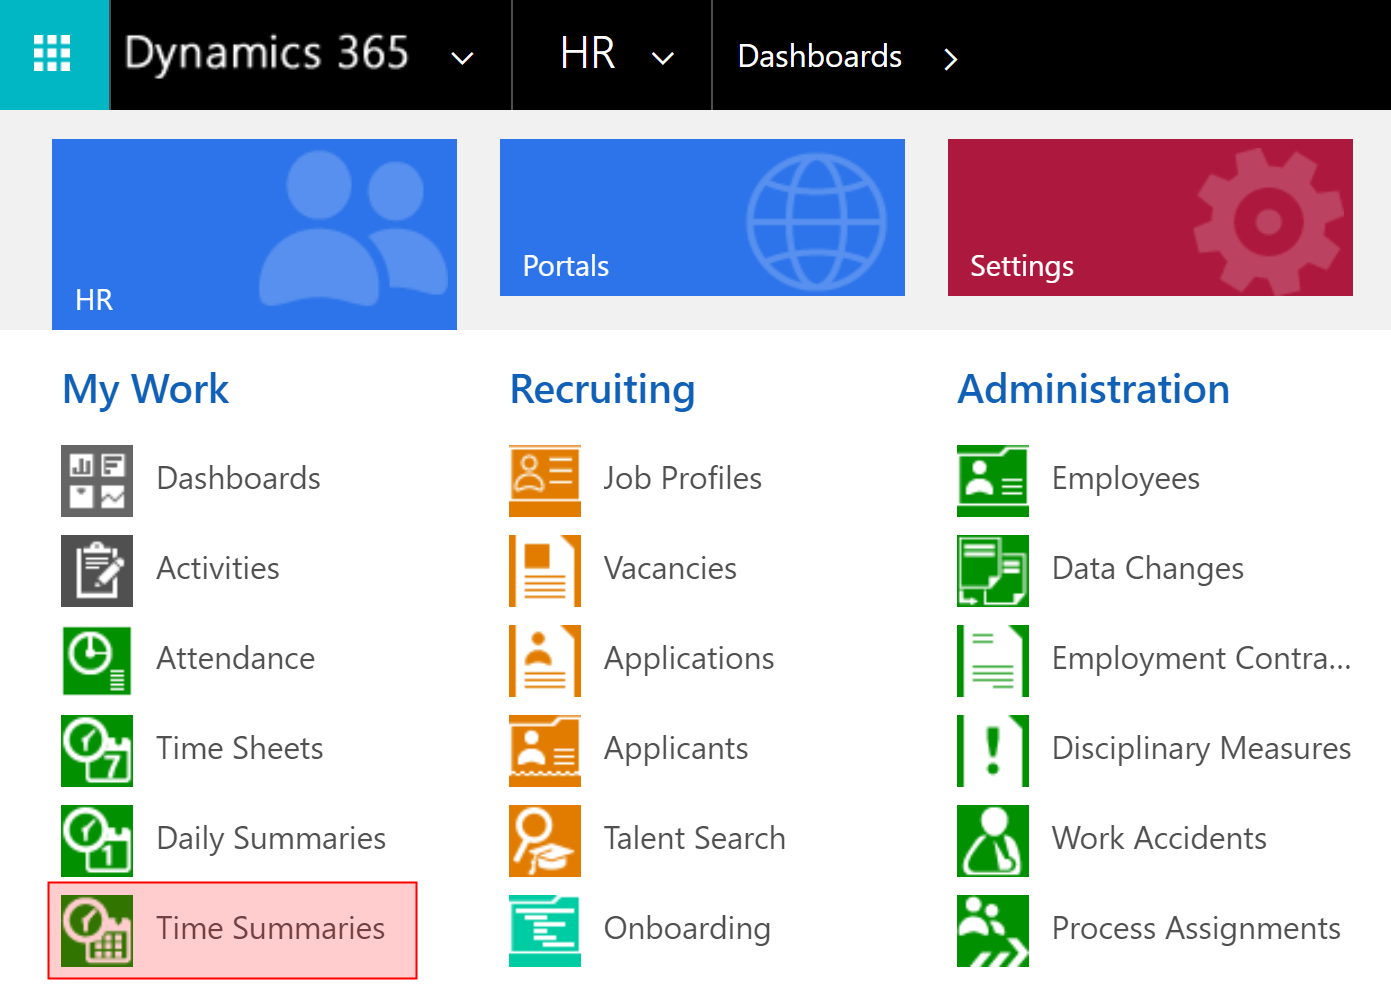
Go to Navigation Bar -> HR -> Time Summaries
In the menu bar, click on the small arrow next to Import Data and select Download Template for Import

Open the file and fill out the columns Employee, Start Date and End Date. You can ignore the other columns. Pay attenttion to the correct format of the cells.
Hint: Export the list of active employees, so you can copy the column from there. This way, you can't forget an employee and there won't be problems with the format.
Save and close the file. To import the file, go back to Dynamics 365, click Import Data in the menu bar and follow the dialogue.
The import will create all Time Summaries for all employees. This will trigger an automated process in the background, which creates all Time Sheets and Daily Summaries.
For more information, see this article: Time and Attendance
Update missing attendance details
With the help of Microsoft Flow it is possible to check the daily summaries for missing attendance data. It is a purely technical monitoring, so that the calculation of overtime is not disturbed and should therefore be used unconditionally. This Flow examines the daily overview of the previous day. If this does not have an entry, the attendance is set to zero.
Download extension
- Go to the Download Page in the Customer Portal
- Answer the questions to find out what solution you need
- Download the file Flow: Daily Summary update for empty attendance (do not extract)
Install extension
Go to Microsoft Flow and log in with your Dynamics 365 admin credentials

If you haven't created a connection between Flow and Dynamics, please follow these instructions: Microsoft Flow - Establish connection to Dynamics 365
In the menu bar click on My flows

Click Import in the top right corner

Now select the file you have previously downloaded and import it
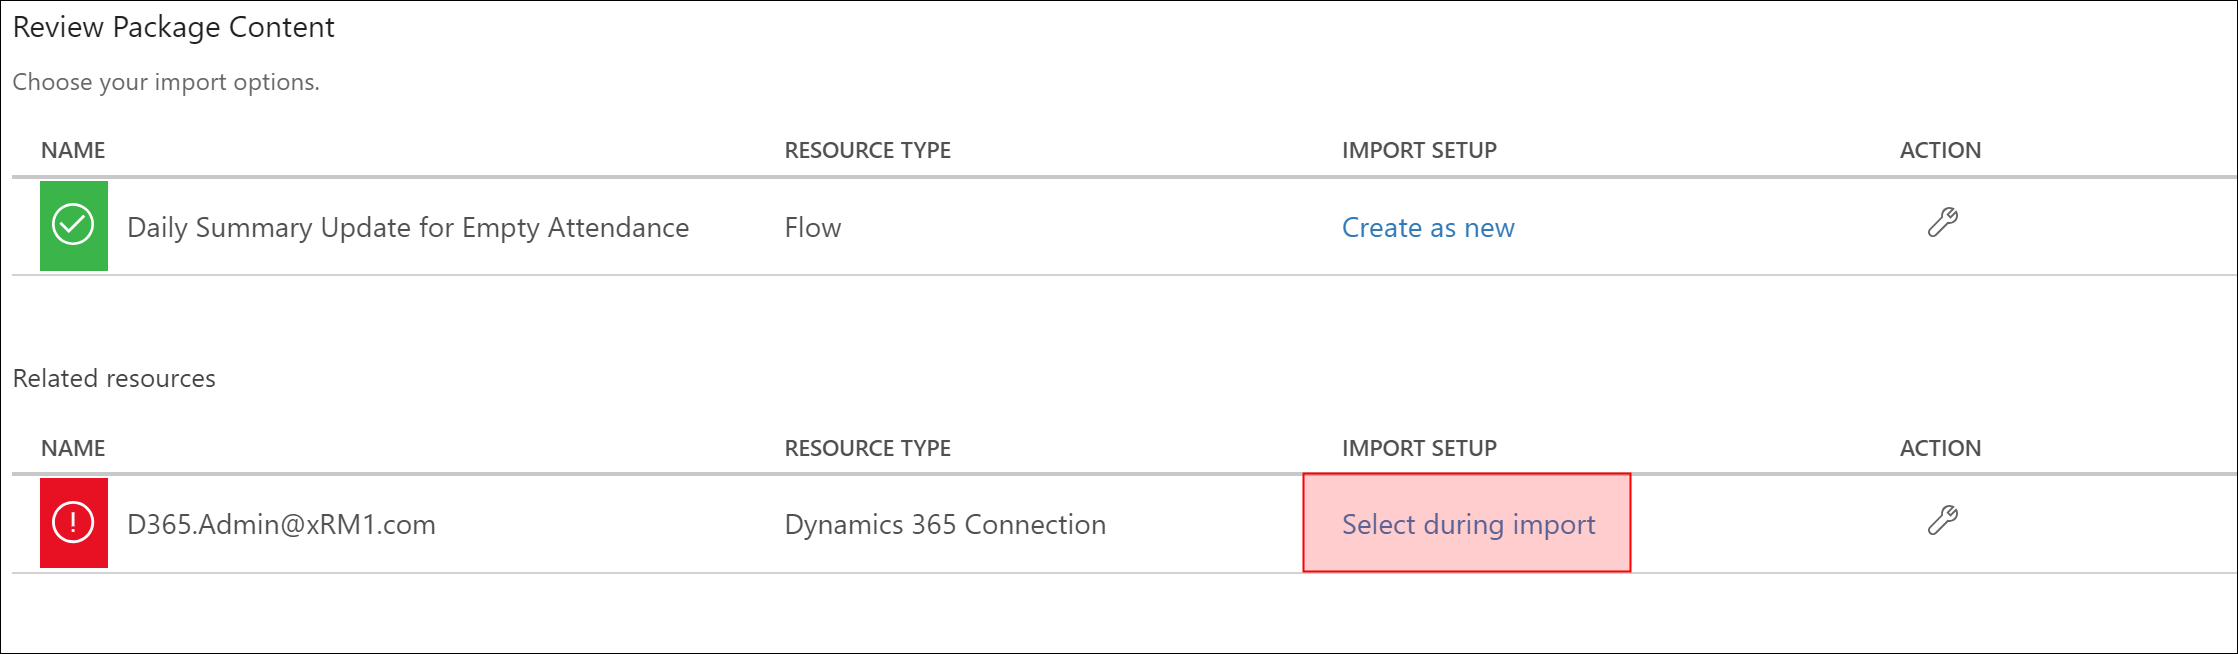
When the import is complete, click in the field Review Package Content option Select during Import and select the connector to your Dynamics 365
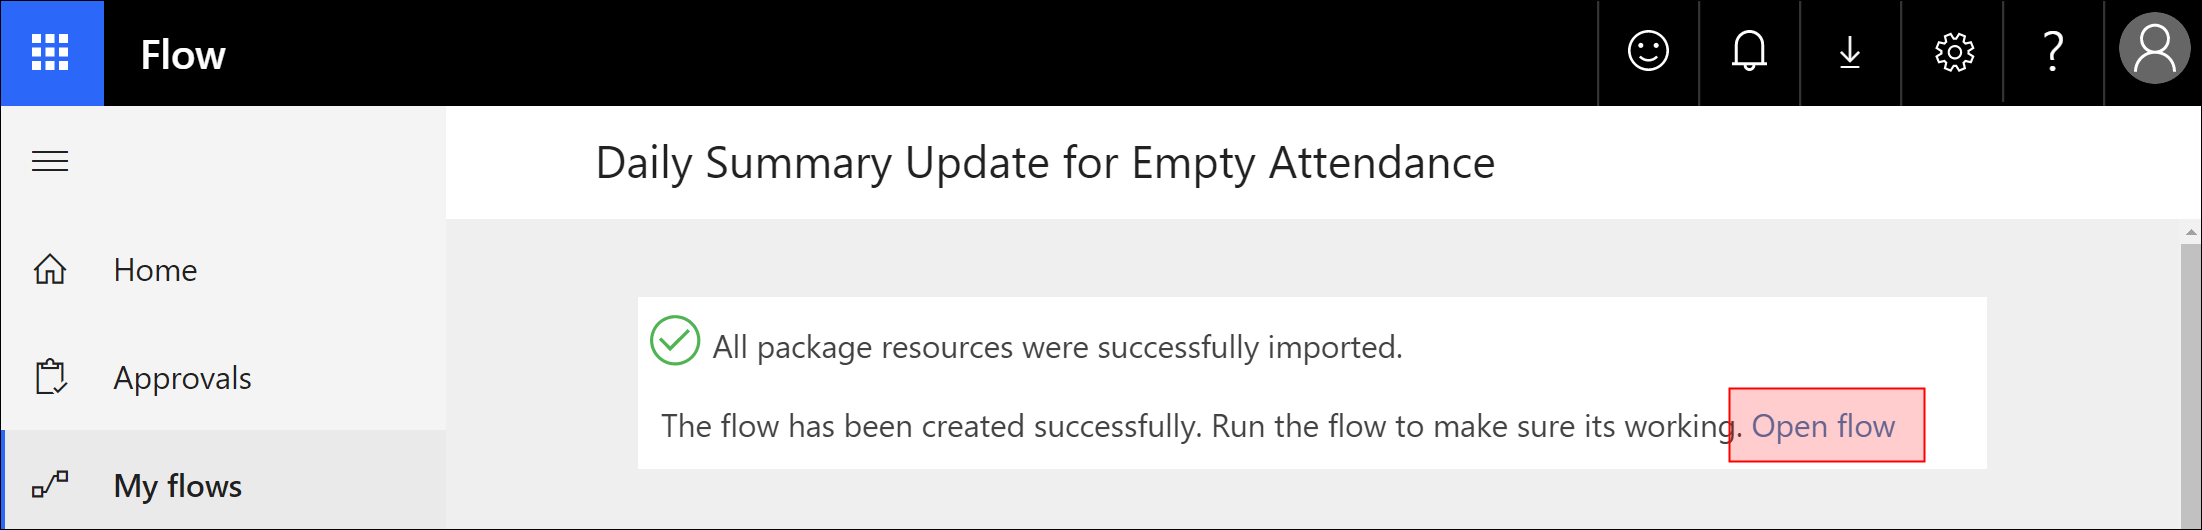
Click on Import and wait a moment to finish the process. You will get a notification about the successful import. Click on Open Flow
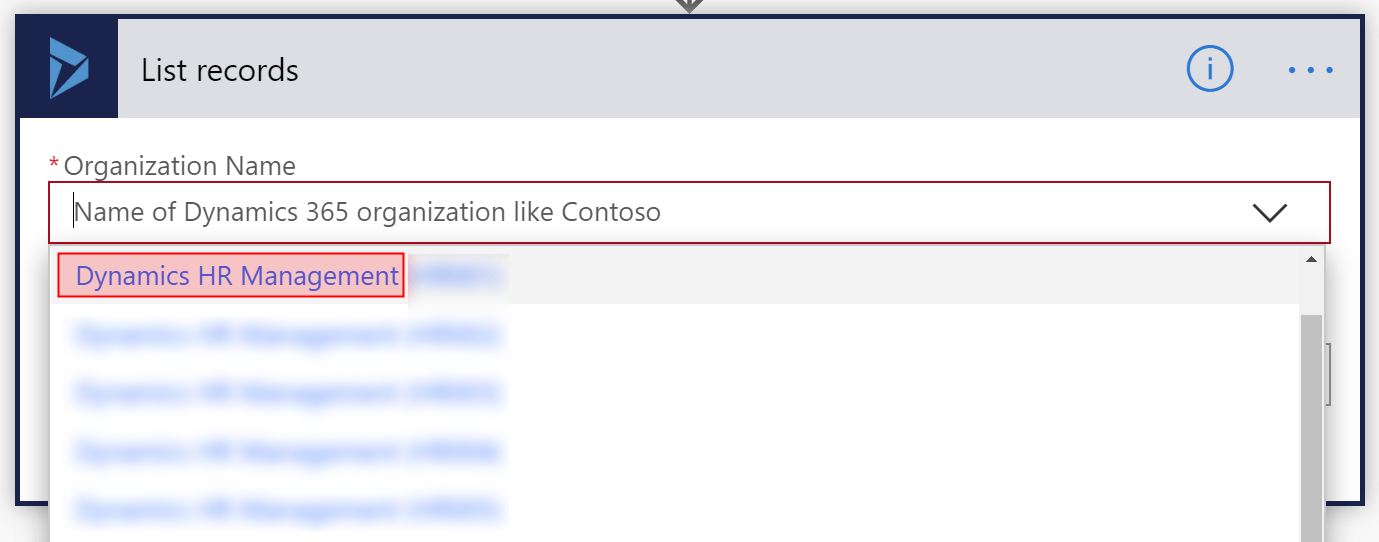
Click on List records and press the X to delete the organization name
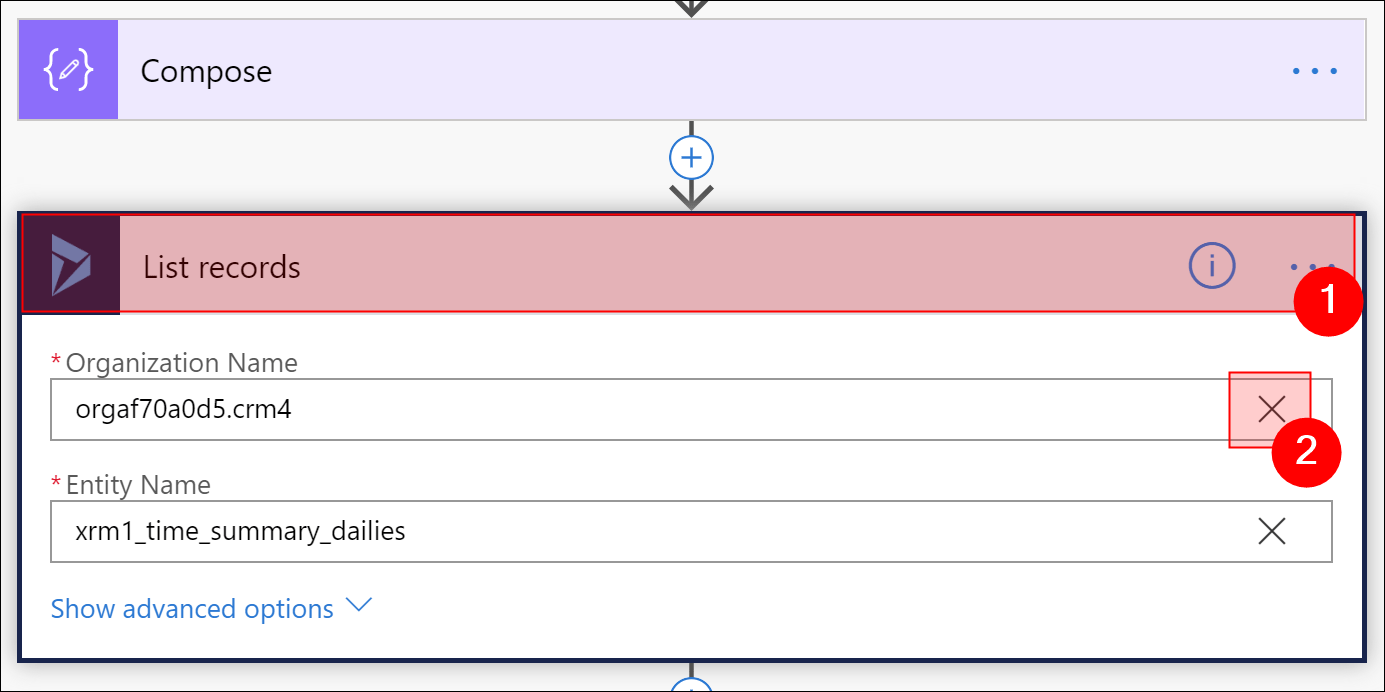
It may take a moment till the drop-down menu opens. Choose your organization and confirm by pressing Save
Mark the imported Flow and press Run
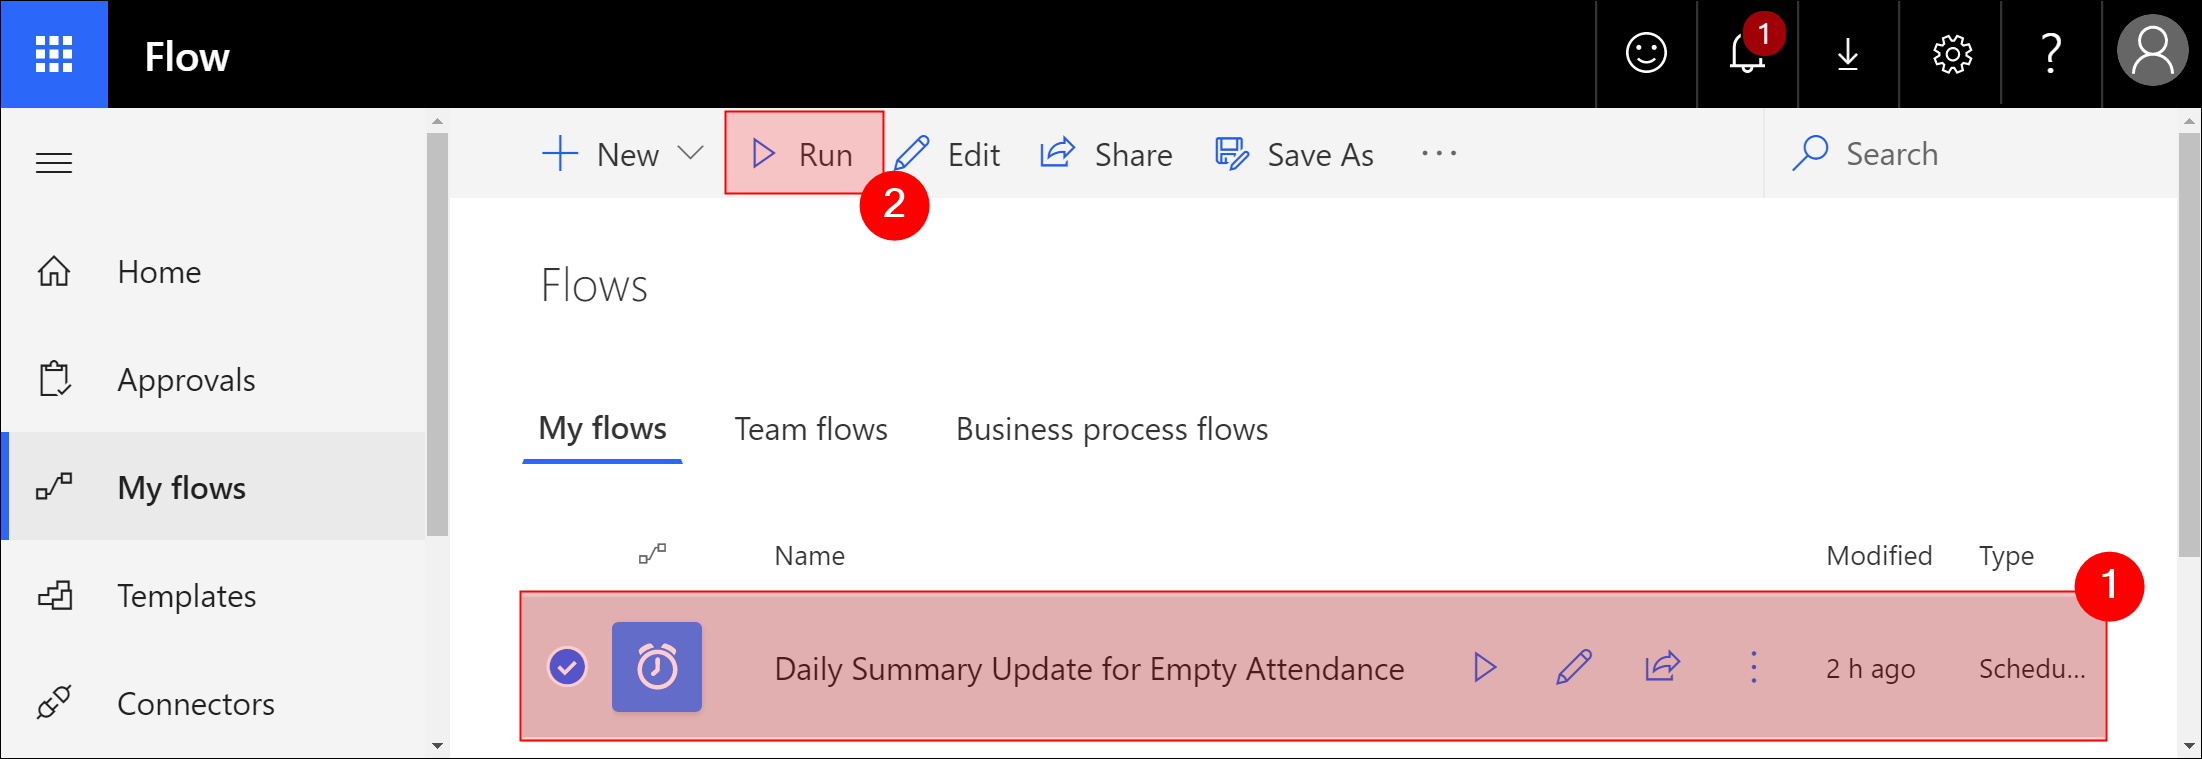
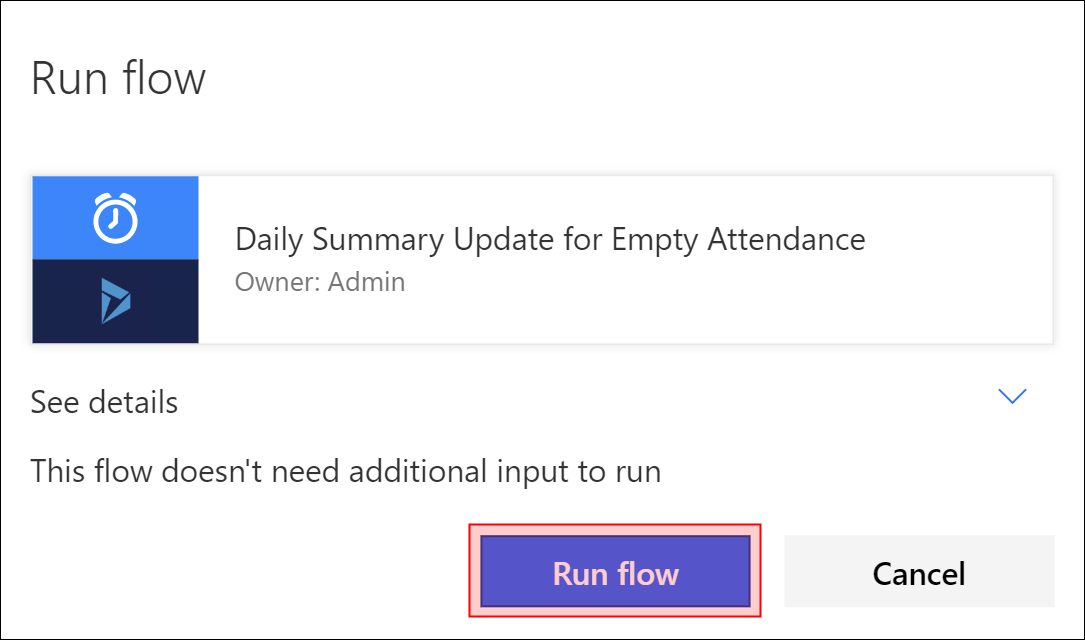
Press Run flow
If you click on See flow run activity, you can check the success of the flow
You should see the notification about the status, the start time and the duration

List of workflows that send emails or create tasks
Please view this article on how to change the content of the email: How to customize workflows and personalize email content
| Name of the workflow | Trigger | Recipient |
|---|---|---|
| Attendance Clean up Child workflow - HR Management [EN] - xRM1 | When an attendance detail of type end is created automatically by the system | HR Manager or Manager of the employee (english) |
| Attendance Clean up Child workflow - HR Management [DE] - xRM1 | When an attendance detail of type end is created automatically by the system | HR Manager or Manager of the employee (german) |
4. Explore
After the solution is installed you are ready to start! Take your time and explore all the features of the solution, as well as the best practices. You can learn more about each feature in our E-Learning Portal.
If you have any questions, you can find additional information in our FAQs
For questions beyond that, feel free to contact us anytime: Contact us