Microsoft Dynamics SharePoint Integration
Step 1 - Enable Server-Based SharePoint Integration
Step 2 – Enable SharePoint document management for specific entities
Step 3 – Using Document Management
Step 4 – Verify that everything works
Dynamics supports two ways of SharePoint integration
- Server based share-point integration.
- List component share-point integration.
Microsoft Dynamics supports Server based SharePoint integration. The reason is, list components require complex installation and configuration and it works only in some cases like higher versions of Dynamics and it is difficult to activate.
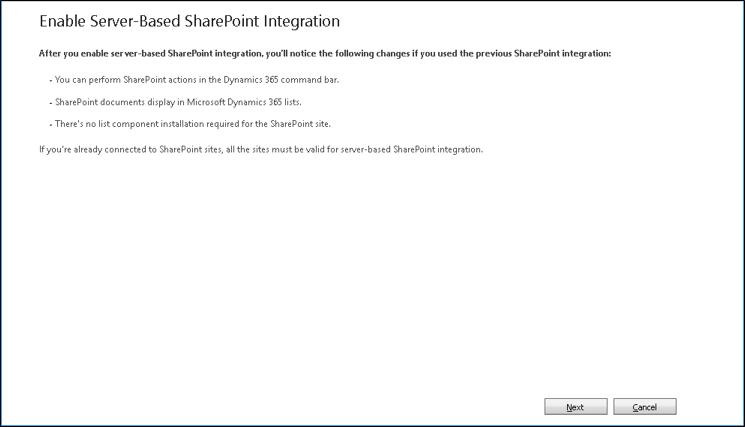
Step 1 – Enable Server-Based SharePoint Integration
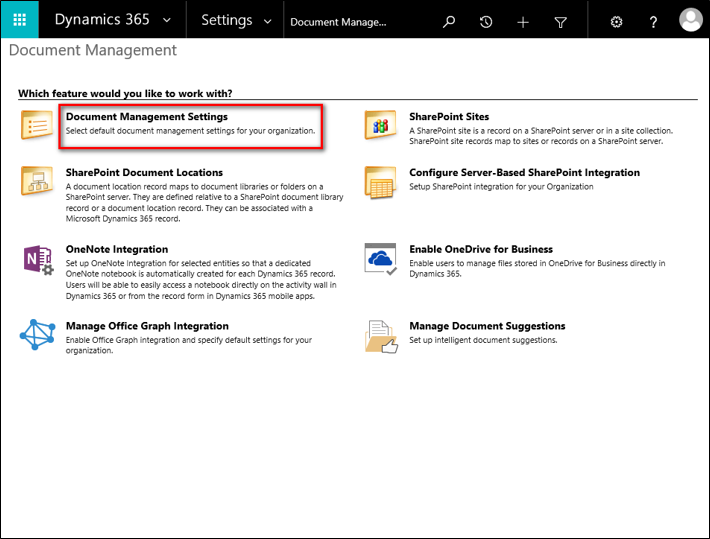
Navigate to Settings -> Document Management.
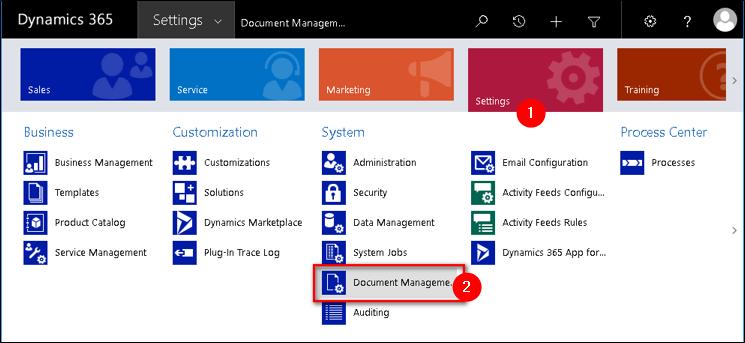
Choose the Enable Server-Based SharePoint Integration option.
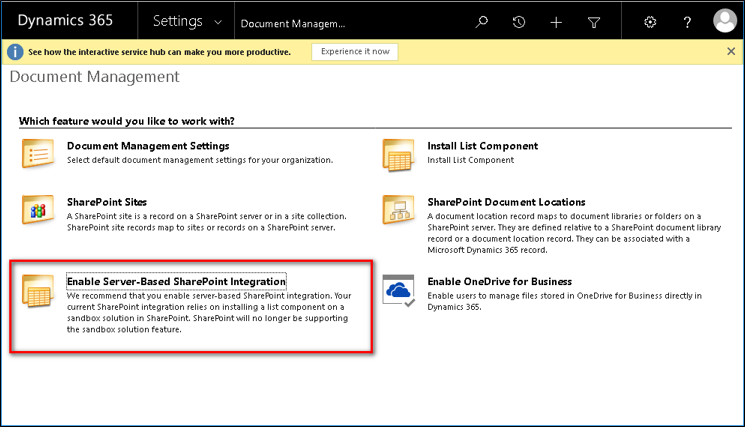
The configuration wizard will start and guide you through the steps required.
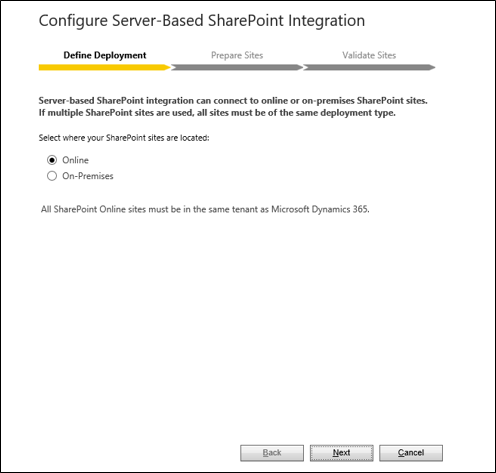
Select whether your SharePoint is an Online or an On-Premise setup, and click Next.
Enter the URL of the SharePoint site for use with server-based integration, and click Next.
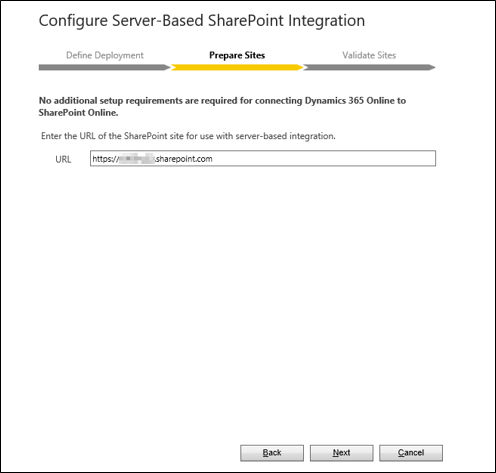
Note:
To see your SharePoint site collections, in the Office 365 admin center, click Admin centers -> SharePoint and then click site collections.
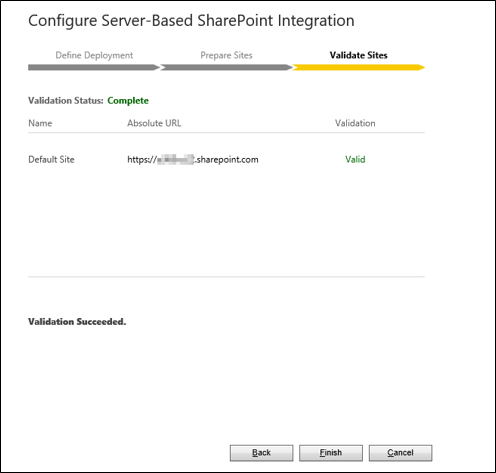
The URL will be checked for being a valid SharePoint online site and for existing in the same Office 365 tenant as your Dynamics 365 organization. After enabling server-based SharePoint integration, you cannot go back to the previous client-side integration. Once validated, click the Enable or Finish button.
Step 2 – Enable SharePoint document management for specific entities
Go to Settings -> Document Management.
Click Document Management Settings.
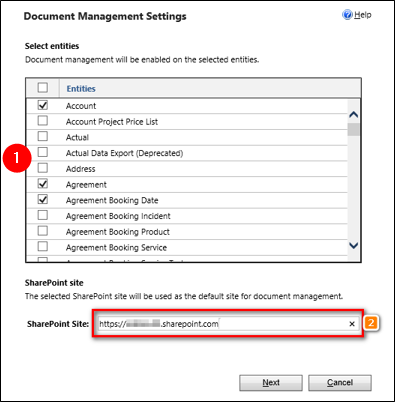
Select the entities that you want to use to manage SharePoint documents. If a URL is not already specified, enter the URL of the SharePoint site where the document locations and folders for storing documents will be created and then click Next.
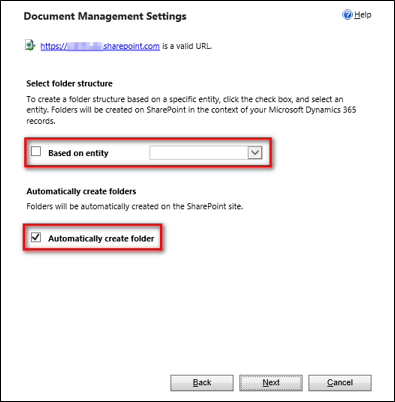
Make sure to clear the Based on entity check box, and then click Next.
Note:
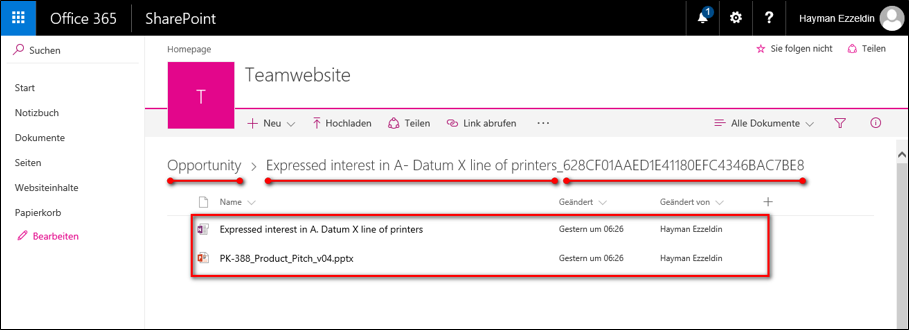
By default, a folder for each record is created under the corresponding document library for the entity. For example, for an opportunity record “100 Bikes”, a document library “opportunity” is created, and in it, a folder “100 Bikes<entityGUID>” is created. The path is ../opportunity/100 Bikes<entityGUID>.
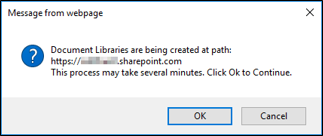
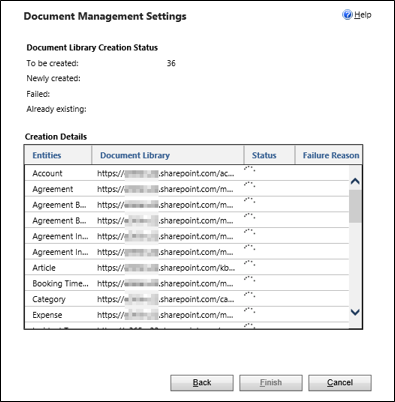
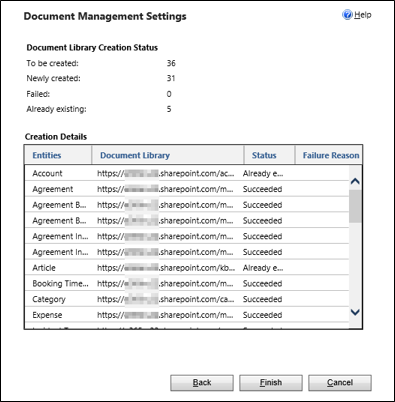
Microsoft Dynamics 365 creates document libraries for the selected entities on SharePoint. Microsoft Dynamics 365 also creates the corresponding document location records that contain the links to these document libraries. The Document Management Settings wizard shows the creation status of the document libraries.
Step 3 – Using Document Management
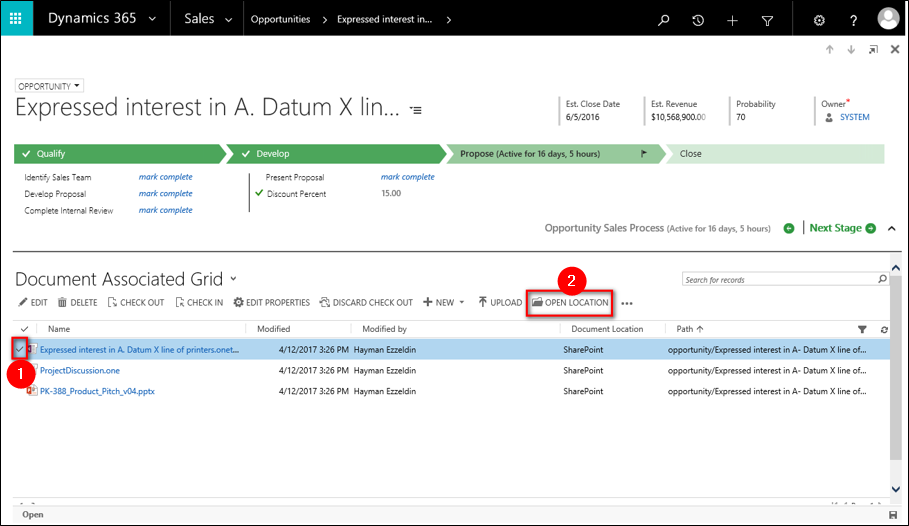
You are now ready to add document storage locations to the entities you enabled above and start managing documents. Begin by opening a document management-enabled record; let us say we would like to upload a document to one of the Opportunities that exists in our Dynamics 365.
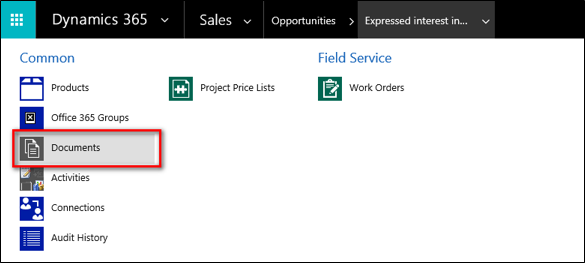
Browse to your Microsoft Dynamics 365 (online) web application. Choose an Opportunity, such as the Expressed interest in A. Datum X line of printers sample Opportunity. On the navigation bar, click the down arrow next to the account name, and then click Documents.
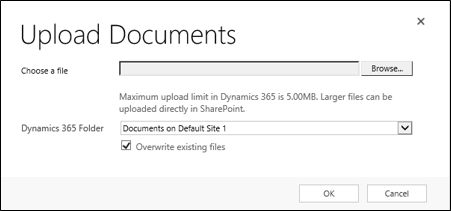
From the command bar, click the Upload button, and then browse to a document to upload to the new folder in your Microsoft Office 365SharePoint Online Team site.
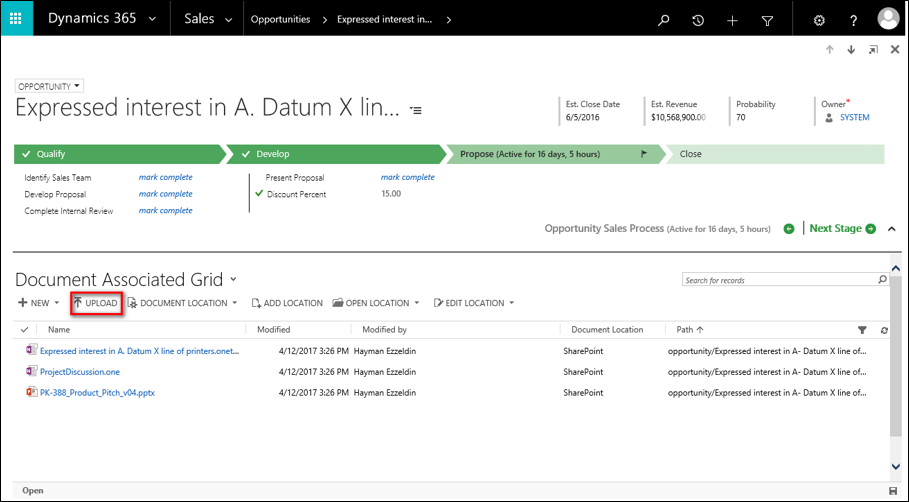
Select the file to be uploaded, then click OK.
Step 4 – Verify that everything works
To verify that the document was successfully uploaded and see it in your Microsoft Office 365 SharePoint Online Team site, click to the left of the document name (you will see a check mark), and then click Open Location.