If this is your first time doing this, we recommend you watch the Walkthrough Video at the bottom of this page first.
Install additional background automations
Objective
This page takes you through the process of installing HR for Dynamics Flows in your newly created Environment, after installing the solution and base data.
Process
System Admin
Download HR for Dynamics Flows in Customer Portal
System Admin
Install HR for Dynamics Flows in your Environment
System Admin
Turn on the Flows
Prerequisites
- You have System Admin rights when running the installer (make sure your System Admin has the correct licenses assigned, including a Microsoft License that allows them to use Outlook - see how to assign them in the first part of this tutorial)
- You have access to the Customer Portal for downloads and guides (two users were invited by us)
- Correctly set up an Environment with a base Language of English, German, or French
- Already installed HR for Dynamics solution incl. base data
Click Through
- Navigate to the Customer Portal
- Log in with your Customer Portal credentials
- Click on Downloads
- Click on Additional Mandatory Download: HR for Dynamics Flows to start the download
- Navigate to PowerApps
- Login with the admin account you created with your new environment
- In the right half of the top bar, select the correct Environment you created for your solution (screenshot)
- Click on Solutions on the left
- Click Import Solution in the grey top bar
- Select the file with the Flows you downloaded
- Click Next
- Make sure in the Advanced Settings, the checkmark for Enable Plugin steps and flows included in the solution is checked
- Click Next
- The setup will now check for valid connections. Valid connections are shown with a green checkmark.
If a connection is not yet valid, proceed as follows:- For each entry without a green checkmark, click on add a new connection
- In the window that opens, click on Create
- Login with the admin account you created with your new environment
- Go back to the previous browser window and click Refresh
- If there are still connections missing, add another new connection and follow the same steps again
- Once all connections are set, click on Import below
- Wait while the Flows are being installed. This may take approximately 30 minutes
- After the import has finished, open the flow solution in your list
- Make sure that below the heading Solutions, the option 'All' is selected, so you can see the entry Dynamics HR Management Flows in the list. Open it by clicking on the name.
- Switch on the Flows in the correct order:
- Flows with the name "(Deprecated) …" need not be turned on
- Of all other Flows, switch on the ones with the name "Child flow: …" first
- Then switch on the Flows with other names
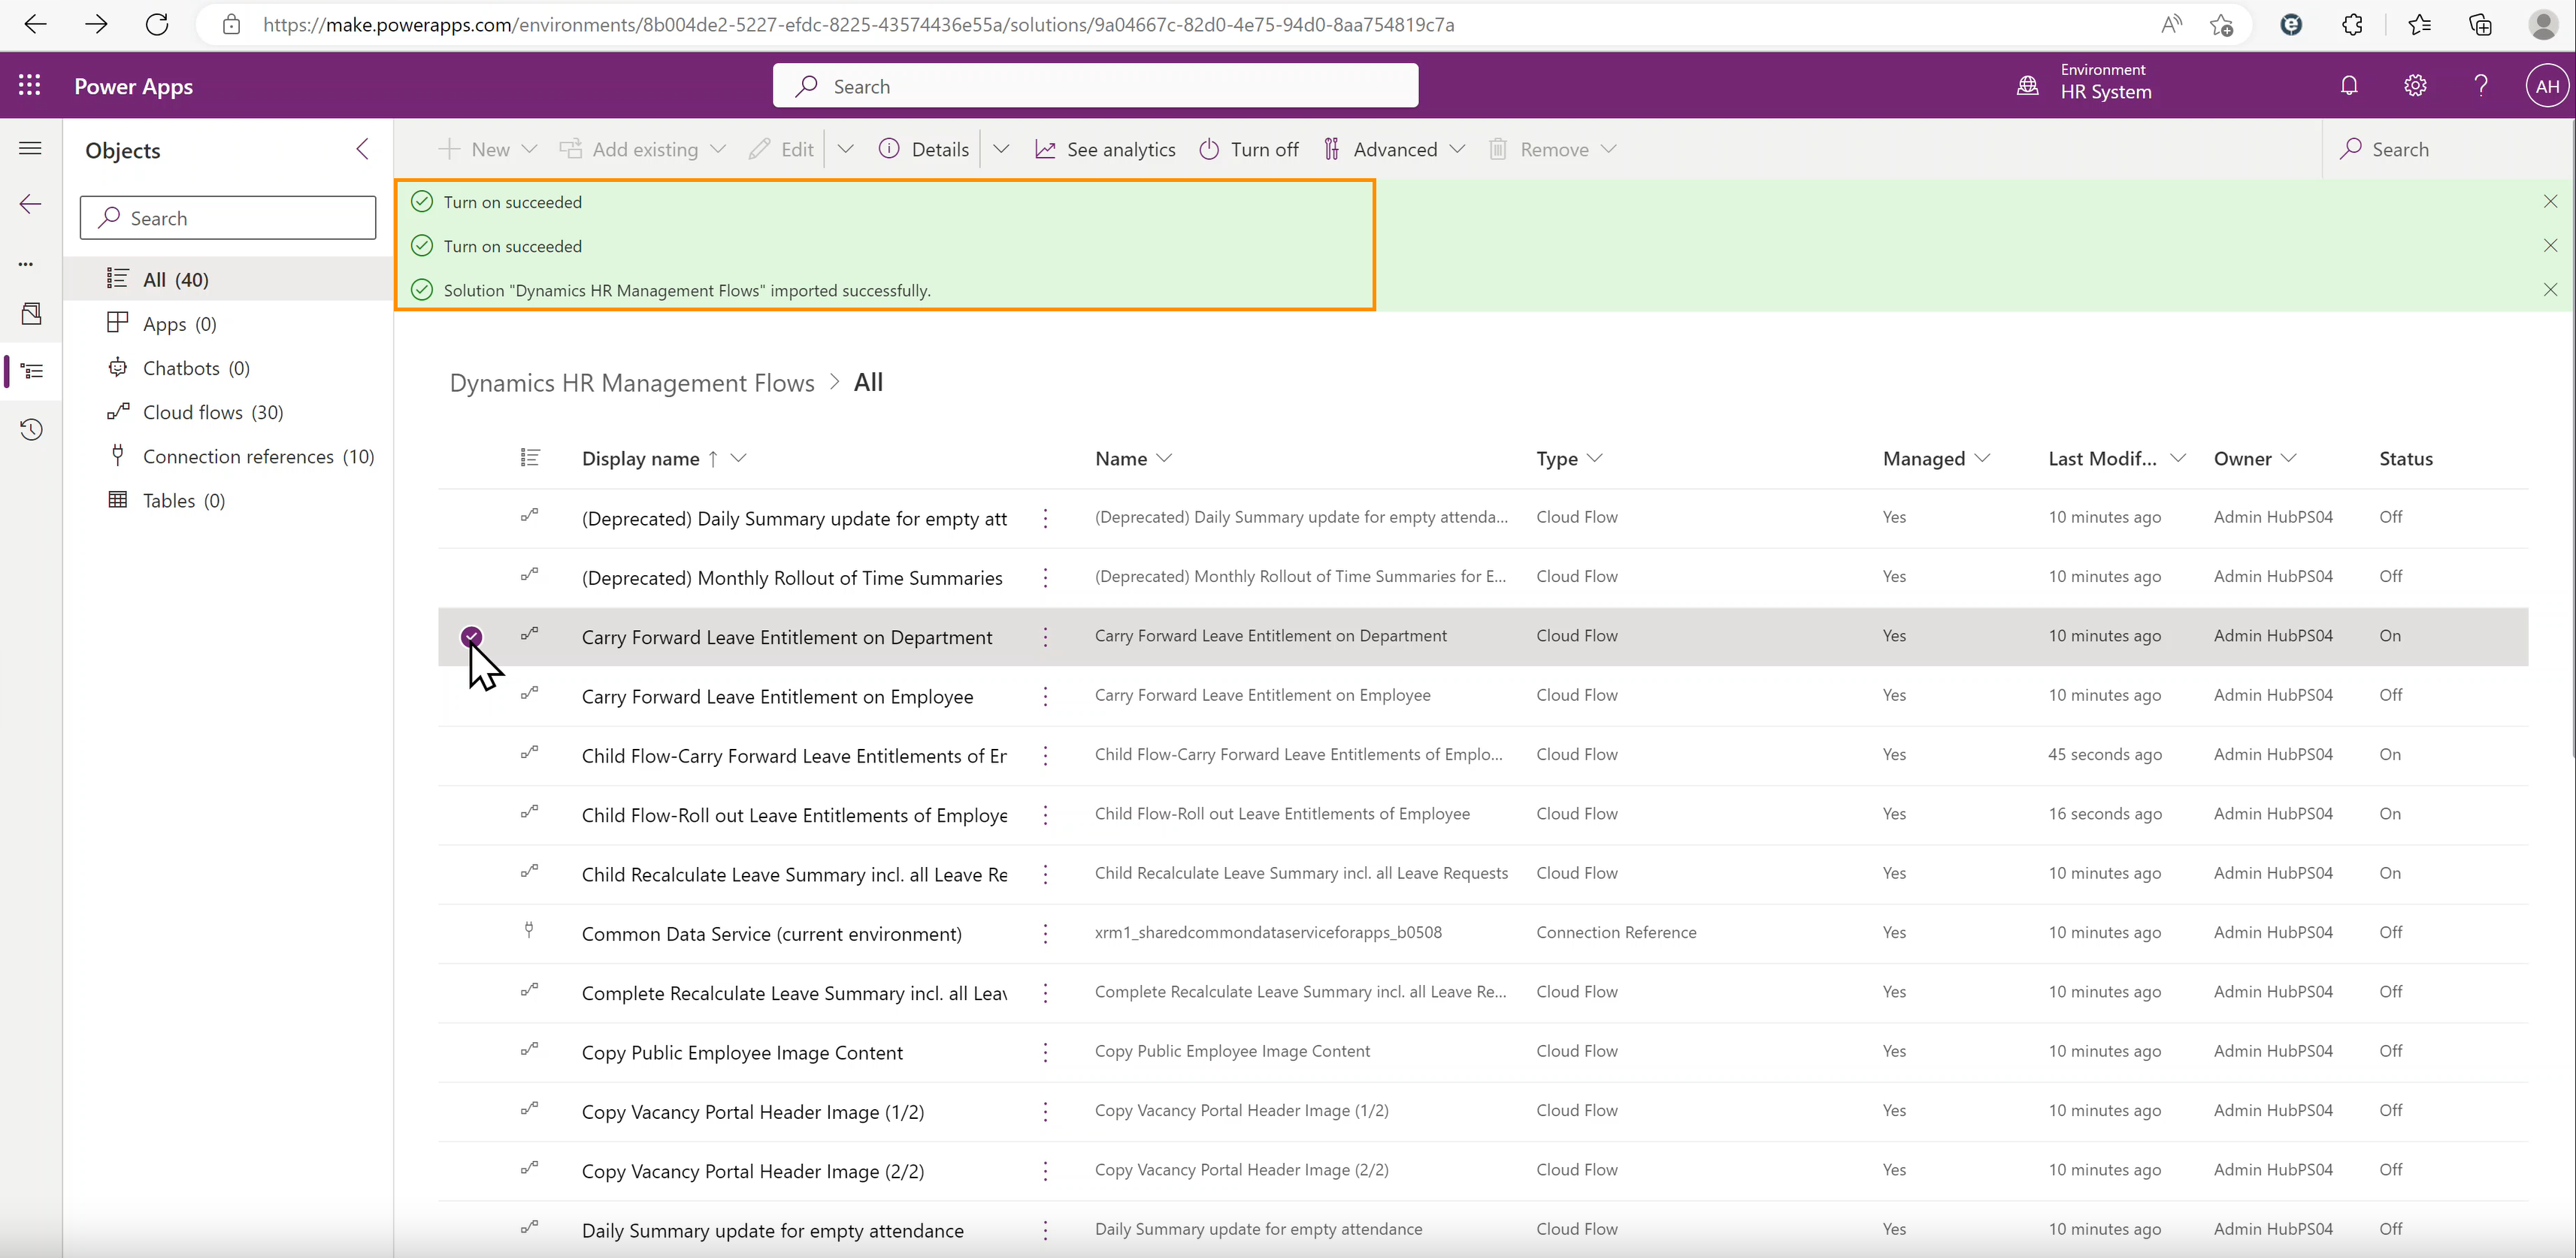
- To switch on flows, mark them one by one on the left side of the flow list, then click Turn on in the grey top bar. Repeat this step until all needed flows are turned on.
- After a few seconds, the button name changes to "Turn off", which tells you the flows are now running.
.png)
Hint
- The Flows named "Copy Vacancy Portal…" need only be turned on if you want to use the Recruiting Portal.
- The Flows named "Dorma Kaba Integration …" need only be turned on if you want to use Dorma Kaba time clock terminals.
- The Flows named "OKR …" need only be turned on if you want to use the HR for Dynamics OKR/Leadership module.
Walkthrough

Result
After successfully importing and turning on all the Flows, they appear in your list like this and you get notifications for successfully turning them on.
Next step
- After installing the HR solution and the Flows, you need to enable necessary addons.